How to glue the ceramic curb on the bath
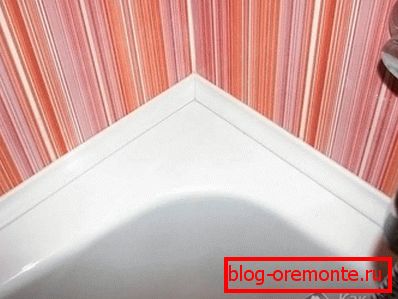
In order to waterproof and decorate the joints formed between the wall and the bathroom, it is common to use the so-called corners and borders. They are made of different materials. For those who appreciate reliability and thoroughness, ceramic borders have been specially developed that perfectly fit into the bathroom interior. However, it should be noted that the final result of using the curb is achieved by the correctness of its installation. And, although it is preferable to entrust this work to specialists, it is quite possible to install a curb on the bath yourself. In this article, you will learn how to properly glue the ceramic curb on the bath.
Choice in light of aesthetics

The modern market is flooded with various options for a border of ceramics. In order not to get lost in all this diversity and correctly choose a tiled plinth, it is necessary to consider the following points:
- The size of the bathroom and sanitary facilities. These parameters affect the size of the curb. If you have a small bathroom and plumbing capacity, then the curb, respectively, should be narrow and low, and thus remove the focus from the miniature of their parameters.
- Color solution and texture of bathroom tiles. The border can be absolutely smooth or have a texture, painted in various colors and have a concave and convex shape. What to stop your eyes - a matter of taste. However, we should not forget that the curb should be in harmony with the color scheme and the texture of the bathroom tile.
When buying a domestic manufacturer's tile, you can purchase a ceramic border in the set that corresponds to the texture and colors, which cannot be said by choosing tiles from foreign manufacturers - this product is not included in their kit. If it is difficult for you to choose a suitable variant of the border, stop your choice on a classic - a product of white color and, thus, it will merge with snow-white plumbing, and you will not break the uniform design of the room.
The calculation of the required number of units of decor
Determine the required number of elements of a ceramic border is easy. For this:
- With the help of roulette measure all sides of the bathroom in contact with the wall, and summarize the results.
- Divide the resulting amount by the length of one unit of product and rounded up to a whole number.
- 5–10% is added to the received border in case of damage or breakage of the product (as a rule, it is 2–4 units of a ceramic module).
Materials and tools
In the process of installing a ceramic curb on the bath, you will need:
- waterproof tile glue or liquid nails;
- laser level;
- ceramic modules;
- silicone sealant, preferably containing special additives that prevent the development of mold;
- assembly gun for working with sealant;
- spatula (can be rubber);
- emery block;
- passages;
- diamond wheels, Bulgarian;
- masking tape;
- stationery knife;
- mash.
Of course, some of the above may not be useful, but if you perform the installation work on the ceramic curb for the first time and do not have the relevant experience, then by preparing the tools and materials in advance, you will avoid a hitch.
Preparatory work
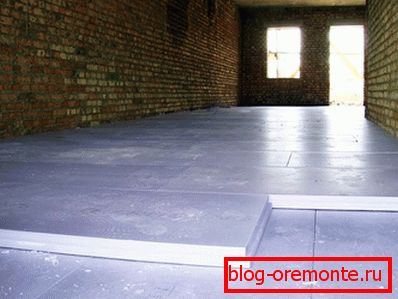
Before proceeding with the installation of a new curb, it is necessary to prepare the surface by cleaning it of all kinds of contaminants and removing ceramic residue if the bath has already been pasted over with curbs. The edges of the sanitary container should preferably be degreased with a solvent, and then sanitized, for example, with a chlorine solution. At the end of the work, the perimeter of the bathroom is well dried and glued along the edge with masking tape.
Tile installation technology
Installing a border of ceramics before facing the walls with tiles is a rather complicated way of installation, which is carried out in the following sequence:
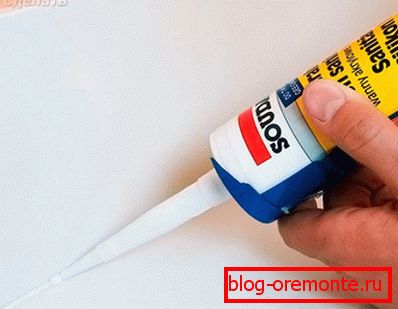
- Using a construction gun, you must carefully and continuously fill the gap between the bathroom and the wall with sealant. Experts recommend using for this purpose silicone sealant for aquariums, and silicone sealant in a tube (2-3 pieces of 50 ml) will be very useful in the absence of a gun.
- In order not to leave places through which water would leak, it is necessary to level the sealant layer with a rubber spatula or, if it is not, with a hand dipped in water. If the gap between the bathroom and the wall is more than 5 mm, then it is filled with mounting foam.
- While the mounting foam or sealant is hardened, glue is prepared for the tile. The consistency of it should not be liquid, but similar to thick sour cream.
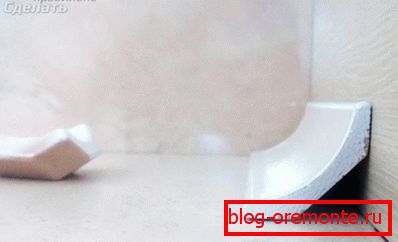
- If there are no pre-purchased corner elements or so-called asterisks, it is necessary to take care of fitting the four parts in pairs with an angle of 45 °. To do this, as a rule, use a grinder with a diamond disc, and in its absence, the unnecessary part of the tile is bitten off with pliers and polished with a cut using an emery bar.
- Using a laser level, you need to adjust the angle of 5-8 °. For example, if the border width is 5–6 cm, then its edge adjacent to the wall should be raised by 5 mm. Then, starting from the corner, glue is applied to the back side of the ceramic product with a spatula and the border is glued to the wall. Each subsequent detail is laid as tightly as possible to the previous unit, not forgetting to immediately remove excess glue, and lightly tap with a rubber mallet.
- The curb surface is again wiped with a damp cloth and left to dry for 8–10 hours.
- The next day, the border is poured abundantly with water to secure the adhesive and leave to dry completely, thus preventing the appearance of microcracks.
- To eliminate the gaps between the wall and the modules of the curb, silicone or acrylic sealant is used, as well as a special water-repellent latex-based grout to match the tone that will be used after tile installation.
In order for the ceramic border to look perfect and not stand out from the walls, it is necessary to leave gaps of the same size when gluing this product using special plastic crosses.
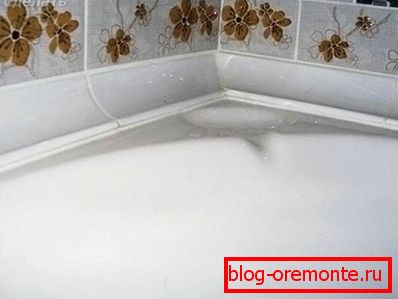
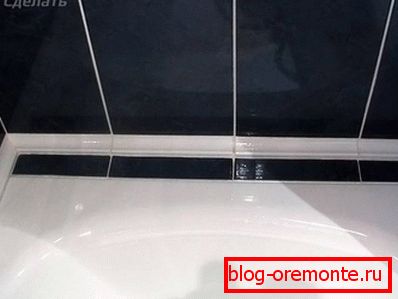
Mounting on tile
Installing ceramic tiles on tiles is much easier. Works are performed in this order:
- They clean and degrease the surface of the bath and the tiles that are laid on the wall.
- Fill the gap between the bathroom and the wall with sealant or foam, depending on its size.
- Carry out the exact fit of the corners as described above.
- After drying the work surface, the location of the border is treated with waterproof glue, for example, liquid nails. You can also glue the ceramic curb on silicone.
- After waiting for the time specified in the instructions, starting from the corner, they apply a curb, pressing the module against the surface as tightly as possible until the glue seizes.
- To avoid problems with the alignment of individual modules, it is recommended to use a level.
- During operation, the spatula removes excess glue.
- After the glue has hardened, the gaps formed between the modules are treated with a sealant or grout for joints.
If you do the job of installing the curtains on the bath with high quality, then this decorated joint between the bathroom and the wall will serve you for more than a dozen years, pleasing the eye and not causing trouble. And the tips and instructions mentioned in the article will help you make your dreams come true. If this happens and it happens or you do not live up to your expectations - please write comments and share your experiences.
Video
Learn more about how to seal the seam between the bathroom and the wall sealant: