How to glaze a balcony with your own hands
Almost every apartment has its own balcony. And this room serves everyone for different purposes: often some make it a warehouse for all unnecessary things in the house that do not fit in the closet or simply interfere in the house, others in the winter and autumn store vegetables there, others do not use it at all . Yet such use of additional space in the apartment can not be called rational. After all, the balcony has a fairly large space, why not make it your own office where you can concentrate and work quietly, a small winter garden, a workshop, a playroom for children or just a comfortable place to relax. But in order to realize all these fantasies, you need to take care of good glazing and warming of the balcony. However, it is easier said than done. Further in the article you can learn how to glaze a balcony with your own hands. To install windows efficiently and quickly, you need to follow some rules and details. Let's take a closer look at everything.
How to glaze a balcony
In order to perform the glazing of your balcony, you first need to decide how to glaze it and in what way. Indeed, today there are many options. Let's consider them, then you will be able to choose the one that suits you both in price and purpose.
Ways of balcony glazing:
- Cold glazing.
- Panoramic windows.
- Sliding glazing.

Cold glazing has been used for many years, but it has not lost its popularity now. Single panes are inserted into the lightweight frame. This is the cheapest option, since you can only protect the balcony from the external environment, but do not warm it to make a study or a place to rest out of the room. The main goal of cold glazing is to protect the balcony from precipitation, wind, dust, dirt and debris. To some extent, you can protect yourself from noise from the street, but not fully. To glaze a balcony in this way, most often use wooden frames and an aluminum profile.
Benefits:
- the cheapest option for glazing;
- creating a cozy space, protected from the external environment, where you can have a good time, especially in summer.
Disadvantages:
- lack of heat, which is felt in the winter and autumn season;
- if you make a frame of wood, over time it can rot and collapse.
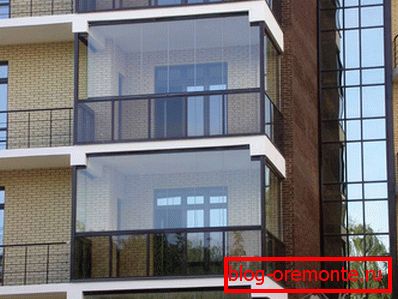
Panoramic glazing of the balcony is very attractive and spectacular, and is often done in the homes of the elite class. In this case, the glass fence is mounted from the ceiling to the floor, without the use of frames. Bottom and top install guides into which the glass is inserted on special attachment points. Because of this, it seems to you that there is no glass on the balcony at all, and you are standing in open space. To make such glazing, you need to use a special durable glass, it is stronger and thicker than usual, they are not so easy to break with a simple blow, and they will not crack in severe frosts. Choosing this type of glazing, you can provide good sound insulation. However, to perform such glazing alone can not be, because such work requires professionalism. Glazing sections can be folding, hinged or sliding.
Benefits:
- beautiful view and attractiveness of the balcony;
- long service life of the whole structure;
- perfectly protects against external factors;
- much more light enters the room.
Disadvantages:
- you can't do it yourself;
- correspondingly high cost;
- in hot summer, the balcony will be exposed to direct sunlight even more, due to the lack of parapet and frames, so it will be hot in the room.
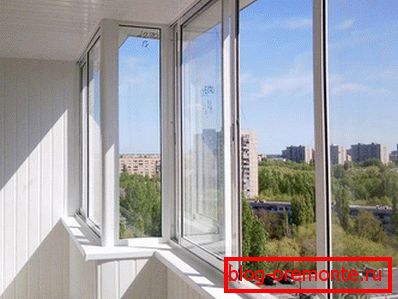
Sliding glazing is used when the balcony occupies a small space, so it is better to do it. Thanks to the special roller mechanisms, you can simply move the flaps, which do not take up much space.
Benefits:
- well protects the balcony from wind, precipitation, dust and insects;
- saves space if you live in Khrushchev and your balcony is very small.
Disadvantages:
- poor thermal insulation, since the structure is often made of aluminum with a single glass that cannot completely retain heat.
Basic materials used for glazing
To perform the glazing of the balcony, use the following materials:
- Plastic.
- Aluminum.
- Tree.
Plastic is the most common material for work, since plastic frames with single-chamber and two-chamber double-glazed windows are installed to provide heat and sound insulation on the balcony. This material is inexpensive and performs well the functions for which it is intended. Your room will be warm and comfortable. Of the advantages of plastic products should be noted the strength of glass, good thermal insulation and tightness. Glazing the balcony with plastic windows, you also save yourself from the need for frequent painting and complex care. Moreover, this balcony will look quite decent and beautiful.
Aluminum glazing is performed using aluminum profiles - they are much lighter and thinner than plastic. In this and its advantage over other materials. Due to their low weight, such glazing frames can be installed on balconies, which have a weak construction, unable to withstand heavy loads. Most often aluminum is used for cold glazing of a balcony using single glass.
The most affordable option for glazing a balcony can be called wooden frames with a single glass. Usually cheap wood does not have sound-proofing characteristics and can let the cold inside the room. However, this can be said about the budget option. If you do not save, you can buy modern frames, which are much more expensive, but have excellent sound insulation and thermal insulation characteristics. Moreover, this glazing looks natural and gives the balcony a solid look.
So, having considered all the glazing options, having learned about the materials that can be used for this purpose, you can weigh the pros and cons to choose the option that will suit you both in terms of material and for the realization of your goals. Now let's find out how to properly glaze a balcony with your own hands.
Some moments
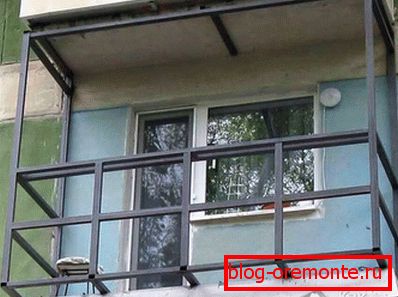
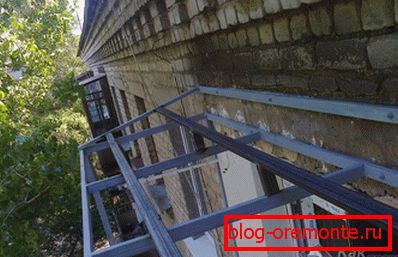
If you live in Khrushchev, then it should be noted that you simply will not succeed in glazing the balcony, as you will encounter a number of difficulties. The first of them - when initially designed the house, no one imagined that the balconies will subsequently be glazed. Therefore, the balcony was an additional concrete slab protruding from the wall of the facade of the house, which is simply enclosed by a lattice fence on three sides. Frames with glass or other devices that would separate the inner space, in this balcony was missing. That is why when you decided to glaze the balcony with your own hands, it is important to consider that first you need to install a single structure that would include the frame, opening mechanisms, parapet of the balcony, which should be sheathed.
All these additional elements will naturally make the whole structure heavier, which, in turn, will put additional pressure on the balcony and the supports. All this can lead to the collapse of the supports.
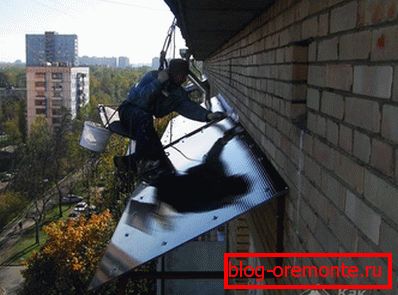
It is worth considering that if you live on the top floor, then during the implementation of the glazing you are waiting for work on the construction of the roof. Such work will significantly increase the complexity of the process itself, and will also affect the weight of the whole structure.
If you have already done all this, or your balcony is glazed with wooden frames that have already outlived their own and have become unsuitable for further use, then they just need to be replaced with new ones. Let's find out more about how this can be done.
Precautions when working
Before you start work, it is important to take care of their safety. Well, when the balcony is on the second floor, where the height is small. But when you live on the 5th floor or higher, the distance to the land is rather big. And since the work will be carried out on the open balcony, the wind or the earthly force can play a cruel joke with you. Therefore, all work must be carried out with a safety belt.
You can buy an ordinary sports belt, which is cheaper and lighter than industrial. It is clear that the industrial belt is more reliable and durable, but there will be enough sports for the glazing works, but you are not doing climbing. When choosing, pay attention to the length of the file, which must be at least 2.5 m to ensure comfortable operation. A belt with a short tail will only complicate the work, and if it is very long, you may be injured when falling. It is important that the belt as a whole and the carbine could withstand a load of about 400 kg. The load must be indicated in the certificate, but if there is no such load, do not buy this belt.

Now, after the purchase, you need to provide a secure mount for the halyard. Therefore, at the time of glazing in the main wall, it is necessary to fix the anchor stud having a metal collet, pushing it no less than 15 cm deep. A safety halyard will be attached to it. Due to the observance of elementary security measures, you can protect yourself from serious injury and even death, so be especially careful!
How to glaze a balcony with plastic windows
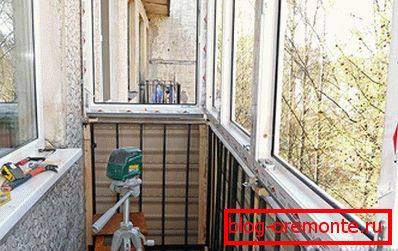
First of all, your task is to perform all the necessary calculations and measurements. The old glazing must be removed: the frames and all fasteners are dismantled. Then take a tape measure and measure the distance from the ceiling to the parapet. Write down the data on paper. Then measure the distance from one wall to another, write everything down. Take the construction level and, putting it on the parapet, check its horizontal position. Everything should be smooth.
Now, having all the data, you need to contact a specialized company that sells plastic windows to make an order. If you just want to protect yourself from wind and rain, while there is no particular desire to use the balcony as a room, you can order a single-chamber double-glazed window, which is cheaper. If the goal is to warm the balcony so that you can relax or work there, then pay attention to double-glazed windows or even three-chamber windows.
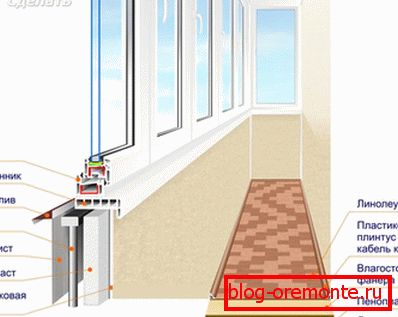
To make the balcony warm, windows alone are not enough. We'll have to insulate the entire structure: the floor, walls and roof. Only then, in the complex, you can achieve that your balcony will become a warm place, a part of your warm apartment.
The process of installing windows is as follows:
- The first step is to remove the glass from the frame. To do this, you need to remove the fasteners (beadings), which are not fully driven by the manufacturer. When they are tightly fixed, they can be removed with a spatula or knife. This is done not only to protect themselves, but also to facilitate the entire structure for ease of operation. It is not necessary to remove the glass from the doors, since the doors themselves will also need to be removed.
- Glasses should be put on a perfectly cleaned floor or on a bed in a room so that debris and other objects will not damage or scratch them.
- Now remove the opening flaps from the frame. Fully lock the window so that the handle is pointing down. Carefully remove the top and bottom hinge covers. Remove the pin from the top hinge by pushing it from above with a hammer or pliers, and remove it from the bottom with pliers. Holding the window, put the handle in a horizontal position. After that, tilt the flap towards yourself and lift it 5-6 cm and remove it from the bottom hinge.
- Before you install the frame on the parapet, you need to attach to it a special fastener, called support profiles. They must be bundled with the window itself. Holes and slots are provided in advance in the frame into which the profile will enter, after which it is fastened with self-tapping screws.
- Along the entire perimeter, you need to drill holes for anchor bolts with which the frame will be fixed to the wall. The distance from the corner of the frame to the first fastener should be 12-15 cm.
 Insert the frame into the opening and level it in three planes. To transfer the weight of the product to the wall, use the support bars. Initially, the frame is fixed in the opening with the help of wedges, which are inserted between the frame and the opening.
- Using anchors, attach the frame to the parapet, ceiling and wall. On each side of the structure there should be at least three fastening elements, and the distance between them should not exceed 70 cm.
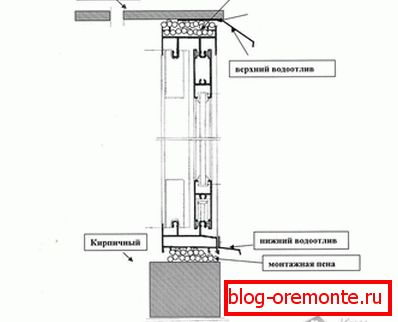
- When there is a place for a low tide on the balcony, put it on the mounting foam and attach it with screws to the support profile.
- From the inside, the ends of the frame around the perimeter can be glued with a vapor barrier tape. After that, the space between it and the wall must be zapenit and, without waiting for the foam to completely dry, glue to the opening. Pay special attention to the corner joints.
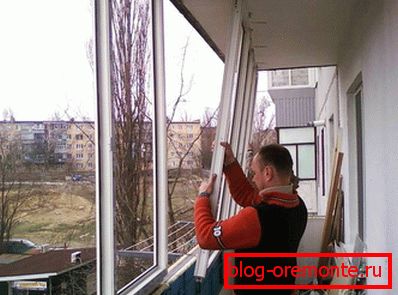
- Insert the double-glazed windows and the sash back into the frame.
- Apply vapor barrier tape to the bottom of the frame and install the window sill.
- It now remains to check the operability of the sash and the integrity of the entire glazing.
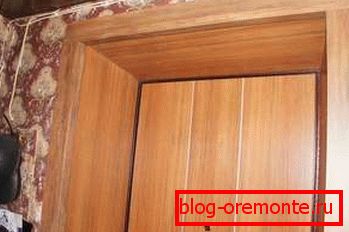
To bring everything to the desired "condition" and give the balcony a more attractive look, you need to make slopes. Please note that all work must be carried out not in a hurry. Follow all the rules and follow the sequence of work. In fact, there is nothing complicated if you figure it out and understand what to do and how. Having done all the work yourself, you can significantly save your money.
When you have provided a good glazing, you can easily start to warm your balcony if you want to make an extra room out of it. Thanks to plastic two-chamber double-glazed windows, the heat from the balcony will not come out, there will be good thermal insulation. You just have to warm the walls, the floor and the roof, and then you can fully use your new room as an office, a rest room or something else. By the way, why would you use such a balcony? You can share this in the comments!
Video
This video shows in detail how to make a glazed balcony with removal, starting from the dismantling of old frames and finishing to installing new structures:
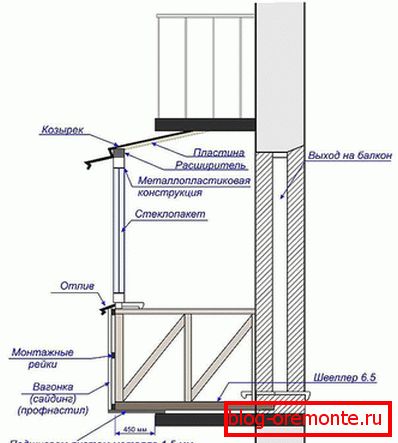
This video shows the installation of plastic windows on the balcony with the roof device:
See also:
- How to prepare a balcony for glazing.
- How to make a balcony with the removal.