How to fix laminate on the wall 2
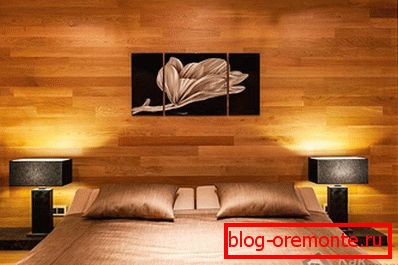
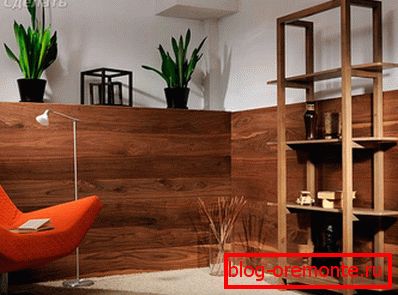
Fastening the laminate to the wall, at first glance, will seem unusual to a person uninitiated in the trend of modern renovation. However, there is no exotic here. In fact, this type of finish is not only unusual, interesting appearance, but also very practical and durable. Laminate for quite a long time used for laying on the floor in various rooms? everyone is used to it. But the facing of this material walls, perhaps, is extremely rare. There is a mass of photos from which one can judge the interesting character of this method of finishing a room.
In this article, we will look at the methods of facing the walls with laminate with our own hands, the technical and aesthetic components of this method. The use of laminate for laying on the wall, is increasingly used in the interior of residential and office space. Using MDF panels and various types of siding is a thing of the past. In the article we will tell how to fix the laminate on the wall with your own hands, show photos and video instructions.
The advantages of laminate for wall cladding

- The main advantage of the laminate in its environmental friendliness. It does not contain toxic fumes, so it is great for widespread indoor use.
- Laminate was originally designed as a floor covering, therefore, has excellent strength characteristics, which means it will last on the wall for a very long time.
- Since the cost of laminate directly depends on the class of strength, then a low-class laminate is perfect for wall cladding, while not at the expense of quality.
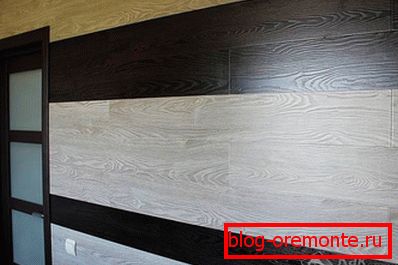
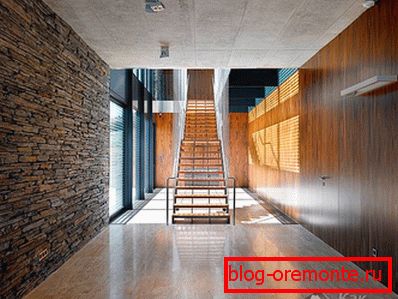
- A huge number of different textures and colors. This opens up great horizons for the imagination of wall decoration.
- Easy installation of laminated panels. So, lay a laminate under the power of even an inexperienced person in this business.
disadvantages

Unfortunately, this method has its drawbacks. Fortunately, there are not many of them:
- The susceptibility of this finishing material to moisture. Therefore, prolonged contact of the laminate with water may cause deformation or swelling of the panels.
- Certain sensitivity to extreme temperatures. This disadvantage must be considered, for example, when facing the walls of the kitchen. At especially adverse temperature conditions, the quality of the appearance may slightly decrease.
That's all. It is enough to observe some precautions, for example, it is not recommended to lay laminate on the walls of the bathroom, balcony, or kitchen. As a finishing coating of the walls of these rooms is best to use traditional, proven methods.
How to choose a laminate for wall cladding
- Conventional shunt laminate. This view is familiar to everyone. It is most often laid on the floor. The convenience of its use lies in the fact that the laminated panels themselves are connected by a special shunt lock;
- Glue laminate. This type of panels is connected to the surface and to each other with the help of building glue, or ordinary liquid nails.
- Laminate with click lock. This view has a more advanced lock that snaps into place, preventing the panels from disengaging. This laminate has a higher strength.
Laminate is divided not only by color and texture, but the main indicator is the class of strength. This parameter determines the price of the material. Need to remember? the higher the grade, the higher the quality of the laminate. The advantage of using laminate board for wall finishing is also the possibility of using low-class panels of 21? 31. After all, there will be no mechanical load on the laminate.
How to fix on the wall

So, to get a beautiful finish on the walls, you need to carefully align the surface. The beauty and accuracy of facing depends on it. Treat this preparatory action as the most important. Of considerable importance is how to fix the laminate. Laying laminate on the walls is done in two ways:
- Mount to the crate. It is used in case of large curvature of the walls. The advantage of this method is that there is no need to level the walls. In addition, under the crate, you can put an additional layer of thermal noise insulation. In modern budget apartments with "cardboard" walls, this method may be preferable.
- The first step is to calculate the required amount of laminate. To this amount you need to add another 10 percent for trimming and fitting.
- Prepare a wall for laying. The wall should be smooth and dry. If you decide to crate, it will require a little more effort from you. Lathing is performed either from wooden bars, or from metal or aluminum profiles, which are mounted on the wall with self-tapping screws. The distance between the screws should be no more than 40 cm.
- Panels can be mounted to the wall both vertically and horizontally. If you plan to veneer the entire wall from the ceiling to the floor, it is better to start from above.
- In the case of gluing laminate it is treated with adhesive composition, pressed against the wall and fixed for a while, until the glue seizes. The panels on the batten are fastened with brackets, which are used for the installation of plastic panels.
- After finishing the walls it is necessary to give them a finished look with the installation of ceiling and floor plinths.
- Gluing directly onto the wall. Here preparation of the surface for pasting is of particular importance. Various glue can be used: construction, liquid nails, titanium, etc. The application of glue produced by "snake".
Order of work
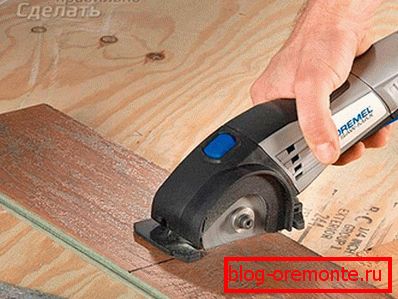
- The first step is to calculate the required amount of laminate. To this amount you need to add another 10% for trimming and fitting.
- Prepare a wall for laying. The wall should be smooth and dry. If you decide to crate, it will require a little more effort from you. Lathing is performed either from wooden bars, or from metal or aluminum profiles, which are mounted on the wall with self-tapping screws. The distance between the screws should be no more than 40 cm
- Panels can be mounted to the wall both vertically and horizontally. If you plan to veneer the entire wall from the ceiling to the floor, it is better to start from above.
- In the case of gluing laminate it is treated with adhesive composition, pressed against the wall and fixed for a while, until the glue seizes. The panels on the batten are fastened with brackets, which are used for the installation of plastic panels.
- After finishing the walls it is necessary to give them a finished look with the installation of ceiling and floor plinths.
A photo

Video
This video shows the process of fixing laminate to a wall, with explanations from the wizard doing the work:
This video will help you understand how to close a niche in the wall with laminate: