How to fix a cast iron bath
Despite the great popularity of shower cubicles, an ordinary bath, nevertheless, still remains an indispensable element of the interior of a modern bathroom. Think about that, how to fix the cast-iron bath, and what are the requirements for its installation technique, you will have to update this element if necessary.
Foundation preparation
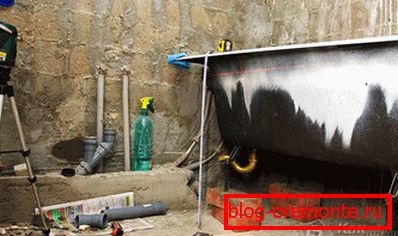
The method of fastening different types of baths depends on the material from which they are made. That is why for possessing a considerable mass of cast-iron baths, a special type of fastening is provided, requiring the use of a sufficiently reliable and durable base.
Currently, cast-iron baths are often fixed on the podium, built on the place of its permanent placement. Immediately, we note that such a podium (base) must meet the following requirements:
- The base under the cast-iron bath should support only the bottom of the bath, while its supporting legs should only touch the floor;
- The podium is usually made of brick; the alignment of its support surface is performed using a bubble level;
- The height of the supports is set immediately after the bath is installed on the podium; at the same time, the alignment of the position of the bath in height is noticeably facilitated, since the main load is shifted from the legs to the podium.
Basic rules for fixing baths
When installing baths of any type (including cast iron), the rules relating to the procedure for connecting the drain and fastening of the bath product should be observed. They are expressed by the following requirements:
- before connecting the drain channel is recommended to lay the bath on its side;
- then it is necessary to connect the drain to the bath and only then proceed to its installation on the podium (legs);
- immediately after this, you need to gently move the bath to the wall, adjust it in height and fix it thoroughly;
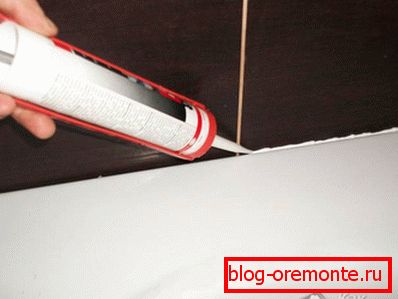
- then, using a special hermetic composition, it is necessary to seal the gaps formed in the places where the bath and walls are joined;
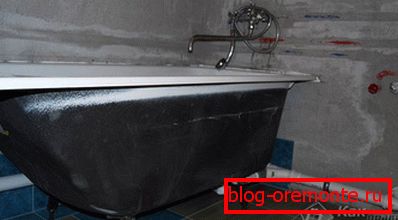
- without waiting for the mixture to dry completely, you can proceed to the installation of a plastic side or plinth used as a decorative lining.
Specialist advice (nuances of installing cast-iron baths)
As for some details and subtleties of how to fix the cast-iron bath, here it is necessary to note the following:
 The bath is fixed on the base with the help of four molded legs, which are rigidly fixed on its body.
- The method of fixing the legs themselves is determined by the design features of the bath being mounted; at the same time, the fastening can be done both with the help of metal wedges, which are available in the kit, and with the help of special tightening bolts.
- When installing a bath of cast iron directly on the floor, a special metal plate with a minimum thickness of 5 mm must be placed under each support.
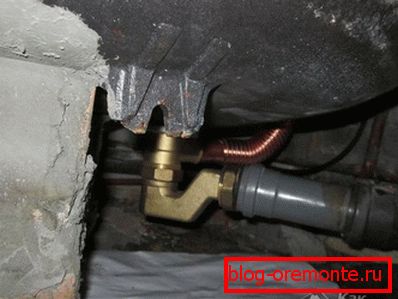
- In the process of installing the bath with special care, it is necessary to act when joining the floor siphon with overflow and outlet, so that the siphon nozzle easily and without distortions “sits” in the sewer pipe.
After the final fixing of the bath, its open side parts can be covered with sheets of drywall. On top of the sheets, you can lay tiles or install a special plastic screen.
Accurate implementation of all the recommendations specified in the article, as well as compliance with all the necessary conditions will provide you with a sufficiently reliable and stable bath mount.
Find out first:
- polycarbonate do-it-yourself shower stall;
- how to properly assemble a shower cabin.
Video
The installation process of the cast-iron bath is described in the following video:
You can find out more about how to install a drain by watching the following video: