How to build a bath barrel
The Russian people love to bathe and can come up with everything so that money can be saved, and the building does not take up much space on the site, and in order to carry it with you. We are talking about a barrel bath, which is gaining more and more popularity due to its characteristics and design. According to many owners, this design is convenient, economical, beautiful and mobile. There is only one caveat - a ready bath in the market can be bought for 200-250 thousand rubles. The price is decent, but all costs can be reduced, because such a structure is easier and faster than building a similar purpose of cinder block or brick. You need to spend money on the material and the stove. If you are a layman, this article will help you learn how to build such an unusual structure.
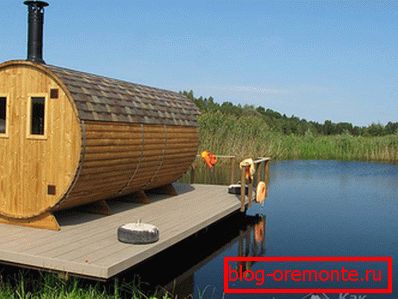
How does the bath barrel
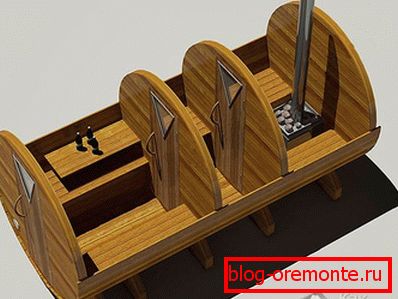
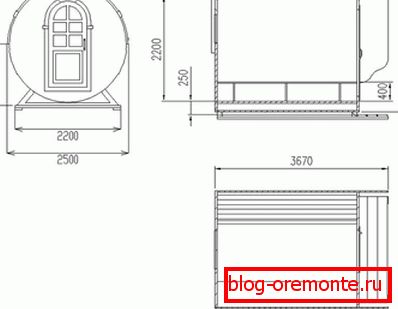
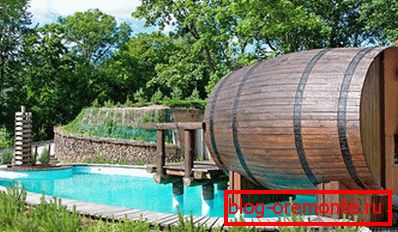
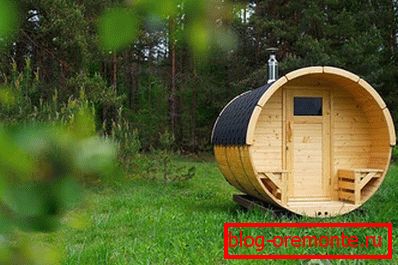
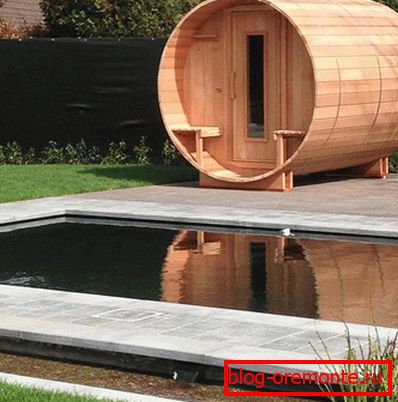
What is such a bath? Most likely, you presented the usual wooden barrel. And you will be right, because the design looks like a barrel lying on its side. Its height, and hence the diameter, ranges from 2 to 3 m, depending on the desire of the developer. The length is also selected according to your needs. If you have a large family, or you want to steam with your friends, the length can reach 6 meters. And when you need to steam, 2–4 people, 3 or 4 meters will be enough.
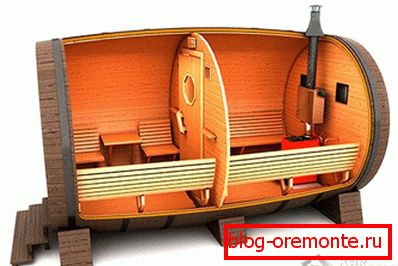
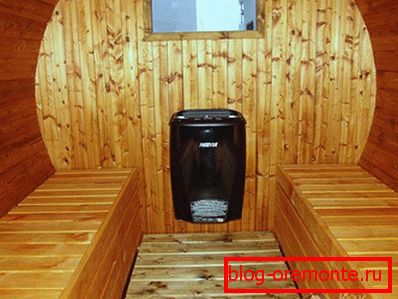
Such a bath can consist not only of the steam room. It is often equipped with a washing room, a shower room, a lounge, a veranda or a changing room. Outside, these sections will not be visible, the separation of the structure occurs inside, due to additional partitions. If there is a washing compartment, it is necessary to bring water and sewage.
The material from which such baths are made is wood. But not every type of wood is suitable for such works. To ensure comfort, it is important to immediately decide which wood to choose and how to build from it. After all, if an ordinary bath can be made of anything, and inside it can be sheathed with wood or other environmentally friendly material, then this design will have the same material inside and outside. For example, conifers cannot be used. The resin that is inside the tree will actively stand out when heated. The heated resin can even burn the skin.
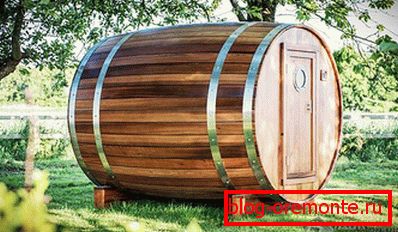
The only type of conifer that is suitable for construction is cedar. Its health and aromatherapy properties have a beneficial effect on human health. In addition, the cedar is resistant to moisture and to various microorganisms, does not deform, does not shrink and does not crack under the influence of temperature. A variety of textured patterns and shades is important for the aesthetic design of the structure.
Often, when choosing a tree, they stop on oak, which is known for its strength and hardness of structure. Such a bath will serve you for many years. Lipa is another breed that is often used. Linden couples have a beneficial effect on the skin, rejuvenating it, and the building itself will quickly warm up and keep warm.
The budget option can be called the construction of aspen. Its properties are very similar to those of linden, only aspen emits a bitter smell and is less durable.
Why bath barrel?

This question may arise immediately. After all, you can make an ordinary bath of wood or brick, as everyone does. But this design has several advantages, due to which it is very popular.
Advantages of this option:
- Compactness. Due to its design, such an engineering creation can be placed on almost any site. After all, often the average bath takes only 8–10 m.2that is useful for owners of small sites. But with all this, the internal space is used to the maximum, and in such a steam room six people can fit.
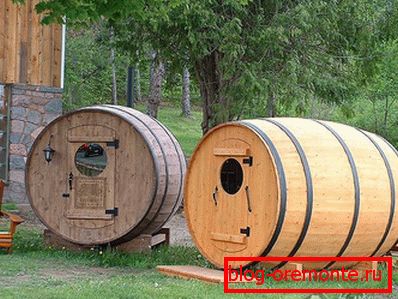
- Mobility. If you need to move, or you sell your dacha or house, just take it with you. It is easy to transport it to another place in a truck, and if it is small, it can be adapted to transport a trailer for a car. And all due to the fact that it does not have a rigid connection with the foundation, but is simply installed on its surface. You can also make a bath on wheels.
- The rate of heating the room. Since the design has no corners, it quickly warms up. Many experts agree that it takes 20% of the total time to heat the corners. With a barrel of such a loss of time will not. In summer, it can be heated to 100ºC in 30–40 minutes, in winter, in 1 hour.
- Efficiency. For the construction of a conventional bath you need a lot more money, while this one will cost you much less, but it should be noted that its capacity is from 3 to 6 people.
- There is no need for a capital foundation device, since due to its low weight, it is simply not needed.
- Unusual and modern design. The shape and appearance of the design attract attention. In addition, psychologists have proven that round shapes promote relaxation.
- Easy maintenance. Dirt does not accumulate in the corners, simply because they are not there, and the area is small, so you will have to clean less.
- Thermos effect. It provides a well-thought-out insulation and form. Thanks to this you can save on fuel and electricity. According to experts, the round shape helps to spend 23% less resources than a simple bath.
As you can see, the merits are enough. Therefore, analyzing them and their capabilities, most developers choose this option. If you are reading this article, then you are also convinced of the practicality of this form.
Materials and components

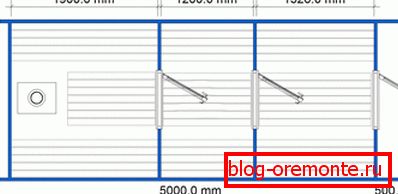
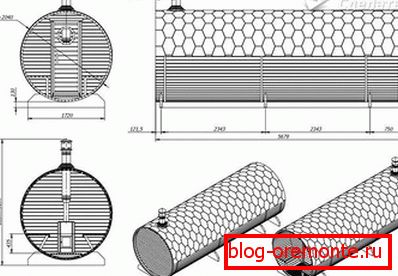
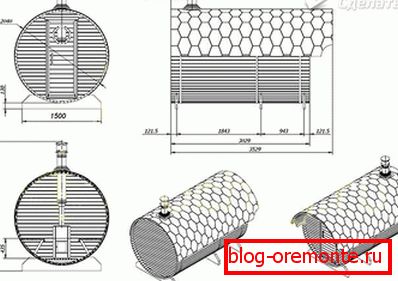
The first thing you need to decide on the material from which to make a bath, as well as its design. To have an idea about the future construction, you can look at the various drawings and plans to choose the one that you like. It must contain all the data: length, width, diameter, etc. Then, based on the size, you need to prepare the following material:
- Grooved boards are 90 mm wide and 45 mm thick. The length is chosen depending on the size of the structure. Do not take boards with a greater width, as in the future when laying them it will be difficult to dock on a round surface.
- Cutting boards 200 mm wide and 50 mm thick.
- Window and wooden blocks.
- Polog.
- Coupling metal hoops.
- Wood, electric oven or stove-heater.
Before doing the work, all wooden elements must be covered with an antiseptic, so that the tree does not rot, and microorganisms, mold and fungus do not start there.
Because of the rounded shape of the bath, the wood needs to be prepared and cut. And the boards will be connected to each other in a spike-to-groove way. If you do not have the appropriate equipment to do this, it is better to order such treatment from specialists. Just show them the size drawings so that they cut it right. And in order to save material, time and effort, you can purchase a ready-made set of materials, which will only have to be assembled and installed, but it will cost much more. When you have prepared everything, you can proceed to construction.
Stage 1 - Foundation Preparation
As already mentioned, there is no need to dig a foundation pit and fill the foundation. It is enough to install it on a flat surface so as to exclude the contact of the tree with the soil. To prepare such a platform is quite simple, if you tamp and level the site and cover it with gravel or crushed stone.
The basis for such a bath can be made of slabs.
If there is no such flat ground, you can make the foundation of concrete. To do this, remove the top layer of soil, 15–20 cm deep. Install the formwork, put sand in the base, make a pillow 5–10 cm, and tamp it. After that, lay down the reinforcement and fill all with concrete. After 3 weeks you can collect the bath, it is then that the solution is fully strengthened.
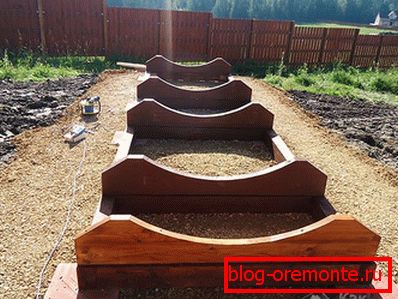
Now you need to make a wooden base. Cross-section details will be made from cut boards 200 mm wide. If you decide to cut them yourself, then cut them into a rounded notch that follows the contours of the barrel. To keep everything smooth, use the pattern as a pattern. Cut the workpiece should not be more than half the width, that is, 100 mm. The number of such boards is determined by the length of the bath. As recommended by professionals, they should be installed in 1–1.5 m steps.
For reliability, the transverse parts can be connected with boards, which are screwed along the embedded boards with screws.
Stage 2 - Assembly of End Partitions

Now you need to assemble the end walls. Their height and circumference depend on your plan. Connect the prepared boards, pressing them close to each other on a flat surface. To fasten them, use the transverse bars. Secure each board with screws to the crossbar. Also do not forget about the openings. Indeed, in the partitions should be doors and windows in the right places. Therefore, when fastening the transverse bars, pay attention to the fact that they do not interfere with the installation of window and door blocks. After the necessary number of partitions is assembled, you can proceed to the next step.
Stage 3 - Frame Assembly
Then you should lay the mortgage boards on the prepared base. All elements are connected by the thorn-groove method.
Pre-cut under the desired size of the board stacked on the bottom. Fasten them along the required circumference until it is sufficient for the installation of end partitions. Boards should be nailed to the base or fastened with screws.
Once that height has been reached, install the end partitions in the right places and continue to assemble the structure, securing the boards around the partitions. Each board must be nailed or screwed to the end of the partition with screws.
To simplify the task of installing partitions on the inside of the embedded boards, where the partitions will be installed, you need to cut grooves whose width is equal to the width of the partition. Then install it will be much easier and faster.
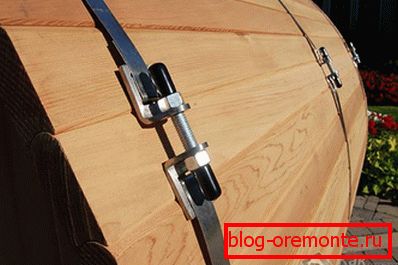
After you have laid the last board, it is necessary to ensure the rigidity of the structure. To do this, the barrel tightly iron hoops. To connect the ends of the hoop, use iron clamps. After a long service life, when the wood dries out a little, the clamps need to be tightened so that the gaps are minimal.
Stage 4 - internal work

It's time to do the interior design of your bath. There is no less work here, as it is necessary to make the floor, the shelves, put the drain, prepare a place for the stove, etc. But now everything is in order.
- The first step is to knock down the shelves and install them inside. It is recommended to collect them from aspen or linden.
- After this, be engaged in installing the floor, which will also be made of wood. Laying the floor should be at a small angle in the direction of the drain, then the water will not be found. To ensure air circulation, the floor can be made in the form of a wooden lattice, so that the distance between the boards is not less than 1 cm. Then your feet will not freeze and will be dry, since all the water will flow freely.
- Take care of the water drainage system. Where to take it, depends on you. If the site already has a sewage system - you need to organize the water flow through the pipes into the sewage system and put a siphon in order not to inhale the unpleasant smell during the bathing procedures. Another option is to dig a drain hole where water will flow.
- If you want to equip a bath with electrical wiring, you need to do it at the assembly stage. In this case, ordinary wires will not work. You need to purchase a special wire in non-flammable insulation and lamps that are designed for saunas.
- When you have plans to bathe only in summer, you do not need to warm it. But if you have a great desire to soar all year round, you need to warm the bath with rolled material. Additionally, it is necessary to lay the vapor barrier layer and make the finishing of the room.
- Do not forget to install the doors and windows in the right places.
- The most important element of the interior is the stove - a key element. You need to choose which oven to buy - an electric stove or a small wood burning stove. Here, choose from your own preferences. It is necessary to install the stove in the last section, where there will be a steam room. The place where she will stand is important to protect. The walls, floor and ceiling near the stove should be lined with refractory material, such as tile, or a metal screen. If your stove is on wood, in the ceiling you need to make a place for the chimney.
Now your bath is almost ready. In general, you can already exploit it. To protect against precipitation, it remains only to make a roof.
Stage 5 - roofing
The final stage that should be done is to make a roof. There are several options:
- simple truss system with a gable roof;
- soft roof (shingles or roofing felt).
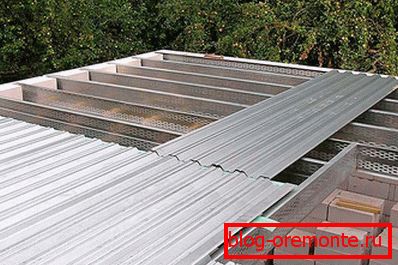
Soft roof is mounted directly on top. But before installing the barrel must be covered with waterproofing material so that water does not penetrate the boards. After that you can lay the roofing material. To make a truss system, you need to prepare a wooden bar with a section of 50 × 50 mm and make the frame, and the roofing material will be metal tile or corrugated flooring.
The last thing to do is to treat the inside and outside with linseed oil or a special composition for the baths. At this all work ends.
It will take you several days to complete the work, but a bath barrel will long please you, your family and friends. Staying in the steam room is beneficial for blood vessels, the nervous system and the respiratory tract. In addition, such treatment is not only useful, but also pleasant!
Also read:
- How to make a broom for a bath.
Video
A photo


Schemes and drawings