How to align the walls in the bathroom
In order for the result of the repair work to be suitable for its quality, it is necessary to treat all its stages as responsibly as possible. In this case, little things do not happen, especially when it comes to working in the bathroom.
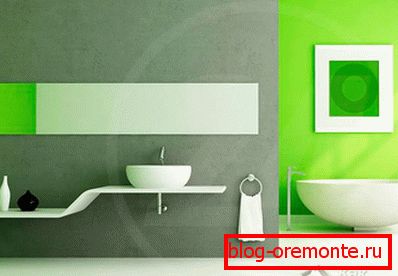
The thing is that quite extreme conditions are created in this room during its operation. This refers to high humidity, rather large amplitude of temperature fluctuations. That is why the choice of suitable materials for finishing is a rather complicated task, and it is also necessary to take into account that almost all of them require the most even base for installation.
Work Methods

There are several ways to align the walls, and they can be divided into two large groups.
- Alignment с помощью смесей.
- Alignment with sheet material.
Each of these options can be applied depending on the specific situation. For example, if it is decided to use ceramic tiles as a finishing material, it is better to level the walls with mixtures. Conversely, if you plan to paint the walls, it would be better to use sheets of drywall. For the most complete understanding of the process, each of the options for the work should be considered in more detail.
Blend Alignment
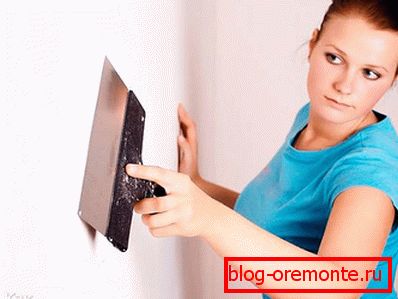
Training

At this stage, you need to dismantle the old coating, if it was, and clean the surface from dirt. Do not forget that if any lamps or other decorative elements were installed on the walls, they should be dismantled. It is also worth remembering that the surface intended for leveling should be treated with antiseptic compounds. This will not only protect the walls from the occurrence of the fungus, but also increase the adhesion of the mixture to the wall, which will be beneficial in terms of the quality of the work.
Markup

After preparing the surface, it is necessary to mark it. For these purposes it is convenient to use a laser level, but you can do it with a simple plumb and construction level. These tools are available and effective. It is necessary at a distance of one meter from each other, draw vertical parallel lines over the entire surface of the walls. Using the laser level, you can easily check how smooth the walls are by finding the maximum bulging points - this is clearly shown in the attached video. If you work in the old-fashioned way, you will have to mark with the help of the water level and align the beacons along the horizontally stretched thread, which is more laborious.
Installation of beacons
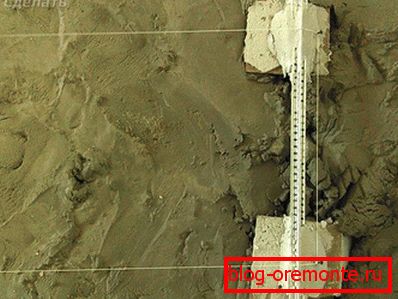
After the marking will be applied, you need to install special beacons, which will be leveling surfaces. As these elements, you can use, for example, profile slats, which are usually used when installing battens for any coating. Rails of the required length are mounted on the walls as follows:
- First, the mixture is prepared. To do this, in a ratio of 1? 3 mixes cement and sand and diluted to a viscous, but dense texture.
- Then, using a construction trowel, this mixture is pounced on the walls along the previously marked lines. The bottom line is that the work results in a series of small tubercles of the mixture. The distance between them should be approximately equal.
- After that, the slats are laid on these tubercles and are slightly pressed. It is necessary with the help of the level to make sure that they are in the same plane.
If you take up work without having a certain experience, then it is better not to use a solution with the addition of gypsum to install the beacons, as it will grab more quickly than you will have time to level the beacon.
Alignment

After the beacons are installed, you can proceed to the alignment. For these purposes, the same mixture of cement and sand is prepared, with the only difference being that some building glue can be added to it to achieve greater plasticity and hardness. The essence of the work is that the space between the beacons is filled with a mixture, after which, using the rule (you can use a segment of the same rail), the mixture is leveled. The rule moves down the lighthouse plane, thereby smoothing and leveling the surface. After the leveled mixture hardens a little, the lighthouses should be removed, and the space remaining from them should be filled with the mixture.
Leveling plasterboard
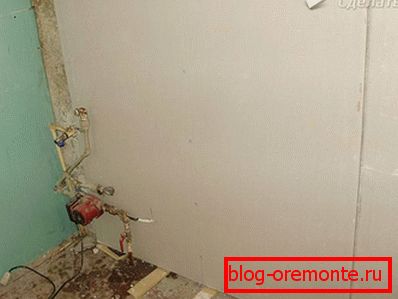
Another option is the alignment of the walls, using sheets of moisture-resistant drywall. It's still easier here:
- First, the wall markings are made. As in the previous case, you need to mark the vertical lines.
- Then, along the lines are mounted fasteners. To do this, you must first drill holes in the wall. Use in this case, the punch is quite appropriate. Dowels are driven into the holes.
- On them are fixed metal rails. It is important to remember that it is necessary to ensure that the elements are in the same plane, for which it is worth using the building level.
- Sheets of material are fastened to the rails.

It is important to remember that if it is decided to use drywall, then you only need to choose a moisture resistant option. In addition, you can add that if the wall has minor irregularities, then the sheets of drywall can not be screwed, but simply stick directly to the walls. So you can greatly reduce the time of work and facilitate them. But this can be done only with small irregularities and a height difference of the surface of no more than 3.5 cm per m2.
If the wall is too large, it should be prepared by roughly leveling it with a cement-sand mortar.
Only a responsible attitude to work will allow us to speak with confidence about the reliability and durability of the result.
We advise you to read:
- how to assemble a corner shower;
- restoration of the bath enamel with their own hands.
A photo


Video
This video demonstrates the process of plastering walls on beacons:
See how the leveling of the walls occurs, by gluing drywall to them: