House of cibit with their own hands
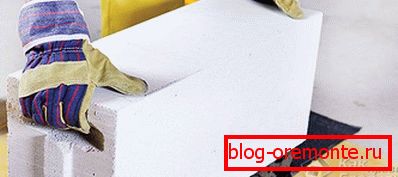
More and more people, thinking of what to build their home from, prefer to choose modern materials so that their construction is reliable, beautiful, meets today's standards and has stood for many years. As a building material, cellular concrete is gaining popularity at unprecedented speed. It can be divided into aerated concrete and foam concrete. Despite the fact that they have the same density, heat treatment, which passes aerated concrete, makes it much stronger. He is able to withstand heavy loads. The representative of aerated concrete is Cibit - a material that is made in an autoclave by curing. Since it is porous, the weight of the blocks from Cibit is small. This is how it differs from traditional brick and concrete. Moreover, Cibit can accumulate heat and “breathe” due to its porous structure. It is these and other characteristics, which we will discuss later, helped to gain great popularity to the new material. But how to build a house of Cibit with their own hands? Let's find out next.
Sibit - for and against
Why is Sibit gaining more and more popularity? The answer is quite simple: because of its positive properties, which make it ideal for building houses. Let's look at the main ones:
- The most important advantage is that Cibit has tremendous thermal insulation properties. In the summer the house will be cool, and in the winter warm. Proceeding from the practice, the owners of houses from Cibit save up to 30% on heating the dwelling, and this, you see, quite a lot.
- Material is easy to handle. If the blocks need to be adjusted or rounded, you can easily do it with an ordinary saw with large teeth. It is easy to cut and drill even by hand.
- Cibit lightweight blocks, so you can save both on the foundation device and on special heavy equipment for feeding the blocks up.
- The porous structure allows the material to "breathe", so the air in the house will always be fresh.
- It will be easier and faster to build a Cibit house, as the blocks are much larger than simple bricks. Masonry walls can be performed not only with the usual solution, but using a special glue.
- Cbit does not burn and is an environmentally friendly material.
Cons sibit: its fragility and strong moisture-absorbing properties. But this is not a big problem, as during laying the reinforcement of the walls is performed, which will further strengthen them. And the moisture-absorbing unit itself, in turn, will be sheathed with finishing material so that moisture does not get into it.
So, with the positive and negative sides sorted out. If you nevertheless decided to use Cibit as a building material, let's take a detailed look at how construction begins and how to build a Cibit house.
It is recommended to build a house from Cibit in spring or summer, at a temperature of 5 to 25? C. If the temperature is above this limit, it will be necessary to moisten the blocks when laying walls.
Preparatory work
As always, it’s necessary to start building your own home with paperwork. You must make a project of the future building, decide on the size, height, shape, etc. In this case, you need to take into account many additional factors: the type of soil at the construction site, the climate and the depth at which the groundwater is located. If all this is not taken into account, do not expect that your house will last a long time.
Not everyone can professionally draw up plans for the future home, so you can ask for help from a special bureau where you can order a house project by paying money for the service.
Based on your desires, experts quickly and accurately design your future home. Moreover, they can calculate how much materials are needed for construction and approximate prices.
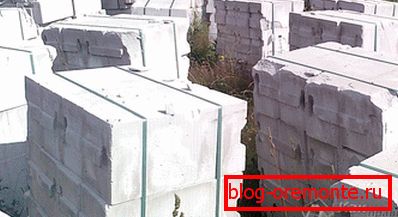
In addition, at the preparatory stage it is necessary to purchase building material: Cibit, cement, sand, crushed stone, etc. To accurately calculate how many blocks will be required for construction, first find out the area of the walls. To do this, based on the size, multiply the total length of the walls by their height. Then multiply the resulting area by the thickness of the block. In this way you can determine how many block cubes are needed. You can buy material in specialized stores. It is important that during transportation the material is covered with polyethylene and well fixed, in order to avoid moisture penetration and damage to the blocks. It is necessary to store Cibit in a dry place under a canopy, so that precipitation does not spoil it before construction.
An important point is the preparation of the construction site. After all, you need to ensure the supply of electricity, start all the materials and store them, as well as prepare a tool for work. Some sites are overwhelmed with various trash, trees, etc. All this needs to be removed. And only after all the preparatory work is done, you can proceed to the main task - to build a house from scratch.
The foundation is the foundation
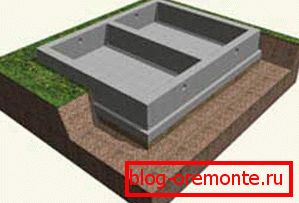
The foundation is a supporting structure that takes over the entire load of the building, distributing it on the ground. It depends on the foundation how long your house will stand, therefore its construction is one of the important stages of construction. Since the Cbit material is not heavy, you can use a strip foundation for building a house. What depth and width to do depends on the number of floors, the density of the soil and the level of groundwater. All these indicators are different, so the depth can vary from 0.7 m to 2 m. The width of the tape is on average 0.4 m.
To make a strip foundation, you need:
- Prepare the site. To clear the chosen place, if it is overgrown with large grass, it should be mowed.
- Make a markup for the trench. It is made of rope or cord, which is stretched along the perimeter of the entire building, repeating its contour. It should be tied to pegs or bars that are driven into the ground at the corners of the building. It should clearly adhere to the sizes and widths that are in the drawings. After the rope is stretched, check all dimensions again. Then draw a diagonal from one corner to another - if the sizes are in agreement, you can proceed to the land works.
- Focusing on the markup, it is necessary to dig a trench for the foundation with the selected depth. The work is hard, but doable. Make sure the walls are smooth. For orientation, you can use a plumb line. The bottom of the trench should also be horizontally flat. To prevent moisture from penetrating the foundation, lay a waterproofing material on the bottom.
- When the trench is ready, make a sand pillow. At the bottom, pour a layer of sand in 10 cm and tamp it. Then scribble rubble on top and tamp again.
- Now it's time to shoot down the formwork. It must be made of wooden planks, connecting them together with screws or nails. Formwork height depends on the climate in your area. If winters are snowy, we recommend making a base of 50 cm high. When the climate is warm, the height may be less.
- At this stage, we recommend laying communications: sewage and water supply. After all, if this is not done before pouring the foundation, then it will have to make holes in it.
- Next, take the fittings O14 mm and make a frame from it, which will need to be placed in a trench. For this, the armature is connected to one another with a flexible wire.
- Now it is time to pour concrete. To determine how much concrete is needed for casting, the total length of the tape must be multiplied by its height and width. You will receive a number that indicates how many cubes of concrete you need. This amount of concrete can either be ordered or made independently. The choice is yours. After that, the concrete is poured in layers of 20–30 cm. Each layer should be compacted and the air expelled from it.
- Once the foundation is poured, its surface must be leveled with a trowel.
It remains only to wait for it to dry. It usually takes 30 days. For 10–15 days you can remove the formwork. The foundation must be covered with something so that the sediments do not wash it. If the air temperature is high, then from time to time the concrete must be moistened so that no cracks form on it.
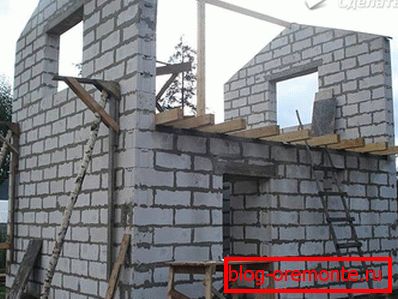
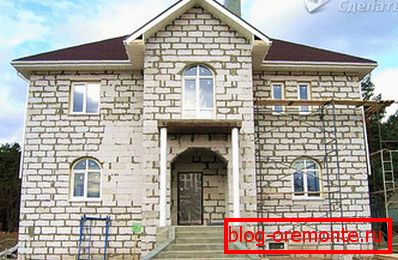
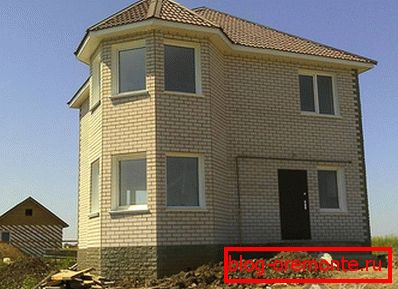
Cibit Walls
The laying of walls from Cibit is much easier than from brick, since the blocks are larger and, accordingly, their number will be less. The only difference is that the Cibit clutch must be reinforced with reinforcement. So, in order to build walls, you will need:
- manual or electric wall chaser;
- Master OK;
- notched trowel or trowel;
- rubber kyivanka;
- special plane for gas blocks;
- a brush to remove dust from the strobe;
- hand saw;
- metal corner;
- string or fishing line;
- building level;
- reinforcement bars O10 mm.
Before you start laying the first row, it is important to take care of waterproofing. Therefore, the base can be covered with bitumen or lay several layers of roofing material.
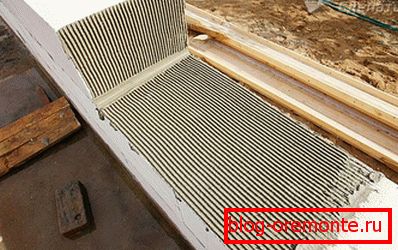
The first row must be put using a cement-sand mortar. To make it, stick to a 1: 3 ratio - cement and sand. Add water until the solution has the desired consistency. A layer of mortar on the base can reach 1 cm, which will hide all irregularities.
The main task when laying the first row is to make it perfectly smooth. To cope with the task you will help the rope, construction level and a mallet. So, you need to start laying walls from the corners. Install the corner blocks and align them strictly to the level. To customize the blocks, use a rubber mallet. Then between the blocks should pull the line or string, which will serve as a guide for the laying of the other blocks. Its horizontalness also needs to be checked by level. Make sure that there is no sagging. If the wall is more than 10 m in length, install an additional block in the middle. The lace should be stretched over the top of the block. Now proceed to the installation of other blocks. Not always the length of the walls will be equal to the number of whole blocks, so some of them will have to be customized to fit the size. You can cut them with a saw, controlling the correctness of the cutting angle. In this way you need to lay the first row around the perimeter. After you have done this, you need to wait several hours for the solution to set.

The remaining rows are done in the same way: the corners are set, the cord is stretched and the process repeats. Only here there are some differences. The surface of the Cbit can be treated with a special plane, giving it a roughness. Then, the binder will go to a much smoother. Also do not forget about the bundle, the blocks of the second row should be stacked with an offset of 8 cm. One more thing - now you can use special glue to connect the blocks. It is uniformly applied with a trowel or a toothed spatula. Then the gap between the blocks will be the same, which will simplify the process of laying. Another advantage of glue - it dries much faster, so you will not have to wait long.
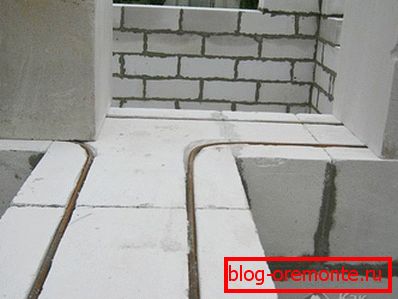
Please note that every 3 or 4 rows of blocks must be reinforced. To do this, parallel grooves for reinforcement are made in the perimeter blocks. The grooves are cleaned with a brush, and the fittings O10 mm are laid in them.
The connection of two pieces of reinforcement should not be at the corners and joints of the blocks.
It remains to apply a solution or glue. Such an event should be carried out not only for the walls, but also for the areas above and below the windows, as well as under the floors for the floors.
Ceiling installation
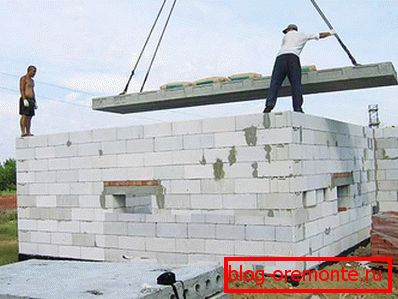
The masonry continues until you have reached the desired level until the slab. Please note that slabs for overlapping should be supported on armored belt. To make it, you need to cut the blocks so that they are 10 cm thick, and put them around the perimeter parallel to each other, making a kind of formwork. Inside you need to put the valve and pour all the concrete.
On such a reinforced belt set plate. They can be concrete, gas-concrete or from similar analogues. The formed joints between the plates need to be filled with mortar. And the ends are closed outside with clumsy blocks.
If you decide to block the house with gas concrete slabs, then it is acceptable to do it when the distance from one load-bearing wall to another does not exceed 6 meters. The overlap of aerated concrete has a high bearing capacity, low thermal conductivity and high refractoriness. In order to install such heavy slabs, you have to hire a crane, which will raise them to the desired height.
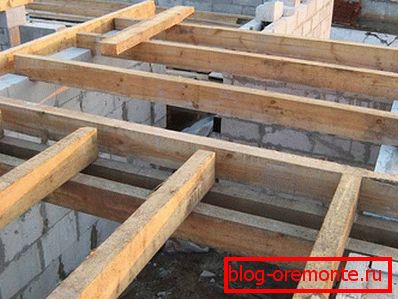
But slabs are not the only way to overlap a house; you can make it from wooden beams, concrete or metal beams.
When your house has several floors, after the ceiling you need to continue laying, erecting the second floor. If the house is single-storey, the final stage is the roofing.
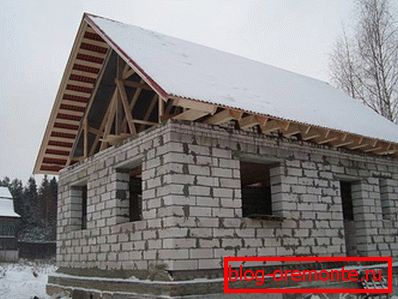
Roof construction
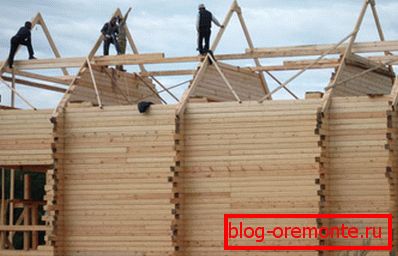
Before you start building a roof, you need to choose which one it will be:
- flat;
- single-skinned;
- gable;
- mansard
The order of work is as follows:
- Perform waterproofing ruberoid.
- Install the mauerlat (support bar) to which the rafters will be attached.
- Install the truss system, strengthen it.
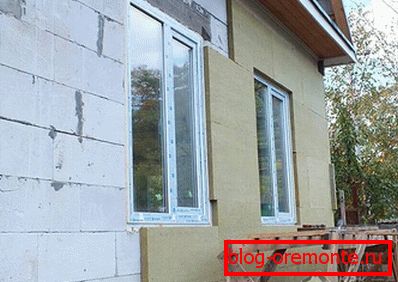
- Perform roof waterproofing, vapor barrier and insulate it with mineral wool or foam.
- Make a crate, which later need to lay the roofing material.
- Sheathe gable.
- Lay your chosen roofing material.
Now the house is built from Cibit. You have already completed the main task, but you need to do a lot more. It is necessary to additionally warm the house, pour floors, make partitions, complete the finishing, carry out communications, insert doors and windows, plaster and so on. But these are already separate topics, since you can’t write everything at once. You can find them all on our website and continue to build your dream home.
Video
This video shows the process of building a house from Cibit blocks:
A photo
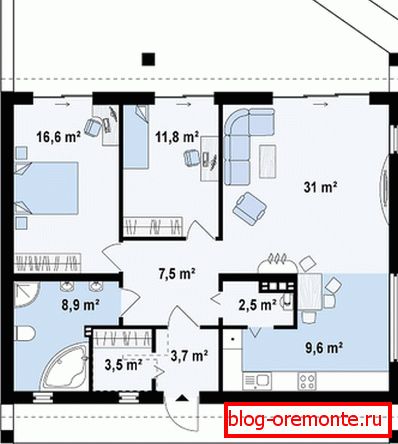
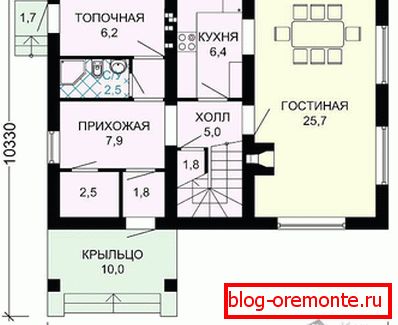
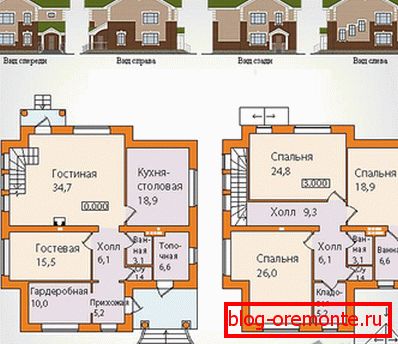
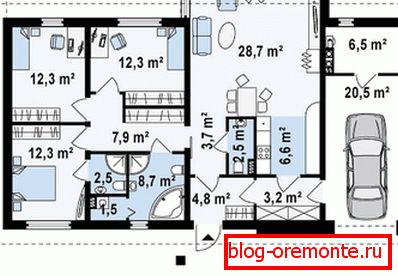
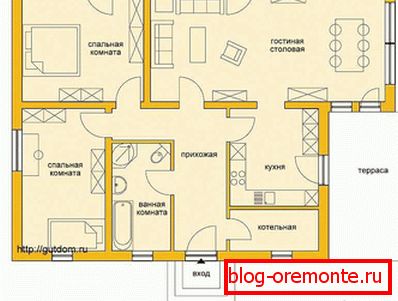
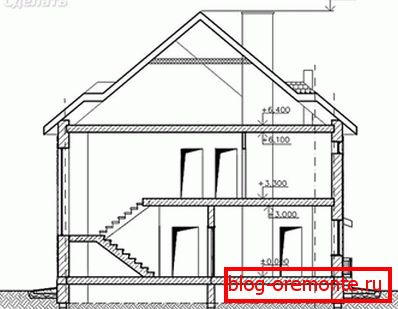
Blueprints