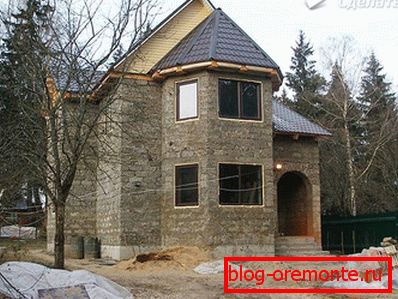
House of arbolita do it yourself
Building a house is a very important step, since everything must be done qualitatively and reliably, because the future construction should serve for many years. It is important to think over the details and first decide what material will be made of housing. The first to come to mind are popular materials, such as brick or wood, but another option should be noted that will give odds to both - it is arbolit. There are many advantages to the material and in this article we will talk about this in more detail. In order to save, many build a house of arbolita with their own hands, and in this case it is necessary to follow the recommendations of experts.
What is arbolit
Perhaps some of you will first learn about the existence of such a building material. But today, more and more buildings are made from it. And this should not be surprising, because it has many positive aspects.
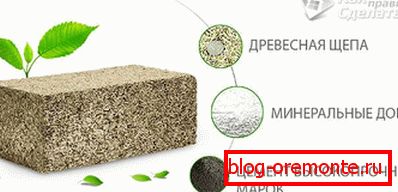
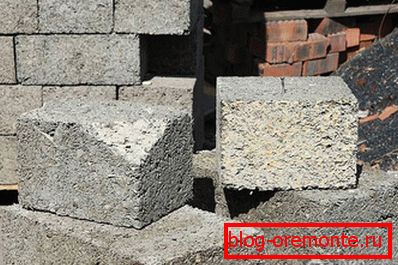
Wood concrete is a type of lightweight concrete. It has a coarse-grained structure, and wood chips are 80% of the entire base. The composition of arbolita includes three main components:
- organic filler (chips, sawdust, shavings);
- portland cement;
- modifying additives.
Modifying additives in the composition improve the technical characteristics of wood concrete. Thanks to them, the material can have the following properties:
- improved bactericidal properties;
- acceleration of the setting process;
- arbolit porosity regulation.
You can purchase material in specialized stores. It is sold both in blocks and in monolithic panels. It is noteworthy that in order to save arbolit can be made independently, for example, in garage conditions. All you need is to prepare all the components.
Advantages and disadvantages
Making arbolit, you actually utilize waste of the wood processing organizations. Due to its composition, arbolit is a fairly lightweight material, so the future construction will not have much weight. Besides:
- The complexity of the whole process of laying walls will decrease.
- Reduced costs for the use of special equipment.
- Installation work will be easily done.
- It is not necessary to make a foundation powerful.
The wall, made of arbolita, less subject to deformation processes during shrinkage of the house. Because of this, you can not be afraid that later there will be cracks and other damage.
It should be noted that the positive qualities of wood concrete mass:
- Low thermal conductivity, due to which the material holds the warm air in the room well and prevents the penetration of both cold air in winter and warm in summer.
- Increased frost resistance, which makes it possible to build buildings in regions with a harsh climate.
- Fire resistance, due to which the material will not burn, despite the wood content in the composition.
- Good adhesion. This property helps to combine wood concrete with any building materials that perfectly adhere to its surface.
- Durability and durability. This indicator is one of the main ones, since during the construction of any building everyone wants to achieve precisely this goal. The blocks of wood concrete are quite strong, so you can safely build a house in 2-3 floors. By the way, arbolit will not rot and fungi and various microorganisms do not appear in it.
- Porous structure providing excellent sound insulation.
- Low weight.
- Absolute environmental friendliness.
- Low price
The material has its own minus - low moisture resistance. Wood concrete is hygroscopic and easily absorbs moisture from the environment, so when working it must be isolated from moisture.
All this makes arbolit an ideal option for building your home.
Material procurement

If you want to build an arbolit house, you need to immediately decide how to do it - to build it from blocks or to fill a monolithic house from wood concrete. Then there is another choice - buy the material or make it yourself. If you have the funds and decide to buy blocks, just prepare a place for them under a shed for storage. Independent production of wood concrete is also welcome, all you need is to prepare the material in advance.
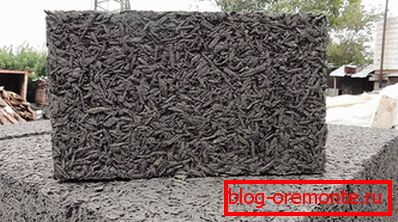
The basis for arbolita are wood chips, but they should not be too small - at least 4? 5? 0.5 cm. This is due to the fact that the tree absorbs moisture very quickly. If the chips are small, when blended with cement, they simply lose their properties.
Preparation of raw materials should be in the following sequence:
- Purchased waste from the sawmill must lie in the open air for 3-4 months.
- After that, they must be treated with a solution of limestone (2.5 kg per 150 liters of water).
- 3 days of chips must be mixed.
- Wait until the limestone mortar dries.
Additives for wood concrete mix can be:
- aluminum sulphide;
- slaked lime;
- calcium or aluminum chloride.
After all the stages, it is time to start mixing the wood concrete mortar.
Preparation of the mixture
To cook 1 m3 solution of arbolita, you will need the following components:
- 300 kg of wood chips;
- 300 kg of portland;
- 15–35 kg of chemical additives;
- 350–400 l of water.
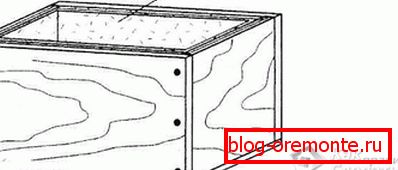 Kneading is best done in containers with low sides, the ideal would be a large trough. In another case, you can use a concrete mixer. To make arbolitovy blocks, you will need forms. They can be made of wooden planks, sheathed with plywood or sheets of metal. To make them bottom, use linoleum. For the convenience of further work, make pens.
Forms before pouring necessarily be moistened with water or lime. And the bottom, which is made of linoleum, will need to be periodically changed, as it will wear out.
Now you can knead the solution. For this:
- Pour the sawdust and additive in a trough or a concrete mixer.
- Cover it with water and mix well. If you do it manually, use a garden hopper instead of a shovel for mixing.
- Then add portland cement and water.
- After that, everything must again be thoroughly mixed.
- The made forms process by lime.
- Pour the mixture into the form and thoroughly tamp it.
Flush the solution into the form is not necessary. Leave 2-3 cm of space from the edge of the form. From above arbolit should be covered with a plaster mixture and leveled with a spatula. It is necessary to keep the block in shape throughout the day, so that it will clutch and become stronger. The next day, the blocks need to be removed and put under a canopy. There they will wait in the wings for 2–3 weeks, only after that they can be used for construction works.
If it is planned to make the walls monolithic, gradually filling them, the mortar should be kneaded immediately after the foundation is made and everything is ready for the walls to be filled. The technology of mixing the solution is the same.
So, the material for building a house has been prepared, then we will look at how to build a house. If you already have a house plan and drawings, then the first step is to make a foundation - the basis for the future house.
Foundation arrangement
The main advantage when working with arbolit is its low weight. Therefore, the foundation for your building can be any:
- pile foundation;
- ribbon low-foundation;
- tiled foundation;
- column foundation.
What is important is the fact that even if the building goes through (which cannot be avoided), the walls of your house will not crack. This is possible due to the unique properties of the wall blocks of arbolita: they have high resistance to fracture. Due to this, you can choose any type of foundation in order to save and ease the arrangement. Most often, preference is given to bored piles and a tapered shallow foundation.
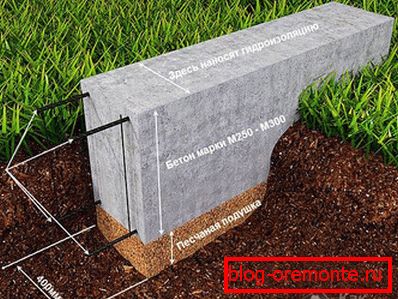
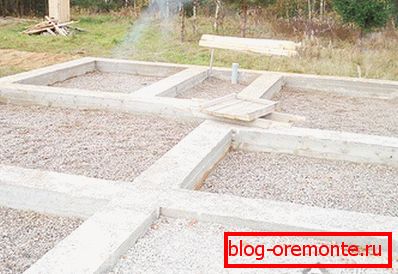
Briefly about how to make a strip foundation:
- Prepare the base, mark the plot according to the house plan.
- Dig a trench under the foundation.
- Seal the bottom, making a pillow 5 cm high of rubble or sand and rammed it.
- Optionally install reinforced mesh.
- Then make the formwork. Take care that no cracks form.
- Now you can pour concrete, tamp it and expel the air.
- Everything is leveled with a trowel and left to dry completely, which will take 1 month.
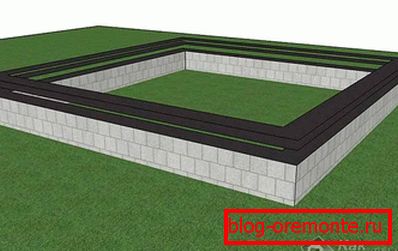
Since arbolit, from which walls will be erected, has low moisture resistance, the foundation necessarily needs waterproofing. First, the base must be raised 40–50 cm above ground level, or the substrate should be made of a brick in half a meter. Secondly, it is necessary to lubricate the foundation with bitumen and lay 2–3 layers of waterproofing (for example, roofing material).
Briefly about how to make a bored pile foundation:
- Calculate the future foundation (depth, height above the soil, frequency of piles).
- Mark the plot based on the calculations.
- Make wells under the piles.
- Make a formwork and make a pillow.
- Reinforce the future foundation.
- Install piles and carry out waterproofing work.
- Pour the concrete into the wells.
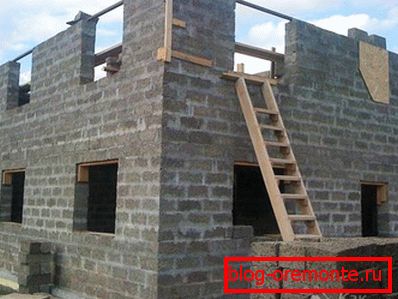
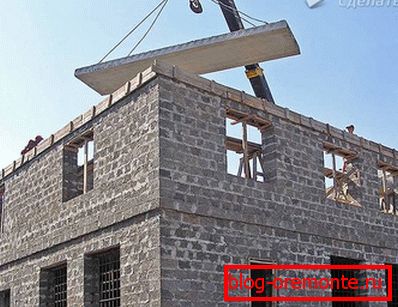
Masonry walls of arbolita
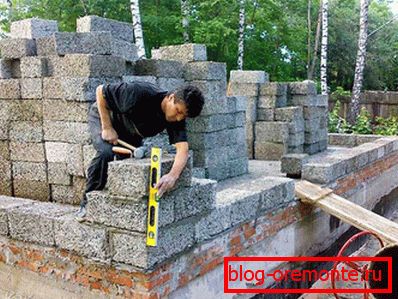
When the selected foundation is ready, you can proceed to the construction of walls. If you have already made brick laying, it will be easy for you to work with wood concrete as well, since the principle of operation is the same. The order of work is as follows:
- Masonry starts from the corners. It is necessary to set the corner blocks perfectly evenly, since the evenness and quality of the future wall depends on it. For these purposes, use the construction level.
- Further between corners the cord or a scaffold stretches. It should run along the edge and be well stretched. The following blocks will be aligned on it.
- After this, the blocking is done directly. They need to be adjusted to the level of the fishing line and make the same seam, not more than 1 cm.
- Having finished the first row, the second one is done in the same way, only with the bundle of your choice.
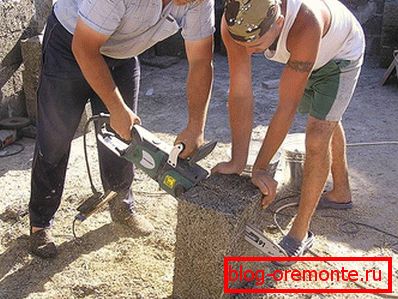
- If the blocks are required to fit in size, they can be cut with a stone saw.
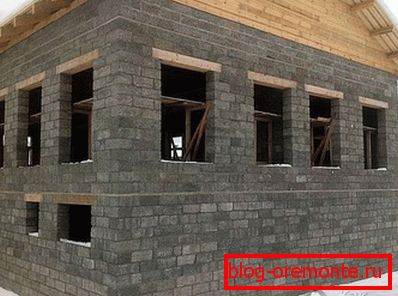
To lay a reliable and high quality masonry, you should consider some points:
- To the house of arbolita showed its thermal performance at 100%, you can not allow the formation of cold bridges. They will contribute to a large loss of heat. To remove them, use the method of breaking the seam with a wooden plank when laying. It should be a section of 12? 12 mm.
- Since arbolit absorbs moisture, before installing blocks they must be moistened with water. Otherwise, it will absorb water from the cement solution. Another option is to make a more liquid solution.
- If it is necessary to build a house with a non-standard design, the blocks are processed immediately on the spot with a stone-cutting saw. If there is no desire to spend a lot of time, figured blocks can be ordered from specialized firms, but it will cost more.
Monolithic walls
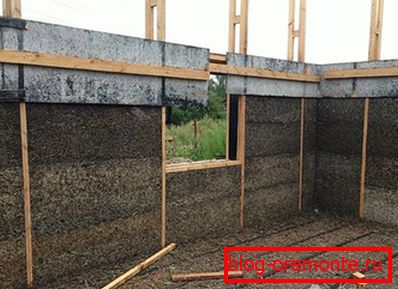
If you plan to make a monolithic wall, you need to make a solution before starting work. The technology is similar to conventional concreting. Formwork is installed on the foundation. Its height should be 60 cm maximum. It is important to ensure its sufficient reliability and durability so that it can withstand the load of heavy wood concrete, therefore it must be well connected and strengthened.
As reinforcement for wall stiffness, you can use board frames, which are installed vertically in increments of 120–150 cm. Thanks to the framework, a deformation seam is created that promotes uniform load distribution. Boards must be treated with antiseptic.
It is better to pour concrete with a layer of 50 cm and no more so that the structure does not collapse under the weight. Do not bury the solution to the brim. After that, everyone tightly tamped and wait for drying (usually it is 2-3 days). As soon as the mortar has grabbed, the formwork is dismantled and rises higher to fill the next layer of wood concrete. The formwork should be removed carefully. All work is done until the desired height of the building is reached.
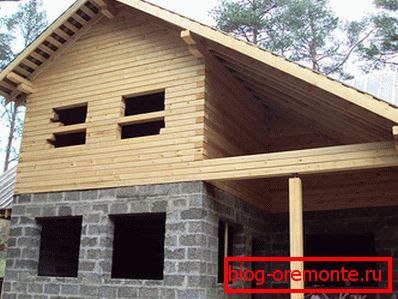
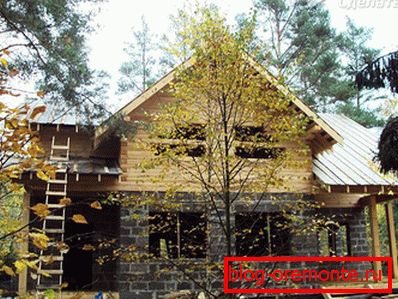
Wood concrete walls
Due to the rough surface arbolitovye walls have good adhesion (adhesion to any surface). And this means that you can plaster walls immediately, without additional preparation of the walls.
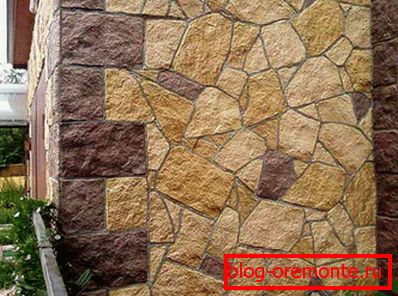
As the outer cladding material, you can use any material:
- siding;
- cloth
- brick;
- wood (block house);
- front paint.
Inside the wall of the house you can decorate everything that your heart desires. There is only one rule - inside the humidity should not be more than 75%.
Roofing
When the box of the future building is done, care should be taken of the roof over your head. The main task is to distribute the load correctly throughout the whole structure. To solve it, you can resort to one of two options:
- Make a concrete screed, which is reinforced on top of a layer of wood concrete.
- Install a wooden beam on the blocks (mauerlat).
Most often use the second option. Beams must be treated with antiseptic and installed in increments of 60 cm. The cross section of beams is 10 × 20 cm. To make the rafters, use boards with a cross section of 20–5 cm. The rafters are covered with waterproofing material.
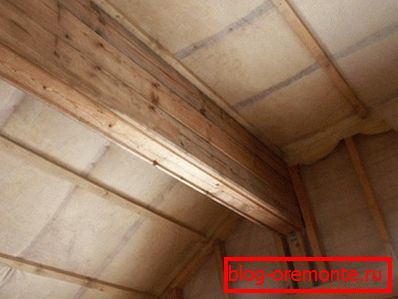
The ridge is made of a timber measuring 5 × 5 cm. It must be attached to the rafters. For a batten, take a plank of 15? 3.5 cm and fasten it in 25-30 cm increments. It remains only to put the roofing material. It can be slate, metal tile or corrugated flooring.
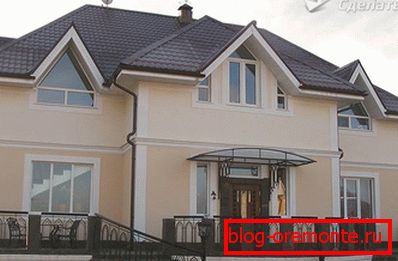
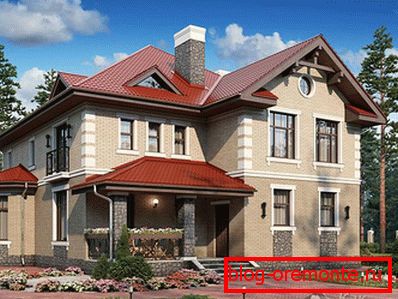
So, it is quite possible to make for yourself your own home out of wood concrete. Moreover, such a house will be warm and durable.
Video
In this video, the author shares his personal experience, telling how he built a house of wood concrete on his own:
A photo