Hip roof do it yourself
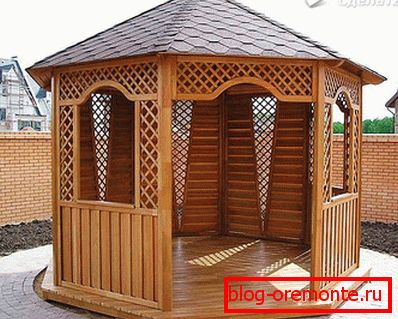
Roof construction plays a significant role in the architectural attractiveness of the building and has an important practical function. Reliable and beautiful hip roof is often used as a roof option. A lot of attractive house projects, the photos of which you can see after reading the article, clearly show what the original design has a hip roof. It is characterized by the device of four slopes, at least two of them are triangular in shape. They are located at the ends of the building. The structure of the truss system is more complicated than that of a gable roof, but a hip roof with its own hands can also be built.
Hip roof models

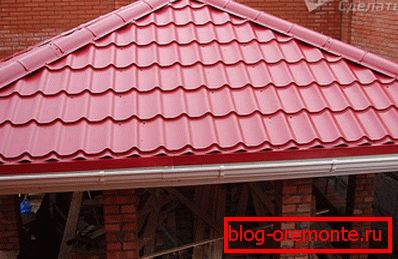
- Gutter or Dutch - a roof with truncated triangular slopes that do not extend to the eaves, and cover only part of the gable. This type is best suited for the attic device. The room gets a lot of space, there is no overhang at the walls. Low slopes of the construction reliably protect the building from wind and precipitation. This model is more difficult to implement than the usual hip roof.
- Hip roof consists of four slopes in the form of triangles with a common top. Such a design is appropriate for a square-shaped house.
Project creation
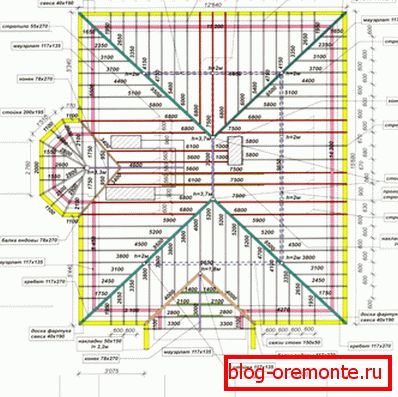
Drawing a hip roof with a detailed description of the length, section of the elements and the angle of inclination - this task is beyond the power of a novice. The scheme should be constructed taking into account calculations using special formulas. It can be calculated, for example, with a construction calculator. Choosing the angle of slope for the slopes, focusing on the type of roofing and weather conditions, you can calculate the height of the ridge and other values. The shape and size of the truss structure also require a detailed calculation and description in the diagram. If you are in doubt that you will competently draw up a project yourself, it is better to contact the specialists.
Features truss construction
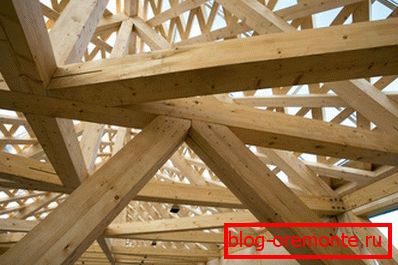
- The ridge girder is the supporting element of the roof, on which the rest are mounted. It is located in the center of the structure.
- Corner rafters have a cross section similar to the ridge bar. They upper part are joined to the ridge bar, and the ends extend outside the building.
- Intermediate rafters connect the ridge and the top trim.
- Short rafters (ladies) are connected with an angular rafter and rely on the mauerlat, their inclination is equal to intermediate rafters.
- Central intermediate rafters converge on the ridge and lean on the mauerlat, they create side ramps.
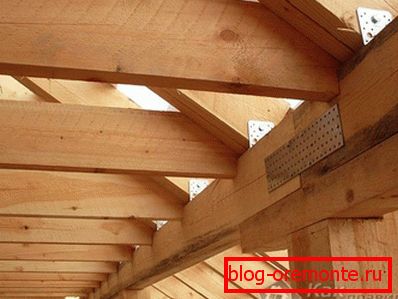
For construction, dry, flat wood of conifers is selected - larch, cedar, pine. Pre-material is treated with antiseptic.
Markup

Before you make a hip roof, you need to markup. Accuracy of marks will allow to avoid mistakes when mounting rafters. Initially, the centerline is calculated, then the location of the rafters. The location of the central rafter is marked at the point denoting half the thickness of the ridge. Marking the position of various types of rafters is best done not with a tape measure, but with a measuring rod. With its help, it is easy to note the location of the central intermediate rafter. One end of the rail is aligned with the intended line, and the other is directed along the line of the side wall.
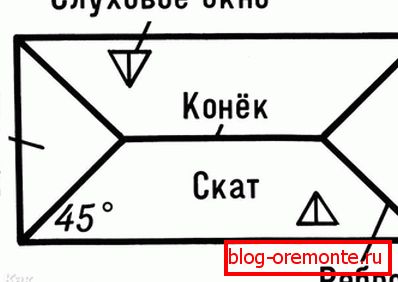 If we present the markup in the form of a projection, it becomes clear that intermediate rafters with a wall form a square, and the angular rafter divides it diagonally into two rectangular squares. The length of the corner rafter allows you to calculate the Pythagorean theorem. A special table of coefficients allows you to calculate the size of the corner and intermediate rafters. To calculate, you need to measure the horizontal projection, find the angle corresponding to your angle of inclination of the slope and multiply the length by the factor. The length of the short rafters is calculated by multiplying the lay of the mower and the coefficient of intermediate rafters. All measurements are consistently performed at the four corners. On the marked points are guided, how to build as a truss system.
The marking rail is made of plywood, 5 cm wide. It indicates the required dimensions.
Roof mounting

- The first stage is the installation of the support belt from the mauerlat. Under it fit a layer of roofing material for waterproofing. For fastening of a bar 20? 20 cm the anchor put in a laying is used. Along the edges of the frame of the bars connect the brackets. The marking is applied to the mauerlat for fastening the rafters.
- The next step is to lay the ceiling beams, which are located on the wall near the power plate. For reliability between the opposite walls are fastened. On the beams you can lay the flooring of the boards, providing a more comfortable working environment.
- The ridge girder is fixed on the vertical supports located on the central beam. Racks are set vertically in level and secured with braces.
- For side rafters, boards of 60? 150 mm are required. Pre-made template, which sawed off the corners for fastening. In the joints with the power plate, gash is performed on 1/3 of the board thickness. Rafters set in increments of 60 cm.
- Behind the side is set the central hip rafter, which is attached to the end of the ridge and rests on the power plate.
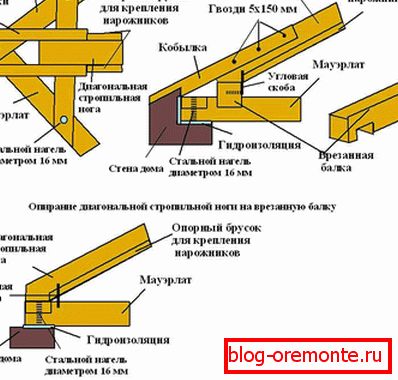
- At the next stage, diagonal rafters are attached. All of them have the same length, and are equal in thickness to the ridge girder. For fastening the rafters in the corners of the mauerlat, two bars of 50 × 100 mm are fastened together. Wicker rafters are made on the template and attached to the ridge and the power plate. The corner rafter at the top point is joined immediately with two central rafters, so you need to make an undercut with a double bevel. The long diagonal rafter requires support in the form of a support post.
- Short rafters are installed in steps similar to the side, the place of their attachment noted on the mauerlate. To fasten the bedbirds at the bottom, a pattern from side rafters is suitable, and an undercut when connecting to a diagonal beam is made on site. Installation begins with the shortest rafter.
Depending on the size of the spans and design, additional elements are used:
- bolts for connecting trusses;
- racks for large spans;
- подкосы;
- шпрентели.
A sufficient overhang of the roof is provided by the length of the rafter legs or with the help of nail boards “fillies”. Rafter legs are fixed to the mauerlat in several ways: brackets, metal corners, nails. On the ridge, the rafters are connected with bevels and fastened with metal plates. After that, installation of the batten is performed.
With no experience building a hip roof, you can watch a training video or consult a specialist.
Video
In this video, the author tells about the design of the hip roof, clearly explaining with the help of a layout:
Roofing of a hipped roof of a house - photo of projects - roof of a roof in video:
A photo