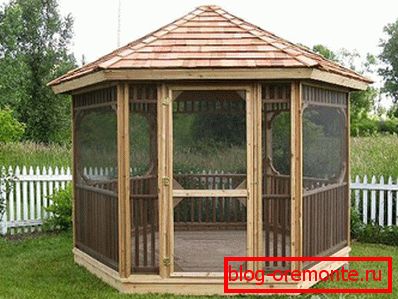
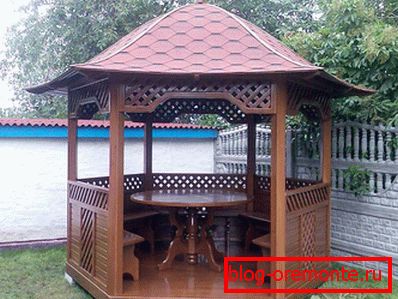
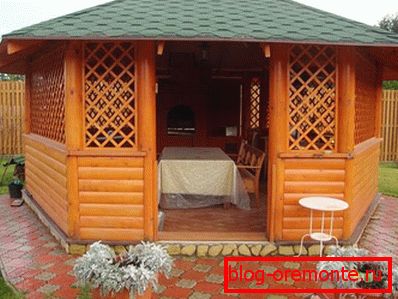
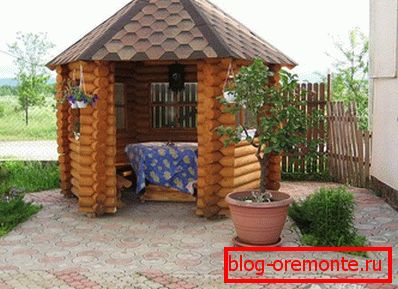
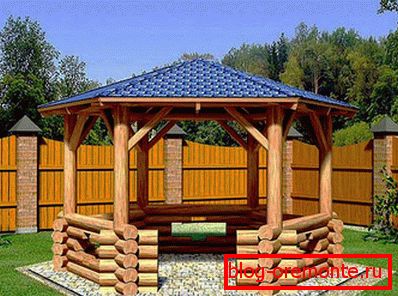
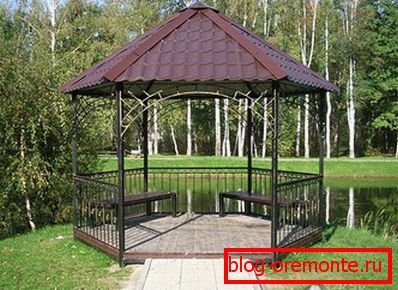
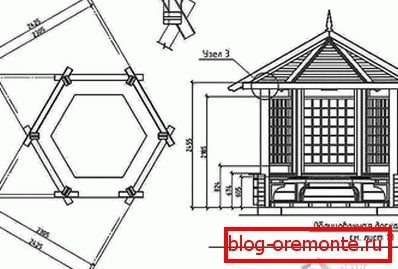
Hexagon gazebo do it yourself
Who among us does not like to relax in nature, enjoying the fresh air, scenic views, pleasant communication with family and friends? For a comfortable and relaxing holiday in the country can not do without a gazebo. It is not so difficult to perform independently, having free time and necessary material.
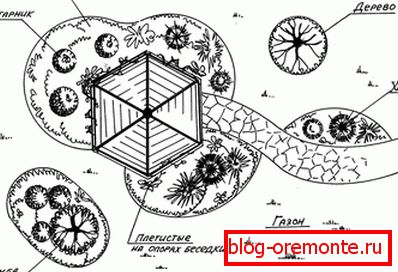
Where to have is a personal choice, but it is best to have a shade of trees, rather than the scorching sun, and, if possible, close to the reservoir. Such a building will be a practical and original solution for the garden plot. This article will discuss how and from what materials such an arbor can be made.
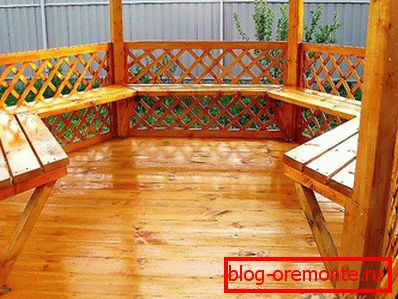
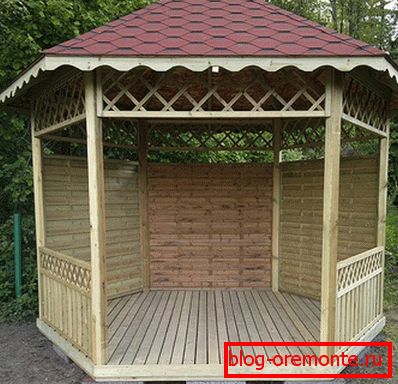
The six-sided arbor, in comparison with the usual one, has its advantages:
- it is compact, so it does not take up much space in the garden;
- it is rather spacious due to its shape - it is possible to accommodate both people and furniture;
- attractive due to the decoration and decor;
- stable and durable due to its design.
Tools for the manufacture of wooden structures
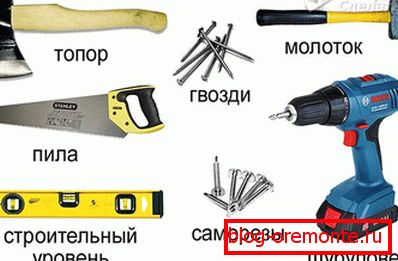
To perform the work will need the following tools:
- circular machine;
- chainsaw;
- hacksaw;
- electric jigsaw;
- electric plane;
- drill;
- screwdriver;
- hammer;
- ax;
- level;
- plumbing.
Stages of work
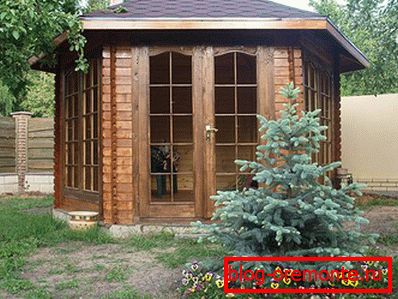
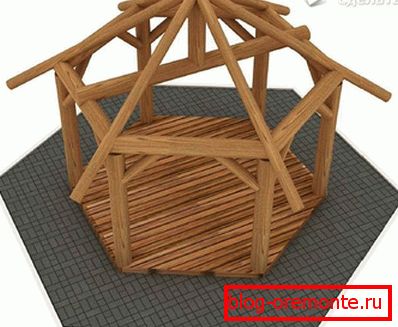
In order to make a six-sided arbor, you need to decide on the choice of material. In this case, suitable spruce or pine, because of its properties, this material is quite durable and relatively inexpensive.
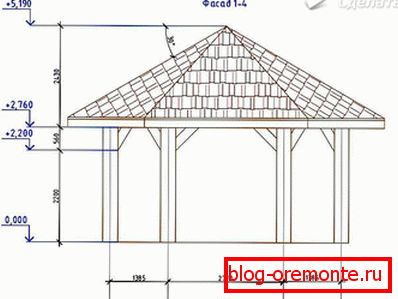
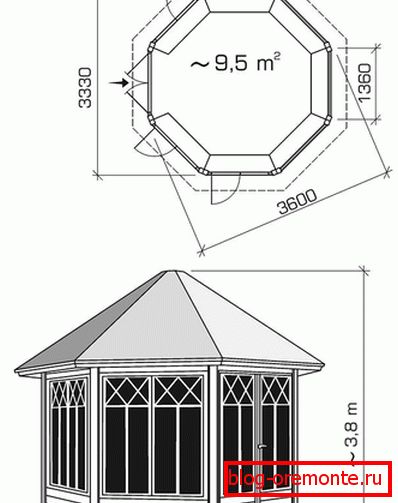
- Before starting work, it is necessary to draw up drawings where dimensions will be reflected. For example, the height of the structure may be 2.6 m.
- When you decide on the dimensions of the future structure, on a circular machine you should cut the boards and bars of the required size and trim them with an electric planer.
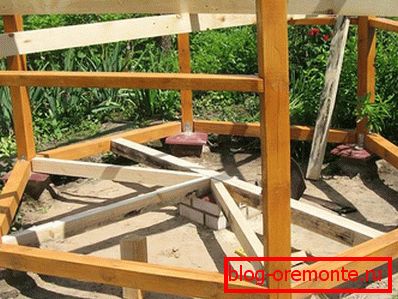
- Then you want to mark the site for construction. To get the hexagon of the correct form, you need to draw a circle of a given diameter, using two wooden pegs and a rope. On the circle, it is necessary to draw six lines equal to the diameter of the circle and at the intersection of the lines apply notches.
- In the places marked with notches, they dig holes for a foundation about 50 cm deep. A layer of sand about 10 cm thick is poured at the bottom and tamped down. As a support for the supporting pillars, paving slabs of 30 × 30 cm can be laid in the pit and lightly piled them. After installing the support bars, the pit can be filled with sand, followed by tamping and watering.
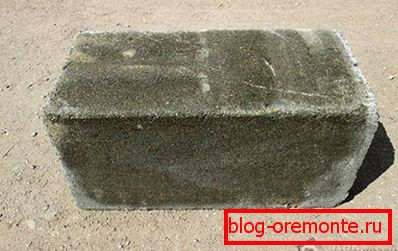
Also, as a basement under the gazebo, you can use concrete blocks.
- In order to give strength and stability to the wooden structure, at the corners of the markings in the excavated pits with tamped bedding, you need to drive one reinforcing bar 1–1.5 m long. The diameter of the reinforcement may be from 10 mm, but in this case it is hard to score. how it will vibrate. To do this, you can put a piece of pipe on the reinforcement and hammer a rod in it. The pipe needs to be removed, and then drill holes in the concrete blocks and put them on the reinforcement.
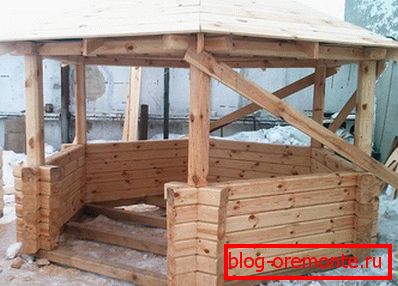
- It is necessary to lay a layer of waterproofing on concrete pillars - this can be two layers of simple roofing felt. Then, using an electric drill, they drill holes in each wooden beam and put them on the fittings of the well type, and cut them at the intersection of the bars. For strength and alignment, pre-cut for the connection "in half a bar." Then the bars are collected and fastened with nails. For supports suitable bars with a section of 100 × 100 cm.
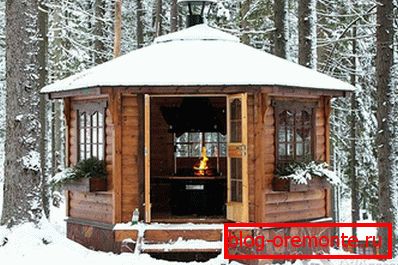
- The next step is the foundation device. If the gazebo is large, then in the middle you need to make a support pole, which will serve as a support, and then lay the logs, having previously treated them with protective impregnation from the destructive action of moisture. As flooring, widely used are grooved wooden boards, moisture resistant plywood, as well as moisture resistant chipboard and OSB boards.
- After fixing the flooring, you can put support pillars, pre-drill holes for reinforcement, and then put the bars on it. Using a plumb line, you need to check how vertically these poles are installed, and then fix them in this position with temporary jumpers.
- The crown is made on the same principle as the bottom ring of the frame. It is laid on the bars and secured with screws.
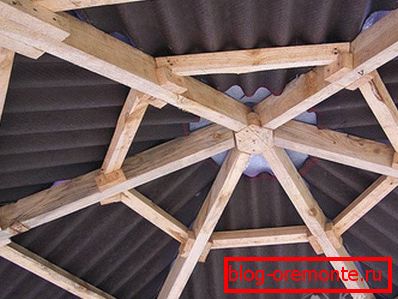
- The final stage of construction - installation of the roof. This happens as follows - the tops of the vertical pillars are connected with bars, leveling them with a hacksaw with the end part at an angle of 60 degrees, and then fixed with self-tapping screws. When the frame is fully ready, the gazebo is covered with roofing material. For convenience, the roof is best performed on the ground, and after the finished structure should be installed on the upper ring of the structure. In that case, if the roof is assembled at the top, two boards are mounted on the upper ring, a support column is mounted on them, and then guide bars are placed on it and fixed. The finished crate is sheathed with sheet material or slats. For a roof use a metal tile, a professional flooring or other material.
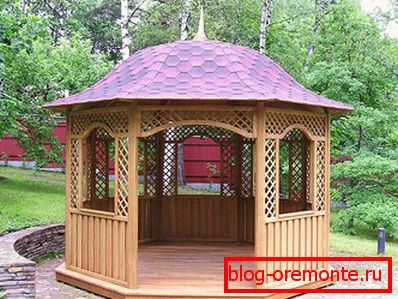
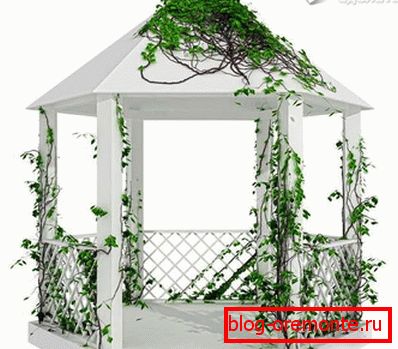
- Arbor around the perimeter must be protected by railings with a height of 0.9 m. Railings are made of ordinary boards, and with the help of a special template they can be given an unusual shape.
- Vertical bars can be sheathed clapboard or decorative grille made of wooden slats.
- To protect the wooden structure from rotting and give a beautiful appearance, you must certainly coat it with varnish or paint - the choice is yours.
You can equip the path for convenience and make a small porch, fill the internal volume with floor and wall vases with fresh flowers, and arrange the evergreen climbing plants on the outside of the wall.
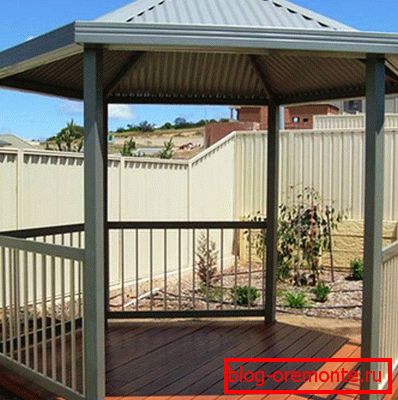
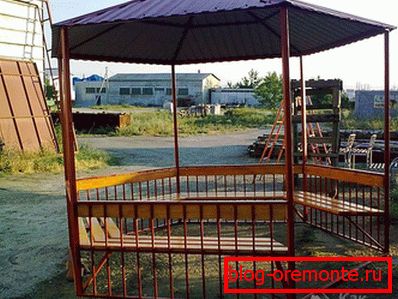
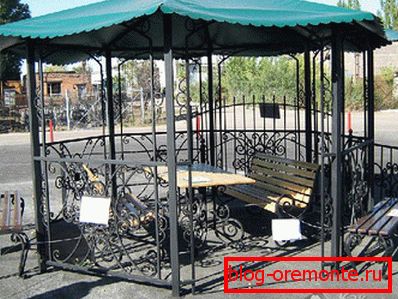
Metal arbor
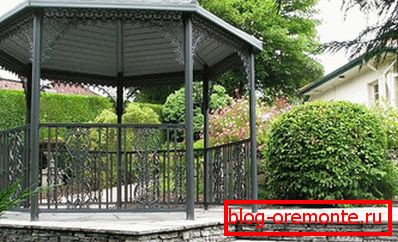
A wooden gazebo can be built with the skills of carpentry, and in the manufacture of metal will require knowledge of plumbing and special tools. In this case, of course, can not do without welding. Therefore, it is necessary to skillfully use the welding machine.
The advantage of the metal structure is that metal structures are more durable than wood, especially in the underground part of the building.
Since not every garden owner can afford to buy a ready-made metal or forged gazebo within his means, it’s worth making the production yourself.
First you need to decide where the metal building will be located. It is better to install it near the pool or pond and where there are beautiful views of the garden area. Considering that the look of such an arbor is more pompous, it will look good in a park or garden.
The metal frame is sheathed with materials that will protect it from wind and rain, and make it possible to install the barbecue inside.
The advantages of metal structures
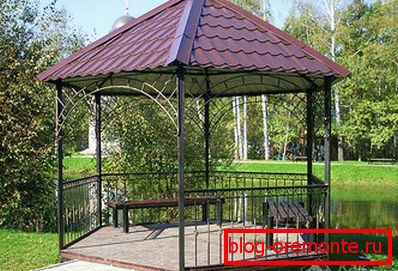
Compared to wooden, metal structures are distinguished by durability, but without proper anti-corrosion treatment they begin to rust. These gazebos are not subject to rotting and fire, but are installed on any foundation or without it at all. Installation of metal structures is relatively simple, and a rigid frame prevents the change of geometric shapes when the ground subsides.
Preparation for work
Metal arbors are temporary and capital. Temporary arrange for the summer, and for the winter clean. The foundation for such structures is not needed. Sometimes hollow pipes are driven into the ground as a foundation, which will serve as the basis for the framework. In winter, the top of the pipes should be closed from falling into the sediments and debris.
Capital arbors require a reliable base, which is arranged prior to construction. The base can be wooden flooring or concrete pavement. It is necessary to impregnate the elements of the base of the tree with an antiseptic, and metal parts to be primed to avoid corrosion.

During the work will require the following tools and materials:
- welding machine;
- drill and drill bits for metal;
- Bulgarian;
- roulette;
- building level;
- metal pipes of square or round section;
- primer and paint for metal;
- roofing material.
To the installation of a metal gazebo need a competent and responsible approach. First you need to make a drawing with an indication of the size and calculate the required number of pipes for the frame and supports, the amount of roofing material. You need to buy building materials with a drawing in order to get everything you need and properly dispose of the funds.
Getting Started

First, on the ground, where there will be a gazebo, markings are made in the corners. Then you need to dig holes and install pipes in them to connect the metal frame to the legs. To that part of the pipe that will be concreted, pieces of reinforcement are welded in advance. Using a plumb or construction level, the pipe installation is checked vertically, then they are fixed and concreted. Between the pipes make a wooden or concrete floor.
After the pipes are concreted, the main structural supports of the structure are inserted into them and welded to them. Then racks on top are connected with the help of horizontal pipes. So the main frame will be made. Then you should install additional crossbeams or pillars, the number of which depends on the size of the gazebo.
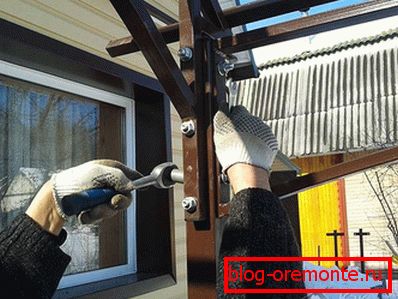
Metal arbor can be assembled by welding or be bolted with nuts. The choice depends on the ability of the owner of the garden area to work with the welding machine, as well as on the financial possibilities to pay for the services of a professional welder. After the frame is assembled, you can begin the installation of the roof of your chosen material.
You can assemble the frame with a bolted connection, but the appearance will not be very attractive, and the design will be less durable. This type of connection is most often used for collapsible structures.
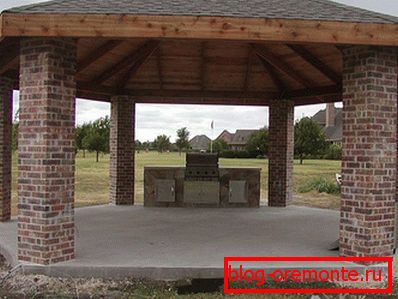
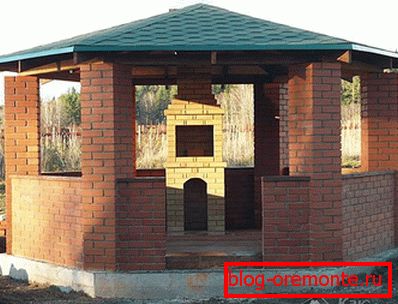
Brick arbor
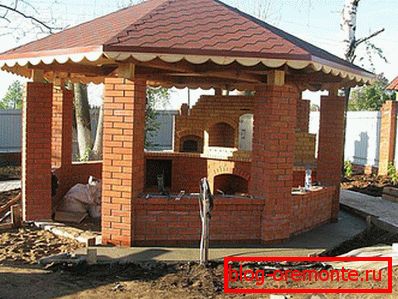
Many people prefer to build brick, embodying the construction of a variety of design solutions.
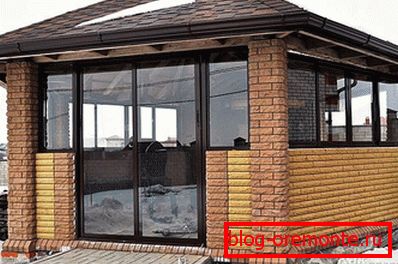
Brick gazebos are very popular today. They may differ in design and style. If this is necessary, provide glazing and heating.
The main advantage of brick buildings is that they are durable, and their maintenance and maintenance are simple.
Varieties
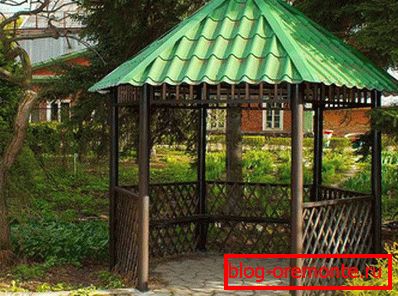
Most often there are three types of buildings: open, half-open and closed.
- Open - a structure that is intended to rest in it in the warm season. For decorating it, wooden or metal gratings are used, along which climbing plants can be made.
- The basis of the semi-open arbor is one or two retaining walls. Inside this structure can be installed brazier.
- The closed structure is designed for use throughout the year, as it provides for glazing and heating.
Stages of construction
Since the presence of gazebos in the garden area is permanent, therefore, it requires a reliable and strong foundation. This makes the structure stable and will increase its resistance to wind loads.
Prior to construction, it is important to make a choice as to what the structure will be. Walls erected in half-brick thickness is the most popular option. If the wall is built on a site with a slope, then the foundation under the wall is stepped.
Basically, a gazebo erected from decorative bricks, which today produce many species, thereby eliminating the need for further wall decoration.
The construction of open and half-open structures will require less financial costs and time. Construction of enclosed structures can be costly, since this is not an easy task, and you will need to pay for the labor of employees. In order to save money, it is better to build structures of this type yourself. But in order to take into account all the nuances and not to make mistakes, you should follow a number of important rules:
- The foundation is laid first. Moreover, the foundation pit is a certain depth, which depends on the type of soil. It is necessary to correctly calculate the ratio of the depth and weight of the supporting walls of the structure.
- The lower part is built "in loud". Thus, if the gazebo is open type, the height of the laying from the ground level should be within 1–1.5 m. This will protect the leaves, dust and prevent moisture from penetrating inside the structure during a shower.
- The roof is better to perform in the form of a cone to prevent snow accumulation on it in winter. You can make a sloping roof with a slope of at least 10 degrees.
- The location should not be near the sewage pit in order to avoid soil subsidence and the presence of an unpleasant odor next to it.
- We need to take care that there are no trees and plants with a strong root system that would destroy the foundation.
Tools and materials

For the construction of a brick arbor you need the following tools:
- shovel;
- trowel;
- level;
- roulette;
- putty knife;
- wooden order;
- buckets;
- concrete mixer;
- welding machine.
You can do without a concrete mixer, but then the mixing of the solution will have to be done manually.
And from building materials you will need:
- sand;
- cement;
- concrete;
- fittings and metal rods;
- brick;
- boards for formwork;
- rooftop wood;
- roofing materials.
Work
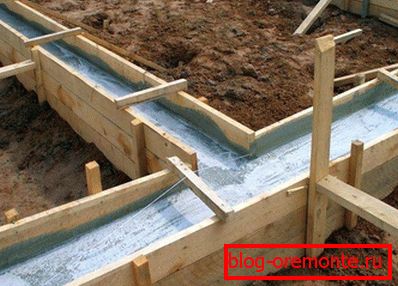
First of all, the foundation is poured, which may be tape or monolithic. First you need to dig a trench with a depth of at least 0.5 m. A layer of sand 10 cm thick is poured on the bottom of the trench and rammed. A layer of waterproofing is laid on top, as which we will use polyethylene film. Then a prepared framework of reinforcement is laid on a small elevation from the bottom, and concrete is poured from above. In order for the contours of the foundation to be even, it is necessary to pre-form the formwork well.
At construction of open arbors both the tape, and column base is possible. The second is made of brick or butobeton.
Filling the foundation, you need to consider the number of angles of the hexagon. For an open version with only the lower part lined with brick, metal pipes should be installed in the corners of the pit to support the roof of the building. Pipes need to be inserted before pouring concrete and construction level to check the verticality of their installation. Further work is not carried out until the concrete hardens well (this may take 3-4 days).
Masonry technology

The next step after the foundation will be brick laying. It is carried out from both ordinary and facing bricks (in the first case, the appearance will suffer).
If you use bricks of different colors, you can give a gazebo a decorative and sophisticated look.
Bricks are laid on cement mortar using a trowel. Cement mortar consists of:
- 1 part of cement M400;
- 3 pieces of sand;
- water (added as needed).
To give the building a complete look, you can use curved grates as well as decorative architectural elements as decoration. If wood products are used, they must be soaked in an antiseptic in order to avoid rotting and mold. Also products can be varnished.
As you can see, if you try hard, you can achieve the desired result, and then the gazebo will be a matter of pride, and using it will bring a lot of joy and pleasure.
Video
See how to build a good hex arbor:
Learn about 10 mistakes that are often made by people when choosing a gazebo:
Schemes and drawings

A photo