Grouting tiles in the bathroom with their own hands
Having tiled the bathroom, it is necessary to perform one more step - to wipe the seams, because not only the aesthetic appearance of the whole room depends on it, the durability of the finish is ensured due to the absence of mold or fungus. Grouting tiles in the bathroom with their own hands is quite a feasible task. In this article we will describe how the treatment of joints between the tiles in the bathroom.
How to choose a grout
First of all, you need to choose a mixture based on its composition. Consider the types of grout.
| Zipper | Composition |
 | Mostly fugue is sold in powder form, which includes portland cement, plasticizers and fine sand. If necessary, added pigment components that provide the desired color. |
 | Latex grout more perfect and is a type of mastic. The mixture contains latex components, due to which the ready-made mixture is elastic and moisture resistant, which is an indisputable advantage, since the moisture does not penetrate into the seams. No problem, you can choose the right color and even shade. |
 | In addition to the resin itself, there is a hardener in the composition of the epoxy grout. After hardening, the composition becomes very durable and waterproof. With regard to the selection of a suitable shade, then there will be no problems, since there are a lot of coloring pigments designed for such grouting. |
 | Silicone grout is waterproof and frost-resistant, so it is used on balconies and terraces, as well as in rooms with high humidity. Resistant to ultraviolet radiation. Used for sealing seams from 2 × 7 mm. |
| Furan Resin Grout | Furan grout is not terrible aggressive environment. Due to the nature of the composition, the grout can only be black, so it is most often used on industrial sites and very rarely in residential areas. |
You can buy a grout in the form of a paste, but more often it is sold in the form of dry mixes, packaged in 1 kg each, in small dense packages. Grouting can be one- or two-component, for example, polymer-cement or cement-sand.
In addition to the composition, grout differ setting speed. It can be said with confidence that for an inexperienced person who works rather slowly, this factor is of no small importance. If there is some experience, then this criterion is not so important.
Also, the grout can be made from sodium "liquid glass", plaster, alabaster and other materials, but it is important to realize that the quality of the prepared mixture may not be at the highest level.
How to make a grout

The process of making homemade grout is not complicated, and it can be made by any person.
Cement-sand mixture
To determine the composition, it is necessary to know the width of the seams between the laid tiles.
- Seam width not more than 1.5 mm. We take Portland cement as a base (white can be used) by adding a latex or other suitable additive to it. The mixture can be made in color by adding a water-soluble color.
- The seam is in the range of 1.5–3 mm. Portland cement in a 1: 1 ratio is mixed with fine sand.
- The seam is 3–12 mm. Re-use Portland cement, only with larger sand, and its grit increases in proportion to the increase in the width of the joint.
These data can not be taken as an indestructible axiom - this is just the average data that may have to be adjusted in the process of using the trowel mixture.
Alabaster or gypsum
These two materials are not the same as it may seem at first glance, but these materials have something in common - they seize very quickly, but you can slow down the process by adding some PVA glue or lime paste to it. Kneading a small amount of alabaster, you need to use it for a few minutes, otherwise it will harden and become unusable, and you can’t re-dilute it with water. Accordingly, it is necessary to clean the tile from the remnants of the solution immediately.
Liquid glass

Чтобы изготовить такую затирку, достаточно перемешать жидкое стекло с блестками. Floorучившийся состав выделит шов, подчеркнув красоту плитки.
Clay
Of course, this material is not particularly durable and also very hygroscopic, but with a skillful approach it will cope well with the function assigned to it. Clay should be properly prepared, going through, clearing from various debris. Then it needs to be soaked so that it becomes plastic. Thoroughly knead the mass, add a little cement and lime, about 100 g per 1 kg of clay? These components will make the grout more plastic and strong. By the way, clay can be of different colors, so the choice, although small, is still there, and if you want you can add a little color to the composition.
What to consider when choosing a grout
So, having a little understood what kind of grout there is, we will try to make the right choice, considering some factors.
Type of room
In which room is the tile laid and where? on the floor or on the wall? The answer to this question will help clarify a lot.
Room feature

This room has the highest humidity, so a cement-based fugue would not be the best choice for grouting tiles. Not only will such a composition absorb moisture, it will also begin to crumble, especially when using low-grade cement. By adding latex additives, the quality of grouting can be significantly improved, but it is better to use mixtures based on liquid glass or epoxy resin.
Floor

In any room, the tile laid on the floor is subjected to intense load, so it must be washed frequently and sometimes even cleaned with a stiff brush. This is a good reason for not using cement-based grouting, as this compound is not water resistant, and weak. When using resin materials, you can not worry about the durability of the applied grouting and the method of wet cleaning.
Usually the shelf life is not more than 6 months. After this period, the quality of the fugue deteriorates markedly - it hardens and loses plasticity. It is also important to be extremely careful not to get a cheaper low-grade fake.
Suitable color
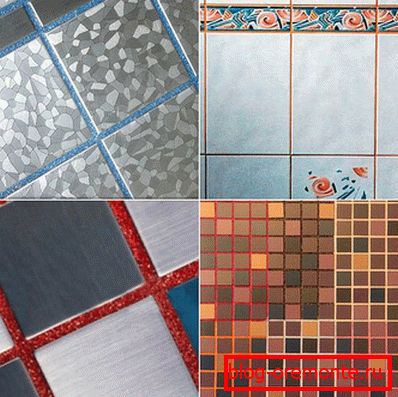
To buy high-quality fugu and properly wipe the seams is not all, because its color must be in harmony with the tile or create a sharp contrast - this depends on the chosen style and preferences of the owner of the room. Consider 3 design directions.
- The most commonly used grout white colors, because it fits almost any tile. This neutral color is in harmony with both light and dark shades of wall or floor tiles. Thanks to its use, a feeling of solidity is created, or vice versa - the contours of a darker tile will be emphasized.
- Also grout can pick up in tone laid (or purchased) tile. The fugue may be of exactly the same color or its shade may differ slightly. The second option is more common, as it allows you to make the finish more expressive. It is rather difficult to choose a grout of the same color as the tile, but even if it worked out, there is no guarantee that the shade of the fugue will not change over time.

- If you need to do finish contrastingthen the color of the grout should be qualitatively different from the color of the tile. For example, the seams between black tiles can be wiped with a white fugue (or vice versa - the seams between white tiles can be wiped with a dark composition), and it will look, while the combination of other colors is not always harmonious.

At first glance it may seem that it is not difficult to choose a fugue of a suitable color, but when you come to the store, you can get confused when faced with a huge choice. To avoid this, it is better to look at the design options for the bathroom.
Photos of bathrooms

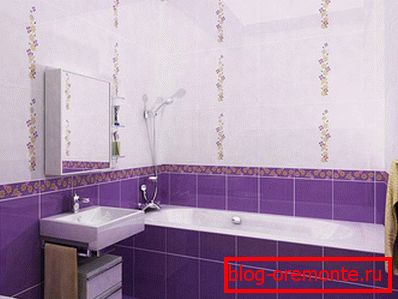


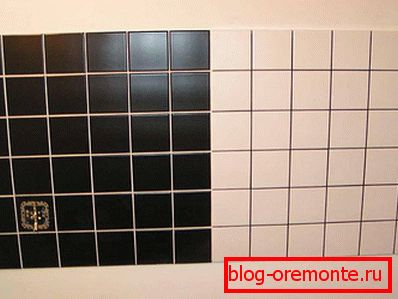
Purchase grout

So, based on the vending design, let's go to the store. Of course, if you wish, you can buy a grout in the online store, but it is important to remember that its color on the screen can be distorted. For example, a light brown fugue may in fact turn out to be bright red, etc. Given this nuance, we will focus on the first option.
- In order to choose a fugu suitable for the color, you need to take a couple of tiles or pieces left over from the lining, otherwise there is nothing left from the old confidence that you remember the color of the tile.
- Do not fall for the entreaties of the seller or consultant to acquire the "hit of the season"? unusual color fashionable grout or such a shade that you do not like.
- Note that the manufacturer you like may not produce the fugu of the desired shade.
- It is mandatory to check the release date on each package.
Of course, you will need to calculate the consumption of grout for tile joints of 1 m2that you can do on our online calculator.
Video: the nuances of choosing the right tile grout
Preparation of the tool for work
The quality and speed of work is directly dependent on the available tool.
|
| Although most often only 1 rubber spatula is chosen for work, it is best to purchase a kit, and then choose the one that works best for you. |
|
| Since the volume of the batch is small, a small plastic bucket from any kind of construction mix will do. After completion of the grouting, the container must be thoroughly cleaned, otherwise the dried-up pieces of the old fugue will be in the new composition. |
|
| This tool is very easy to use, because with its help the work is done quickly and efficiently. When removing the old grout, you can combine actions - first clean the seam with a hacksaw blade, and then with a special knife for clearing the seams. |
|
| Narrow paint brush is more convenient to use, but it is better if it is tough enough so that you can thoroughly clean the seams. |
|
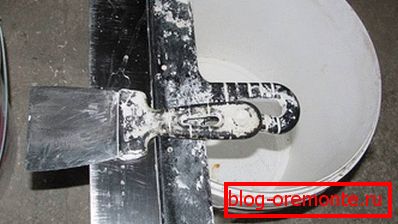
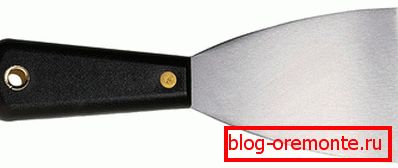
| Spatula does not need to choose the narrowest - enough 35-50 mm. |
|
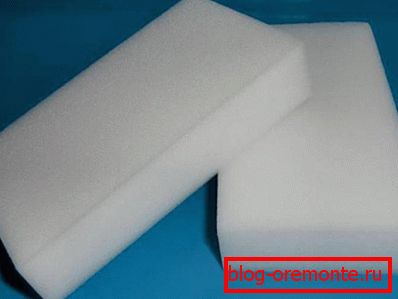
| Foam sponge choose high density. Often used sponge for washing dishes. |
|
| There is a different soft fabric, but we need one that absorbs water well. The acquired dishcloth is ideal. |
|
| Many mixtures can irritate the skin, so it is better to work in thick rubber gloves. |
|
| Protective mask will be needed both when mixing a new mixture, and when removing the old one. |
Grouting process
Having prepared all the necessary tools, you can start grouting. Consider the stages of the work.
Stage 1. Seam cleaning

No matter how hard we try, all the same, after laying the tile between its seams, glue remains, and it cannot be delayed with its removal, otherwise, when the glue dries, it will become a very laborious process. To perform the work, it is best to use a knife to clean the tile joints. You need to clear the entire depth of the seam, and not just to the base of the tile. Upon completion of work, the seams must be cleaned with a brush so that there is no garbage left in them. To speed up the process, you can use a vacuum cleaner.
Stage 2. Mix preparation
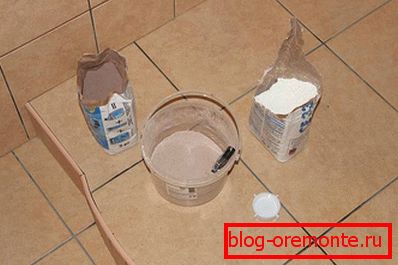
If you purchased ready-to-use grout, then it can immediately be used, but the dry mixture must be prepared. To do this, some water is poured into the container (according to proportions), and then the dry mixture is added and the whole is stirred with a metal spatula. The solution should turn out like thick cream and no lumps. If glitter is added to the mixture, it is necessary to measure a certain amount each time so that the seams do not visually differ from each other.
If the mixture hardens for quite a long time, then it can be kneaded in larger quantities. In this case, it will be convenient to use a mixer.
Stage 3. Grouting
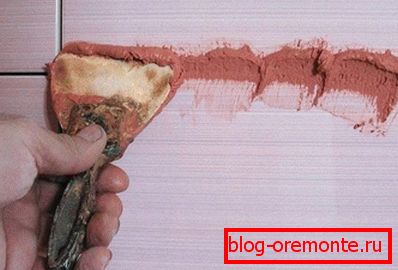
Before starting to grout, the joints should be moistened with an antiseptic primer or water with a spray gun. If there is none, then you can use the same small brush, occasionally dipping it into the liquid poured into the bucket.
The process of grouting itself consists in the fact that it is necessary not to cover the seams with a plow, but to wipe with force, trying to make it fill all voids. Therefore, it does not need to be spread over the entire tile; it is only necessary to apply with a rubber trowel across the seam. At one time it is better not to take up an area of more than 2 m2.
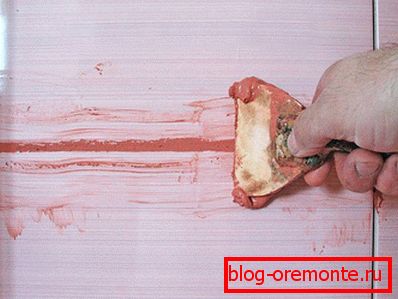
After making sure that the seam is full, slide the trowel along the seam, leveling it and removing excess fugue.
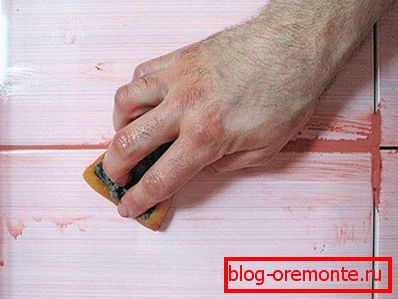
After waiting a little while the grout grabs a little, the excess sponge is removed with a damp sponge. There is no need to press - the goal is not only to clean the tile, but to even out the grout layer in the seam, so the movements should be light.

The grout should harden slightly, but not dry, after which the tile can be wiped with a dry and soft cloth.
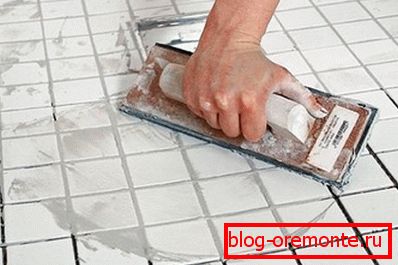
When mashing the seams of a small relief tile, the fugue can be rubbed with a wide spatula. In this case, a less thick mixture is used. The following procedure does not differ from that described above.
How to replace grout
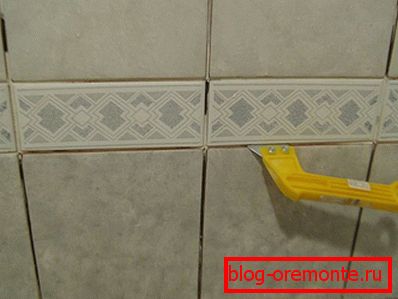
Most often, grouting of old cement-based joints needs replacing. Since its service life is small, it can crumble or marvel at the fungus. Unfortunately, the seam of newly laid grout can crack due to the fact that the corresponding conditions were not created, for example:
- Too much water added.
- The density of the tile is not taken into account - the porous material quickly absorbs moisture from the fugue, because of which it dries very quickly.
- The base is not stable. In this case, the cement-based fugue will constantly crack, no matter how much it is changed.
- Wrong grout for wide joint.

There may be other reasons (maybe you need to make a seam of a different color), but we have led the main ones. Now consider what you need to do to wipe the seams of the new fugue.
So, we need to remove the old grout. How best to do this, learn from the following video.
Video: remove old grout
As you could understand, the process is simple, but time consuming.
When cleaning the seams from the old grout, be careful near the corner seams, trying not to cut off the slightly protruding part of the tile - in these places you need to do the work with great care.
Keep your eyes from flying pieces of dried fugues, wear safety glasses.
Just as in the case of newly laid tiles, the seams need to be cleaned, moistened and then rubbed with the fresh composition of freshly prepared grout.

