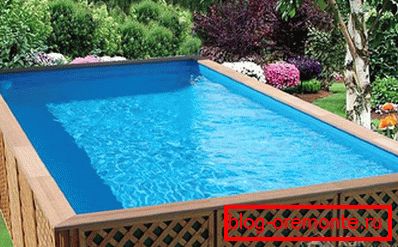
Frame pool do it yourself
Кто не мечтает в жаркий летний день окунуться в прохладную воду? Бассейн на загородном участке предоставит такую возможность в любой момент. Building постоянной конструкции, с учетом перепадов температур и атмосферных осадков, обойдется в круглую сумму. Надувные же не могут обеспечить той свободы движений, которой хотелось бы обладать. Компромиссным решением является каркасное обустройство. В данной статье мы расскажем как сделать такую конструкцию на даче, а также покажем фотографии таких бассейнов.
Preparatory stage
The design can be erected both with the help of a metal base and wooden.
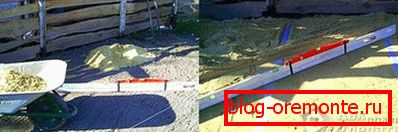
For a pool with a frame will require a flat surface. If there is none, you will have to create it yourself. Having previously calculated its area, it is necessary to prepare a place for the construction of the structure: level the surface of the chosen place, compact the soil and put a 5-7 cm layer of sand on top.
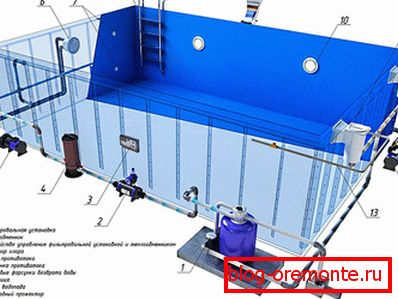
This design, which consists of steel or wooden elements that serve as walls; durable film, which in some cases, either the bottom or bottom and walls. Such structures require an awning to prevent external water pollution, as well as a water purification and filtration system.
Wood frame
Required building materials and tools:
- pine timber 100x50 mm, board with a thickness of 25 mm,
- construction hairdryer, screwdriver, hand drill, wood preservative and bitumen mastic,
- screws (black) with washers, suitable eyelets,
- PVC awning fabric
- linen
How much construction materials will be required for the construction of the foundation depends on its chosen size.
The wooden bar must have a height that is half a meter higher than the height of the planned tank.
Building
First of all it is necessary to process a wooden bar with boards with a special antiseptic and let them dry.
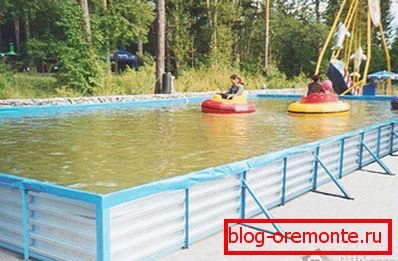
The pool is easiest to arrange in the form of a rectangle. In the corners are mounted supporting wooden bars with a size of 100x50 mm.
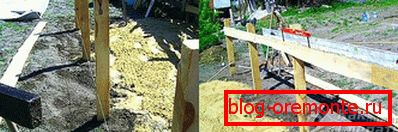
To better secure the timber, it is necessary to immerse a hole in the ground prepared in advance by means of a manual drill. In order for the construction struts to become stronger, the part of them that will end up in the ground must be carefully treated with bitumen mastic.
Along the longer side of the pool, one or more support bars are additionally placed, depending on the size chosen. It is required to mount struts to the supporting stands, which increase their stability.
With the help of processed boards with a thickness of 25 mm, which are located parallel to the surface of the ground and are attached to the supporting posts, it is necessary to prepare the framework.
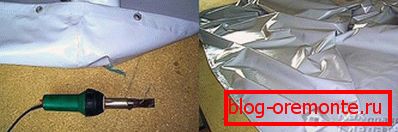
Awning fabric must be cut to the previously made drawing, and weld the seams using a building dryer. PVC fabric should be cut so that its edges can be bent over the top edge of the container and secure them. The finished fabric is carefully lowered into the frame, and with the help of screws, the awning is carefully attached to its upper horizontal bar from the outside.

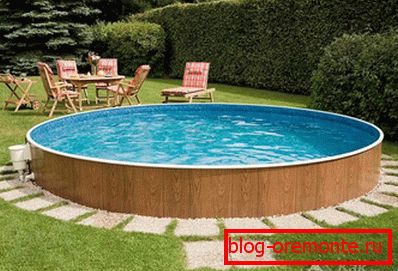
Clapboard cladding from the outside for a more aesthetic look. Simultaneously with the base, an awning is prepared that will protect the pool from external pollution.

To the finished design put the ladder in such a way as not to damage the stretched base.
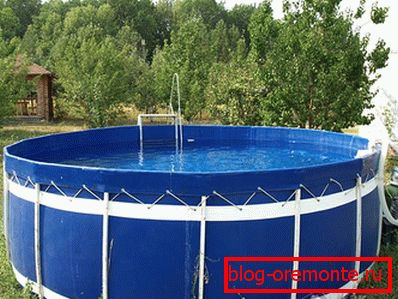
Metal base
The metal pool frame is assembled in a similar way:
- The bottom of the base is the board of chipboard or MDF of the desired size. To it vertically or at a small angle using metal screws fasten metal pipes, which will serve as a support. Horizontal parts can be connected using a welding machine.
- Cutting the basis and tent of PVC fabric is carried out in the same way as in the arrangement of wooden structures.
You should always consider the proximity of the well or borehole - for convenient filling of the tank.
The emptying of the tank can be carried out using an opening at the junction of the bottom and the wall, which can be closed with a sealed cover or plug.
A photo