Finishing the facade of the house foam 2
Nowadays, more and more you can see the house, whose facades are decorated with foam. In the harsh climate, warming plays an important role. And the foam - is one of the materials with which you can make insulation and align its walls. In this article, you will learn how to finish the facade and how to select the right material to perform such an important task.
Each type of decoration has its advantages and disadvantages, reckoning with which you can successfully cope with the facing of the external walls of the house.
Advantages and disadvantages of the material

Many homeowners decide to finish the facade with foam plastic due to the fact that the material is affordable, especially if you compare it with other finishing materials for outdoor use. In addition, the foam has a high thermal conductivity, it does not freeze even at very low temperatures. Not susceptible to changes in temperature and does not rot.
The foam is not afraid of moisture, so when installing it is not necessary to lay a waterproofing layer.
This type of finish is reliable and durable, retains the original appearance for a long time. Among the advantages of the material, it is worth noting that it is easy to assemble the foam. And this is important, because in this situation you do not need to spend money to pay for work.
With regard to the shortcomings of foam, the most important of them - it can live rodents. In addition, when overheated, the foam releases toxins that can be harmful to health.
Although it is not difficult to revet the facade with polyfoam, but, as in every case, you need to prepare for the working process before proceeding to implementation.
Tool and material
In order not to be interrupted in the process of finishing the house with foam plastic, try to prepare all the tools and material in advance.
Before you go shopping for a material, calculate the area of the walls. After that, determine the desired amount of foam. You will need:
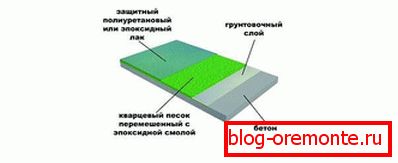
- Polyfoam (expanded polystyrene).
- Primer for exterior use.
- Polyurethane foam or special glue.
- Profile for fixing the bottom row. Its size depends on the width of expanded polystyrene you have purchased.
- Reinforcing mesh, taking into account the fact that the connection canvases should be overlapped, but not end-to-end.
- Puncher for fastening.
- Grater for applying grout.
Wall preparation
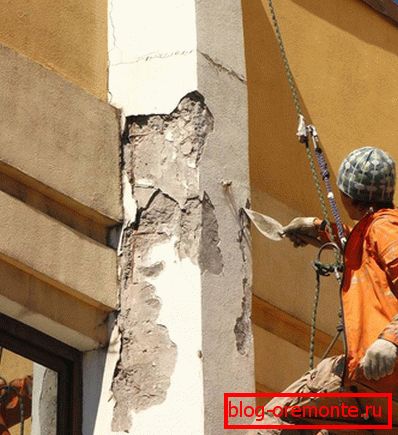
At the first stage of work it is important to properly prepare the base surface of the walls. On how well you do this work, will depend on the durability of the finished walls and the quality of thermal insulation.
First of all, clean the surface from the old finish. To do this, remove from it the old layers of paint and whitewash. If the old coating is peeled off somewhere, then it should be cleaned, removing it with a chisel and a hammer. All trim elements must be removed.
Styrofoam is fixed close to the walls. This implies that there should not be any bulges greater than 2 cm on them. If the bulges still remain, then remove them.
The next thing to do is to treat the walls with an antiseptic that kills fungi. Even if their external manifestations on the walls are not observed, do it anyway for the sake of prevention. Determine the zero point. This line will be the original for the installation of foam. This determines the appearance of the structure. But, more importantly, this event will prevent the occurrence of condensate. The label should overlap the floor level in.
If the dew point is not correctly determined, moisture will build up in the house, which will subsequently cause a characteristic unpleasant smell of mildew. If you do not want to create a hotbed for fungi and mold, then take this process seriously.
As a result, you should get one solid line around the perimeter of the house. Ideally, this line should go parallel to the ground. To achieve such results, use the hydraulic level. For drawing the equal line use a kapron thread and level. Now you can proceed to installation work.
Installation of foam
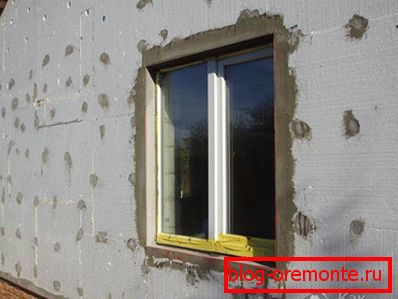
The most important stage of work is the installation of foam plastic. Attach the base plate along the intended line.
The basement plate will not only help secure the foam, but also protects against the penetration of rodents from the bottom of the house.
If you do not have the opportunity to purchase a plinth bar, then make the edging with a wooden bar or a starting profile made of metal. If you decide to fix the foam on a wooden beam, then before fixing it on the facade, treat it with special antiseptic agents. Thanks to this, you protect the material from the formation of mold and fungi on it. In addition, this event will extend the life of the product. Then cut the bars of the right size. Punch holes and fix them on the wall with dowels, aligning the position along the measuring cord stretched along the wall.
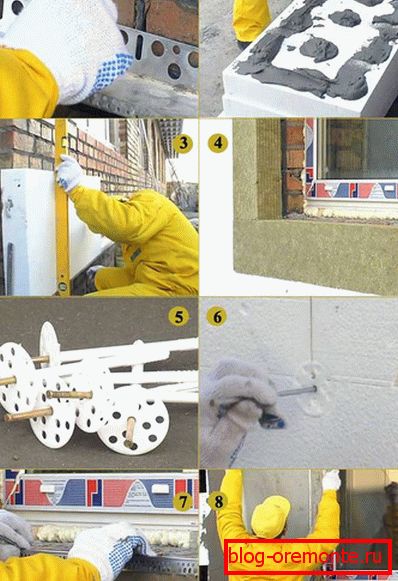
After that, proceed to the installation of the first row of foam. Apply special glue to it. Make additional fasteners with plastic fungi. As you have probably understood, the facade of the house is decorated with foam plastic from the bottom row. If you have not yet formed a picture in your head, then watch the video, where you can see all the processes described clearly.
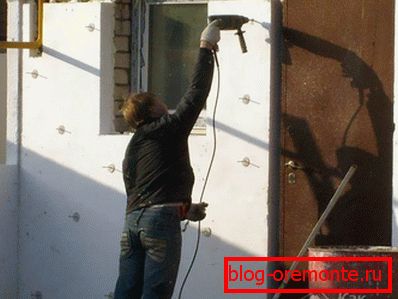
After the glue is applied to the foam, press it against the wall surface. Then make a hole using a perforator, and make an additional connection with a plastic fungus. There should be at least five such fixing points. Fix foam panels in a staggered manner. In this case, there will be less cold bridges.
Seam processing can be started only after the glue has completely cured. Now you need to seal the seams. If they are not larger than 5 mm, then seal them with foam. If wider, they should be filled with a foam polystyrene insert. If the surface is not very smooth, with a curvature of 5 mm, then remove the excess with a grater on the foam.
When gluing polyfoam in 2 layers, it is important that the second seam does not fall on the previous one. Incidentally, in this case, the seams of the first layer do not need to be zapeni
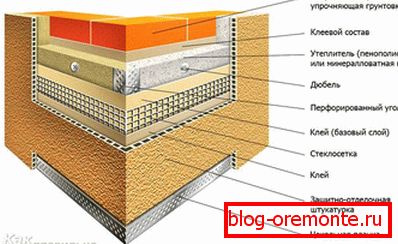
Surface plastering

At the final stage should be made decorative trim. It involves plastering the surface and its subsequent painting. Before you begin to plaster the walls of the house, glue the construction mesh to the foam. It is attached to the glue. Only after the glue layer is completely dry, proceed with the plaster.
Some experts glue the mesh immediately on the plaster. In any case, dock it should overlap, at least 10 cm, and not end to end. To level the corner and make it less vulnerable, install a special perforated corner.
After applying the finishing layer of plaster and drying it out completely, apply a primer to the walls. And then finishing work - painting in any suitable color. Now facing the facade of the foam is completed. In order not to harm health and work with comfort, install reliable scaffolding along the walls.
If you have any questions on the topic or you have found useful information for yourself in our article, then write comments. If necessary, our website experts will provide you with additional advice on the topic.
See also:
- a visor above the porch made of wood;
- how to roof the roof with a metal tile.