Finishing the ceiling with decorative plaster 2
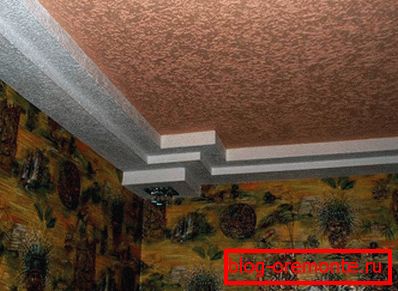
The ceiling, painted with water-based paint or wallpaper, is not very relevant today. In a modern interior, this surface is given no less attention and effort than walls and floors. If you wish, you can create an original and exclusive design. One of the technologies is the decoration of the ceiling with decorative plaster.
Acquaintance with decorative plaster
In the hardware store, the consumer will be faced with a large assortment of decorative plaster for the ceiling. To make the right choice, you need to navigate in their properties, structure and appearance. It is by these criteria that the mixtures are divided, but, above all, they are divided into 3 main groups:
- for interior decoration;
- for exterior trim;
- universal.
Stop your choice should be on materials intended for interior decoration. But here it is not so simple, the plaster is divided into several types depending on the components that are included in the composition:
- acrylic;
- polymers;
- polyurethane;
- epoxy resin;
- marble, granite and quartz crumb.
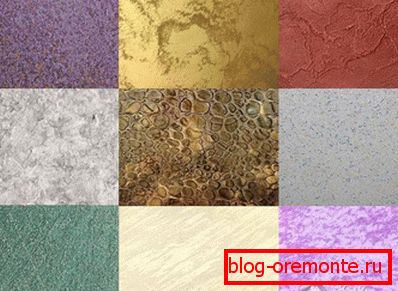
In addition to differences in composition, the plaster mix also differs in aesthetic properties. So, there are two groups: structural and textured types. Structural plaster has a white base, so often the final stage is painting. Textured mixtures are divided into 4 main groups depending on the size of the granules:
- large;
- medium;
- small;
- thin.
To choose decorative plaster with high waterproofing and antiseptic properties, choose the options that include thickeners, antiseptics and preservatives.
Benefits and features
Special components that are part of the decorative mixture provide the finishing material with a large number of positive properties and advantages. Among them are several main ones:
- practicality;
- water repellency;
- antiseptic properties;
- strength;
- simplicity in drawing (all stages are carried out by hand, without the assistance of outside help);
- decorating the surface of any type;
- masking of minor defects;
- environmental friendliness.

An important advantage and positive property of plaster is the ability to quickly transform the interior. Using it, you can create any pattern or pattern, and then paint in the desired shade, which will be combined with the decoration on the walls and ceiling.
When using decorative plaster to carefully prepare and align the ceiling surface is not required.
Nuances when applying decorative plaster

During the purchase of a decorative mixture, it is recommended to immediately buy the necessary tools for work and paint, if subsequent painting is envisaged. From the tools you will need:
- spatula of various sizes;
- perforator;
- capacity for mixing (bucket);
- half rubs
If you need to align the ceiling surface, you can use special fillers or mount a plasterboard construction with an aluminum profile. If you are new to the construction business, then you need to carefully consider and study the instructions on how to apply decorative plaster on the ceiling.
It is also worth considering a few nuances that will improve the desired result:
- The ceiling must be clean and dry (this will prevent mold and mildew).
- Before applying it is recommended to apply a layer of deep penetration primer and wait until it is completely dry.
- The mixture should be thoroughly mixed using a special construction whisk (it is not necessary to use a high speed for this, as the texture can be damaged).
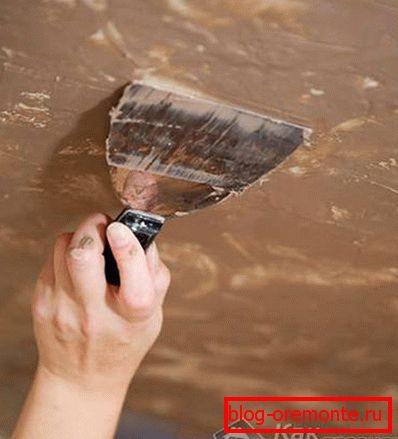
- The movements during the application of decorative plaster are identical to the puttying process (smooth in the direction from the bottom up).
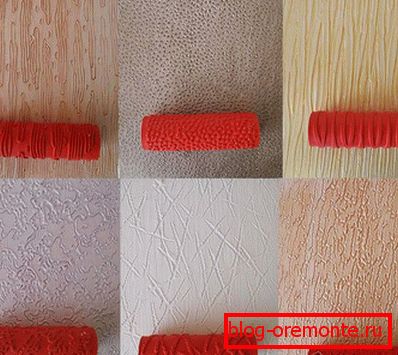
- To impart an texture or pattern, it is recommended to use a grater, roller or spatula.
- After applying the plaster should take at least a week, after which you can proceed to the next steps: painting or varnishing.
- In large building stores, they initially sell white blends, which are dyed with pigment paints in the tone desired by the client.
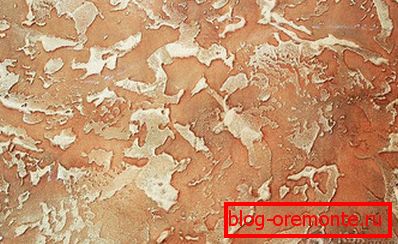
To obtain a variety of effects, various techniques are used. For example, when performing circular movements as a result, you can get a shell pattern. With the help of a plastic float, you can achieve the formation of grooves of different directions.

After the layer of plaster is completely dry, it is necessary to wax the surface. This will give the ceiling a glossy effect, as well as add additional protection.
How to work

When applying a decorative composition is recommended to follow simple rules:
 Before starting work, the floor must be covered with film, old newspapers or wallpaper, so that the solution is not absorbed into the floor finish.
- Dilute the dry mix properly. For this, it will be sufficient to follow the recommendations and instructions indicated on the package. It is desirable to use warm water. As a result, the consistency should turn out like thick sour cream.
- Apply plaster with a spatula, and roll out with a roller. If we are talking about fine-grained formulations, then the construction sprayer is also suitable.
- The layer of plaster should not exceed 5 mm, but should not be less than 2 mm.
- Application method - cross-brush strokes. It is necessary to work very quickly and without interruptions, as the decorative layer dries quickly enough. If the walls are covered with excess plaster, they can be cleaned with a spatula and a damp, soft cloth.
- Start from the corner of the room and continue along the wall. When the first lane is fully ready, you can proceed to the next.
- Depending on which plaster is used to decorate the ceiling, the principle of application may differ. Thus, the standard composition (modeling plaster) requires an instant drawing of the pattern using a notched trowel. When working with textured compositions, the formation of the pattern occurs automatically.
If you doubt your abilities or do not have the necessary amount of time, it is better to trust with professional experts or choose another type of finish.
Now we can make small conclusions and summarize. Decorative plaster in our time is the most popular type of finish. With her help and a little fantasy, you can transform the ceiling beyond recognition in a few days and at the same time hide small errors in the surface. As a result of the work done, the room will daily delight you with its beauty.
See also:
How to make a ceiling of plasterboard
How to trim the ceiling clapboard
Close up the seams on the ceiling
Video
You can get acquainted with the technique of applying decorative plaster on the ceiling below: