Facade finish planken 2
The most important component of an aesthetically appealing and reliable home is the facade. It among other things promotes increase in durability of a structure, and also increases its thermal insulation. It often happens that the material from which the house is built, has high performance, but its decorative properties leave much to be desired. In such cases, it is important to correctly face the facade. Recently, for this purpose, planken was increasingly used. In this article, you will learn what this material is, how and where it can be applied. In addition, the article will tell you about the features of the installation of planken.
What is a planken
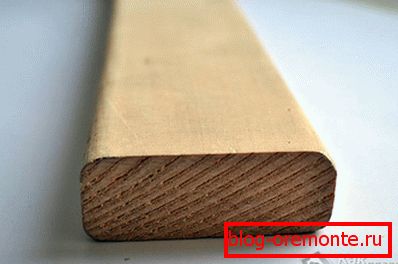
Planken is a front board from a natural tree which feature is the rounded or slanted shape of edges. It looks like a deck and deck. The thickness of the stalk is from 15 to 22 mm, and the width from 70 to 140 mm.
In the production process of planken, Siberian larch is most often used. Material is different:
- durability and strength;
- resistant to moisture, which is why it does not rot;
- long time of preservation of decorative properties;
- good tolerance to temperature changes and adverse weather conditions,
- the fact that she is not afraid of insects.
Siberian larch is unique in its kind. Unlike other types of wood, it becomes harder and stronger, being exposed to water and moisture. In the house, which is sheathed with planken, reigns favorable to health atmosphere.
Despite the excellent characteristics of larch, it should be treated with special impregnations, oils or varnish.
In the manufacture of planken is also used wood of oak, ash, pine, cedar and exotic species.
In private housing, the slat is used for the following purposes:
- The device ventilated facades.
- Creating horizontal surfaces, such as terraces.
- Interior finishing work.
- The construction of fences and fences.
- Sheathing gazebos and verandas.
- Creating playgrounds, tables, benches, etc.
Features and benefits
The material is divided by type of profile. There are 3 types of planken:
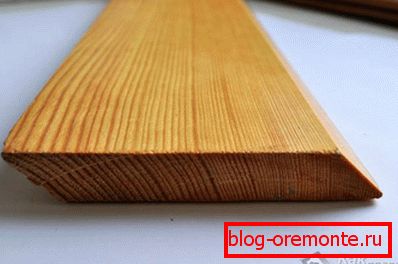
- Straight. Its installation is carried out in an open way.
- Oblique or oblique plank. The section resembles a parallelogram. The main advantage of using this type of profile is that the bevelled edges allow you to hide the connecting gaps. This contributes to the fact that moisture does not fall inside the facade, as a result, it performs its functions accordingly much longer. The tilt angle can vary from 45 to 70 degrees. Installation is carried out in a hidden way. To do this, use the mount "snake".
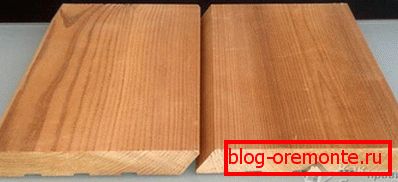
- Straight grooved stalk. To connect the parts used fasteners "crab" or "bridge".

In comparison with the clapboard, which is joined by the groove-thorn method, the planken has a distinct advantage. Shrinking or swelling of the wall panel leads to its torsion and warping. From all indications, the changes in temperature and humidity adversely affect this type of attachment. In addition, it is very difficult to replace the lining part. In contrast, the plank is not afraid of swelling and drying, and if necessary, you can quickly and easily replace any of the trim parts with your own hands.
When replacing parts of the stalk, there is no difficulty, only if an open method of fastening was used. Hidden installation method will require disassembly of the part of the cladding that is above the board that requires replacement.
Planken is environmentally friendly. Condensate does not form in the gaps, which prolongs its service life. In addition, the material has high thermal and waterproofing properties. At installation of a planken there are no difficulties. The color palette and texture of the material is varied, so it is possible to choose the right shade even to the most demanding customers.
Installation rules
Finishing the façade of the Planken requires familiarization with the main rules for its installation. Depending on the type of wood, as well as the width of the profile, the technological gap is determined with which the plankens should be mounted. It ranges from 2 to 10 mm. Such a gap allows even at the highest humidity drops to maintain the same appearance of the skin and to ensure the ventilation of the facade.
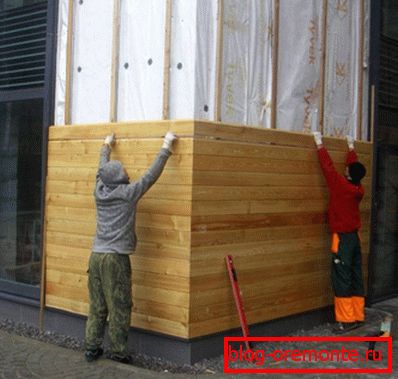
Although it is practiced to install the boards diagonally and vertically, traditionally they are installed horizontally. The panels should be mounted on a crate of wood, which is installed in steps ranging from 30 to 60 cm. The crate is installed perpendicular to the mounting direction of the planken. The distance between the elements of the batten is set taking into account the width of the insulation and the thickness of the board. In order for you to have a ventilated facade, there must be a gap between the insulation layer and the planken.
To carry out the installation of planken at the appropriate quality level, use stainless steel screws or coated with a special anti-corrosion protective layer.
Methods of fixing
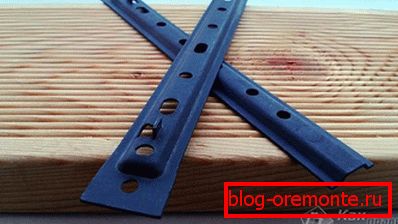
The easiest way to fasten planken is an open method. In this case, the boards should be screwed to the crate from the front side with stainless steel screws. The disadvantage of the technique is that the fastener will be visible. As a rule, when installing the stalk, a hidden method of attachment using a "snake" is used. It is a metal strips having a standard length of 14.5 and 19 cm. Their width is 1.5 cm. In the "snake" there are several holes for screws or self-tapping screws.
If you install a sloping plank, then first lay it back up, so that the front surface is directed at an acute angle downwards. The height of the layout in this case will correspond to the height of the wall that you will sheathe. Now on this design you need to transfer the dimensions of the batten. On it, you and secure the plate. On the details mark the middle of each bar crates. On labels of this line fasten the levels made of metal. Do this, then from the left, then from the right. Thus, the mount forms a "snake".
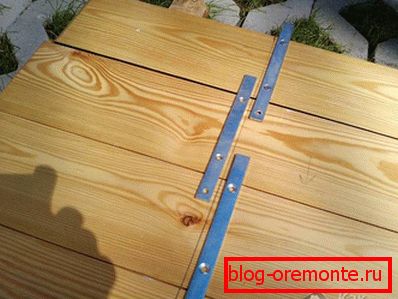
Install the fastener at all points where the batten beams intersect with the planken. Install the fastener so that the upper and lower parts of the plank protrude on both sides at least 1 cm. There must be a screw hole on top. Now set the slats on the guides. Mount the first row by screwing it down through the board and the upper hole of the mounting “snake”. To make it possible to fix the first panel smoothly, use the building level.

Part of the mount, in which there is no hole, get under the previous panel. Then set the gap and fix the part of the planken to the crate through the top of the metal plate with a self-tapping screw. Due to the fact that the gaps between the parts are visually invisible, the impression is made of a monolithic surface made of wood.
If you finish the facade with a straight plank, the gaps will be noticeable.
Planken successfully combines the natural beauty of wood and high protective qualities. It can be combined with other finishing materials. Such facade cladding looks very original! There may be many options. The main thing is that the flight of your imagination and financial capabilities have time for each other.
Video
This video shows the process of trimming the facade of a log house:
And in this video footage shows mounting PlanFix fasteners: