Dry do it yourself floor screed method
Concrete screed - the most common method of manufacturing floors in construction, whether it is an apartment, house or industrial premises. This traditionally “wet” method has a number of drawbacks and one of them, perhaps the most significant, is that it will be possible to live in such a room in about a month. If you are not completely satisfied with it, and you have planned to make a thorough repair in your apartment, then you can change the floors in the rooms without resorting to “wet” technologies, so to speak in a dry way - quickly and safely.

In order to be able to perform the dry method of screeding the floor with your own hands, we will need:
- polyethylene film;
- gypsum fiber sheets (GVL);
- expanded clay or other backfill;
- screws.
As a cover, we can use different sheets. It all depends on how much humidity is in the room, and also how constant the temperature is. Depending on this, you can use gypsum sheets (gypsum plasterboard), gypsum-fiber sheets (GVL), moisture-proof gypsum-fiber sheets (GVLV).
As for the dry screed, the Knauf complex system is considered to be the most universal one in this respect today. This company manufactures entire sets of materials that can be used to assemble a dry floor. Interestingly, such a coupler is carried out by joining between a small moisture-resistant sheets. They are made, according to modern technologies and quite reliable.
Cooking surface for dry screed
Before you start laying the floor, it is important to conduct a thorough preparation of the surface on which we plan to make such a laying. It should be alabaster mixture to cover up all the cracks, cracks, potholes and potholes, and then clean the entire surface as a whole from the debris. If the base of the floor has irregularities up to 5 mm, it will be possible to use a special corrugated cardboard. As for the more serious "hollows", not exceeding 20 mm, here we will come to the aid of various repair mixtures.
But what if the very foundation of the future gender has a bias? Level the surface "in the horizon" by using expanded clay sand.
If you plan to warm the floor with foam plastic before a dry screed, then in this case, all the errors in the base itself should be eliminated with either putty or cement mortar.
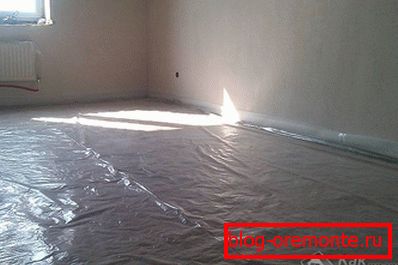
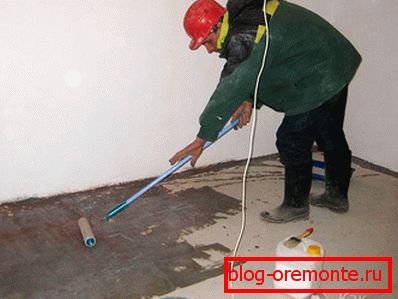
Now the surface itself must be covered with a waterproofing layer - plastic wrap. This is necessary in order to protect the clay from moisture. This film must be laid in such a way that its edges go into the next strip by 20 cm, and secured with tape, as well as on the walls with an overlap so that later after laying the edges of the film barrier, protrude from under the mounted floor by 2 cm.
If the concrete surface is suitable polyethylene. And if the base of the tree you need to use only cardboard and also overlap. In the event that on the very surface of the base communications are laid in a corrugated sleeve, you should place an insulating film under it to prevent hollow spaces.
Which filler is better?
In the dry screed use many varieties of zasypnogo material. They are divided into:
- Керемзит.
- Vermiculite.
- Perlite.
- Компит.
Керемзит
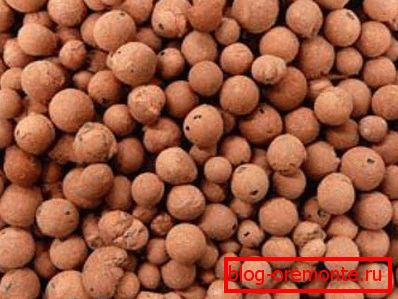
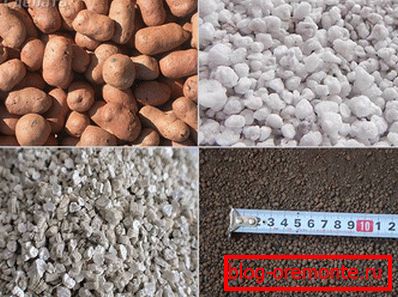
Builders often call the expanded clay backing as “pine nut”. This is an excellent thermal insulation material. Often it is used as a dry filler. If we want our floor to serve us for a long time, then the clay should be of good quality. Here are some tips to help you make the right choice:
- Expanded grains should be the same or almost the same size. The difference between the granules should be insignificant. Otherwise, it is better to refuse such a charge.
- If it is a bag, carefully inspect it. Expanded clay should not contain dust, sand and other mixtures. Otherwise, over time, your floors from such a filler will start to make a creaking annoying you.
- Take the bag and lift. If you have succeeded with difficulty, then expanded clay sand is supersaturated with moisture. In this case, it does not fit, because over time, its use will cause deformation of the floor. If on the contrary - the bag is light, then it means that the granules are rather dry - you can take them.
Vermiculite
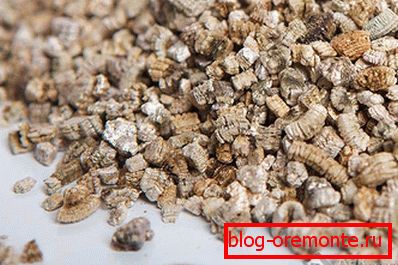
This backfill, similar to small worms - sticks of golden or silver shade. By weight, it is very light, even lighter than expanded clay, and is good as a filling material. However, in order to use it for dry screed, it must be sufficiently expanded. Why is that? Because the usual "worms" have a bad ability to absorb moisture, but we do not need it.
Perlite

Perlite является продуктом вулканической деятельности. Этот материал, как и вермикулит, получается путем термической обработки. Продается во вспученном виде. Также в технологии насыпного пола нередко применяется и перлитовый песок.
Компит

This filler is from Belarus. It should be said that kompevita fakes, such as, for example, expanded clay, are extremely rare. What is he like? This is a kind of small expanded clay (1–4 mm). The mixture is quite dense and it is simply created for bulk floors. This sand is a good heat and sound insulation material. So decide for yourself what kind of backfill to fill your floor.
What else should be done before backfilling
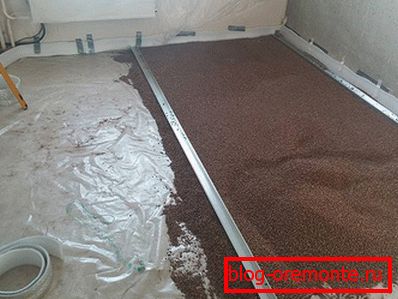
Having set the corresponding lighthouses, we fix a special tape around the perimeter of the room, the width of which is 10 cm and the thickness is 1 cm. It can be made of mineral wool or foam rubber. The tape will play the role of a soft buffer between the wall and the edge of the floor when changing the seasonal temperature conditions in the room, which, in turn, will exclude the so-called sound bridges and the appearance of cracks on the joints themselves between the floor slabs.
One profile is placed against the wall and all of the following are installed parallel to the first at a distance equal to the length of the rule (1.5 m). Then we fill the filler into one lane, after which we level it with a rule or a wide spatula. This work is best done using personal protective equipment, because the work is quite dusty. Such an operation is best performed from the opposite wall. Backfill consumption - one bag (if expanded clay) per one square meter of room area with a layer thickness of 5 cm.
The backfill layer should be from 4 cm to 12 cm. If communications are laid in it, they should be covered with a 2 cm layer of filler.
After leveling, we begin to tamp down the bulk material. This can be done manually with a rubber hammer.
GKL or GVL?
GCR is a sheet of plasterboard. This material is very convenient for a different type of construction work, including for laying the floor. It can be cut. It is easily bent and at the same time has good strength properties. However, gypsum plasterboard is rarely used in the manufacture of dry screed. As for its analogue - gypsum-fiber sheet - GVL, it is used much more often. Why is that? It is much stronger in structure than the GCR.
For laying the floor at home, you can try and moisture-proof gypsum-fiber sheets - VGVL. As a rule, they are small. Also made from environmentally friendly material. On thermal insulation, fire safety and moisture resistance - this is the first element for the floor in the apartment, and especially if there is a risk of water ingress. (it is known that in the apartment there is always a risk of being flooded with neighbors above).
Therefore, when choosing certain sheets for your future floor, pay attention to the special marking, which is located on the back side. The following data is indicated there: sheet type, edge type, nominal length, width and thickness (mm), standard.
Fasten sheets

The floor will be even if the sheets are simply laid in a dry and warm place for several days before laying.
How to do this final part of the installation of the bulk floor? Laying sheet material on expanded clay screed is best carried out from the door, so that once again during work not to go on backfilling. Especially you need to try when assembling the first row, since it depends on how well the whole course of work goes on.
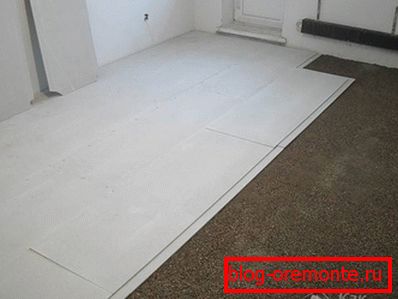
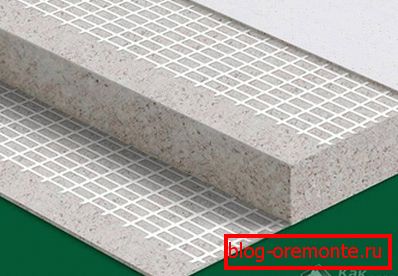
It will be good to install such bulk floors together. The sheet weighs at least 17 kg, so working alone is difficult. On the first row of the laid sheets should be provided folds. These technological ledges are designed to fix the sheet to the sheet, as well as to prevent it from being pushed into the bulk material under load, for example, if it occurs.
The sheets themselves are stacked in the same way as in case of masonry walls, when the joints between the slabs are displaced. This is not some design decision. Such a technology of laying caused by technical necessity: it is possible to secure the adjacent sheets. Special screws are screwed around the perimeter through the folds, fastening between the sheet floor elements. However, in order to make the seams more durable, the place of the fold should be glued with PVA glue.
For GVL provided screws, other than fasteners for GKL. Their peculiarity is that they have a two-way thread and a countersink head, which, in turn, will not allow it to wring back for some reason.
Here, in essence, is all wisdom. Having put the first row of sheets, you, undoubtedly, will lay a floor as it is necessary for you.
As you noticed in this article, you can make a dry screed on your own - this is quite realistic and, if done correctly, such a bulk floor in your house or apartment will be strong and durable, as well as warm and safe, besides having good sound insulation. The main thing to know and understand the technology itself laying such bulk floors. Try it and you will succeed.
Video
This video shows the installation of a dry screed from the floorboard elements of the SSF: