Drip irrigation greenhouses do it yourself
When growing greens and vegetables in a greenhouse, there are three areas that need to be paid first of all:
- Watering.
- Fertilizer.
- Pests.
Today there are a large number of methods to help cope with this or that problem. This article will be devoted to one of them, namely, how to make a drop watering greenhouses with their own hands. Only with the construction of a well-designed watering can you expect a good harvest at the end of the season.
Watering is a responsible and important task!

When watering should follow the rule of the golden mean: a lot of water is very bad, but on the other hand, a little water is even worse. Inexperienced agronomists, when growing vegetables in a greenhouse, can make one mistake - if they want to get a lot of harvest, they can supply the plants with plenty of water and fertilizer. However, this is a big mistake! The soil will be exhausted very soon and will contain a large amount of harmful substances. For this reason, you should think about the structure, which will not only save water consumption, but also moderately care for the plants in the greenhouse. Here are all the pros and cons of the drip irrigation system in the greenhouse:
- With proper watering, the root system will receive enough oxygen.
- If you simply fill the plant, the water accumulated near the root, will push out oxygen, and this will adversely affect the development of the plant.
- The drip irrigation system of plants in the greenhouse establishes a good movement of oxygen air near the root.
- The necessary moisture goes directly to the root of the plant.
- When drip irrigation, fertilization of plants is carried out only when necessary.
- The soil surface will not have a crust, which will positively affect the development of fruits.
- With point irrigation, weeds do not grow, respectively, we can save power on weeding.
- Significantly reduces the risk of plant damage by fungal infections and pathogens.
- Drip irrigation of the greenhouse is associated with lower labor costs.
- Significantly reduced soil leaching.
- The yield and productivity of a particular crop is increased.
- You can point to the necessary fertilizer.
- With low water pressure the possibility of irrigation of a large area.
- Simple installation and subsequent management.
- Drip irrigation saves water.
In the absence of a centralized water supply, one of the main drawbacks of this irrigation system is the need to exercise constant control over the process of filling the storage tank with water.

So, from the above, the fact that the drip irrigation system of greenhouses is a reliable assistant for any agronomist is obvious. You will no longer need to carry buckets and watering cans.
Preparatory work
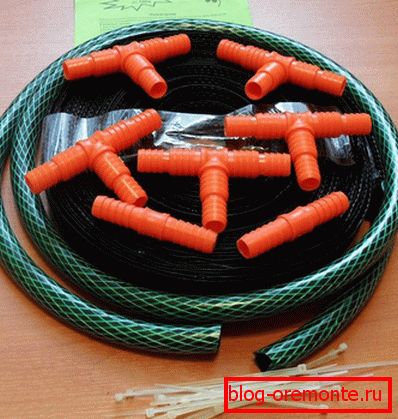
To create a drip irrigation system, you must first prepare all the necessary material. To simplify the work, you can buy a simple set of drip irrigation system. It may include:
- Special drip tape.
- Disc filter.
- Start connectors with cranes and rubber seals.
- Start connectors without cranes, as well as with rubber seals.
- Connectors that connect the hose to the filter.
- A set of repair fittings and forks.
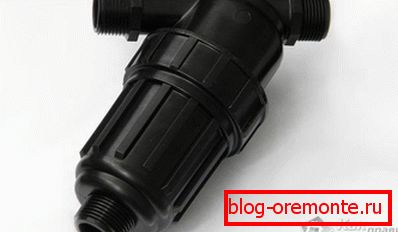
Frequent clogging of the nozzle can be prevented by putting a special filter into the system.
But, to make this system yourself, this set alone will not be enough for you. Additionally, you should purchase and prepare:
- Polyethylene pipes.
- Drill.
- Drill.
- Scissors for cutting pipes, or a hacksaw for metal.
- Marker.
The system does not require much large investments if you make it yourself.
Making a plan is the key to success!
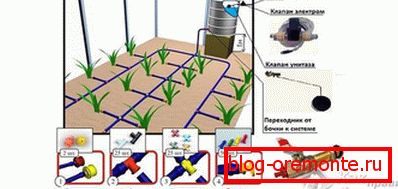
Before starting the installation work, all calculations and planning should be carried out. Mainly, you should indicate on the plan how the beds will be located in your greenhouse. To make the calculations accurate, you can take a regular tape measure and take appropriate measurements inside the greenhouse. Transfer these measurements to the plan. So, on the plan (scheme) created by you should be indicated:
- Sources of water.
- Capacity from which will go washing of all drip system of watering.
- Branching of all channels from the tank on the beds.
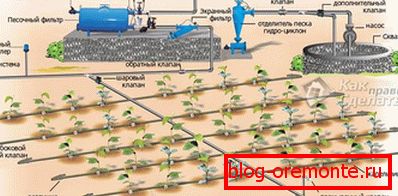
However, the calculation of the pipeline system can be added to this list. If there is no centralized water supply system, then care should be taken to arrange a special storage tank, which will be the main source of water. You may need to install a pump that will pump water through the system and water the beds. All these details can be specified on the plan you created. So, it will be easier to carry out all the calculations for the purchase of the necessary material.
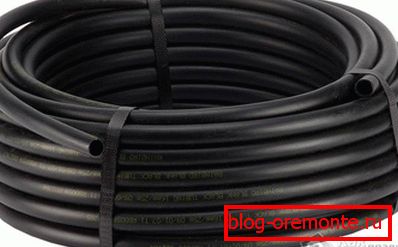
As for the choice of pipes, it is best to use polyethylene for cold water O32. Otherwise, it will be difficult to drill holes as well as fix future fittings. Moreover, in addition you will need to calculate the required number of fittings that will allow you to make several branches in the greenhouse.
Important requirements for creating an overall device plan:
- The filter should be installed in any convenient place; however, it should be located between the water source and the main pipeline.
- With the help of the start-connector to the main pipe is attached dropping tape.
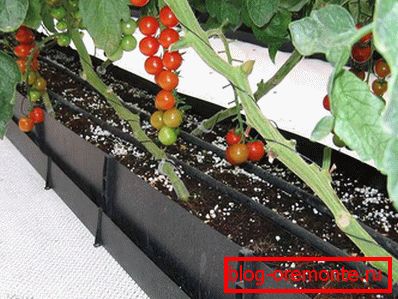
- Drip tape should be placed strictly above the bed, so that it runs throughout the row.
- End the drip tape.
We start the installation work
The first step is to connect the main pipeline. To do this, attach the hose to the line using special fittings. After the filter is installed in the system. It is best to purchase the filter that can be disassembled and cleaned after some time. So, the filter is mounted in the supply hose to the entire system of drip irrigation of the greenhouse.
When installing it, pay attention to the case. It shows an arrow in the direction in which it should be fixed. Otherwise, the filter will not do you any good. In general, when installing the filter should not have any problems.
Then you should mark the pipeline and make holes in the device. Here you will be helped by the plan that you drew at the beginning. Drip tapes should be placed evenly and consistently. The pipeline should be marked with a marker mark the future places of attachment of the drip tape.
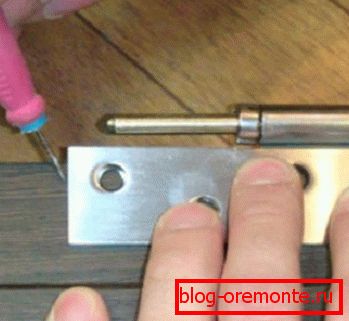
Then, using a drill and a drill, make holes at the marking points.

The hole must match the rubber seal (from the kit) that will be inserted into them. But it is imperative that it enter with effort.

In the rubber seal is mounted start-connector, as well as a valve that can be closed in the case when watering should not be done on all beds.
As a result, you will not need to turn off the entire system from watering, if some vegetables need to be watered less.
Some sets of start connectors do not have a crane. Therefore, when buying it, make sure it is available. Otherwise, you will not be able to switch watering beds or you will have to buy additional taps.
In order to save water, it is better to install taps in all cases. For example, some cultivated crops do not require constant watering, so while some beds need intensive watering, others need to be turned off.
So, in the next step, you should start connecting the dropping tape to the start-connector. For its attachment should not put much effort. At the start of the connector, it is tightened with a nut.

When installing the drip tape, make sure the dropper is pointing up, not down.
Separately, attention should be paid to drip tape:
- Drop the tape from the start-connector to the end of the bed.
- At the end it should be silenced.
- Make it very easy. It is enough to cut in the right place, twist and roll up the end.
- Thanks to the splitter, the drip tape can be completely folded at any time. This is especially good in cases where the direction of the beds may change slightly or simply have an irregular shape.
- The opposite end of the line should also be securely shut off.
Automatic watering of greenhouses
So, we have reviewed with you the sequence of work on the manufacture of drip irrigation greenhouses with their own hands. But now consider some of the nuances that should be taken care of in the process. What if you do not have a centralized highway? You can set the capacity in the greenhouse itself.
The only thing that will be required of you is to constantly monitor the water level. However, this process can be automated. For example, to mount pumping equipment that will pump water into the tank from an available source. Moreover, it is possible to approximately calculate the daily water consumption in the greenhouse. Accordingly, you will be able to pour water in a certain amount for a day or several days, depending on the intensity of watering the beds. To organize automatic watering, you should arrange drip irrigation according to the method as described above. After you need to buy an automatic controller that will regulate the flow of water.
These controllers have a built-in sensor that can be programmed to turn on the water during a certain period of the day or even several days a week. This automatic controller must be installed immediately after the filter.

So, having organized self-watering using drip irrigation with your own hands, you can achieve several goals at once.
- Saving water.
- Save time.
- The ability to grow vegetables and herbs more efficiently.
Thus, watering in the country will not dream you in terrible dreams. Especially when there is no rain for a long time. In all these cases, drip irrigation with their own hands will be the most effective and productive tool. If you already have experience in this area, then leave your comments at the end of this article. Your practical experience is simply invaluable!
We recommend reading:
- how to build a polycarbonate greenhouse with your own hands;
- well in the country with their own hands.
Video
This is an automatic do-it-yourself-watered irrigation; only drip tape is purchased from special equipment: