Do-it-yourself toilet bowl installation
Conventional floor toilets have outlived their time. They are replaced by new developments. Toilets mounted on the wall, began to crowd out the usual models. Hanging toilet is more difficult to install, more expensive, requires more time to install, however, it saves so important square meters. Especially this development will be appreciated by residents of old buildings, where the bathroom and the bathroom occupy a couple of square meters. Among other things, you will be able to save your money if you install the suspended toilet with your own hands. From this article you will learn about each stage of this work.
Device and principle of operation
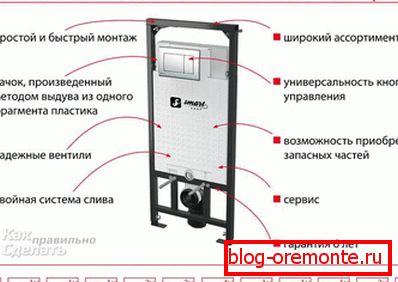
Understand how to install a wall-mounted toilet, you can, if you understand how the design of the installation and what the principle of its operation. The entire construction of a mounted toilet can be divided into three separate elements:
1st element - strong steel frame:

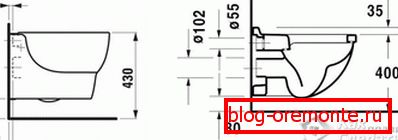
The frame is the main part on which the toilet bowl and the drain tank is fixed. It must be securely fastened to the floor and wall. After installation, it must withstand the weight of an adult. As a result, walls must meet this requirement. If you have drywall on the walls, then it will not work as a base for a suspended toilet. Among other things, the frame has a mechanism that allows you to adjust the height of the bowl in the region of 40–43 cm. Sturdy steel pins are used to fix the toilet bowl.
2nd element - flush tank:
In such a system, the tank is hidden. It is made of heavy-duty plastic. The shape of the tank is standard. It is installed in a steel frame. To prevent condensation, the tank is covered with Styrofoam. To install the drain button on one side there is a special cutout. If a tank repair is required in the future, then it is through this opening that the valve of the drain tank will be removed. Each tank in the toilet is equipped with an economical drain system. Water is dosed in 3 and 6 liters.
3rd element - toilet bowl:
The bowl is the only visible part of the suspended structure. Its shape can be different (square, rectangular, round), although in most cases it is an oval.
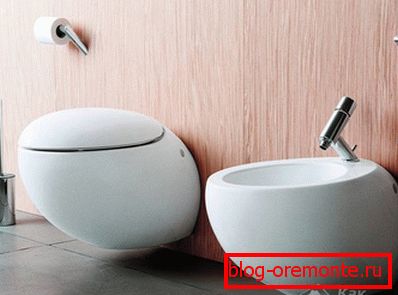
As for the fixture for the suspended toilet, it comes in the kit. Therefore, in addition something will not have to buy.
Tools and materials for installation
To do quality work, you need to prepare the following set of tools and materials:
- plastic drainage outlet
- Teflon tape,
- studs
- flexible hose
- angle valve,
- perforator,
- a set of keys and screwdrivers
- construction level.

Depending on individual needs, the set of construction tools and materials may vary slightly.
Mounting technology

The installation process of the suspended toilet bowl is as follows:
- To begin with, an installation for a suspended toilet is installed. It is fastened through special holes to the floor and wall with dowels. To this place in advance or after the installation of the frame it is necessary to bring engineering systems: sewage and water supply. When installing the frame must be mounted vertically. The correctness of the installation should be monitored using the building level.
- At this stage, the height of the toilet bowl is also set. Height will depend on the growth of tenants.
- Water supply to the tank can be made of flexible hose. Although it will be more practical hard method of connection. Such a supply will last much longer.
- An important step is to connect the toilet to the sewer. The release of the toilet should be inserted into the outlet and secure the connection corrugated.
- After installation, check the design for leaks. To do this, connect the tank, fix the bowl and empty the water. If no leak is detected, then the bowl should be dismantled and set aside.
 After all tests and checks, the installed structure must be sewn up. The best option would be drywall. Buy moisture resistant drywall. According to the characteristics and the service life, it is much better than its usual counterpart.
- Pre-assemble the frame from the profile, and at the very end, sew it with a sheet of drywall cut to size. Several plumbing holes are cut in the drywall in advance, for the drain button, for draining the water from the tank, for fixing the bowl.
- After that, it remains to perform plasterboard lining with ceramic tiles or plastic panels.
- When the finish is dry, you need to mount the bowl. It is fixed with two studs. A rubber cuff must be installed between the ceramic tiles and the toilet bowl. Otherwise, the cup may burst!
- Now you can proceed to the final touch - setting the button. Immediately before installing the button, turn on the tap to supply water to the tank. Do it later will not work. The order of connection of the button in each case will be individual, depending on the model of the suspended toilet. If the button is mechanical, then you will need to adjust the plastic pin along its length. If the button is pneumatic, then it does not need adjustment. The only thing that needs to be done is to connect two thin drain tubes to the button block. Then you need to press the button until it clicks, setting it on its seat.
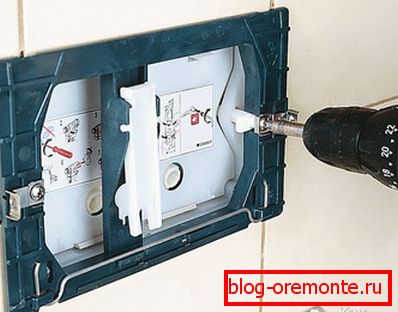
The work is, of course, difficult, but if you strictly adhere to this manual, and also study the attached instructions from the manufacturer, you can do everything yourself.
This video shows the installation installation GEBERIT:
Installation without installation
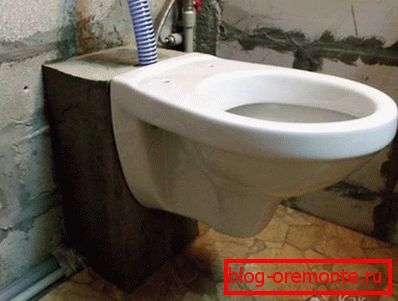
In case you like the model of a wall-hung toilet, but you cannot manage to buy it along with the installation, you can build a home-made concrete base. This is a much cheaper option. As for the installation of the tank in this embodiment, there are two options:
- Mounted on the wall.
- Mounted above the toilet bowl.
For example, consider the most affordable and economical way to install a toilet without installing a concrete base. To do this, you need to prepare in advance:
- 40 liters of concrete M200;
- boards for formwork;
- washers, nuts and screws for wood;
- 2 metal rods O2 cm, length 50–80 cm;
- plastic tube O11 cm, length 8 cm;
- silicone sealant;
- drain coupling.
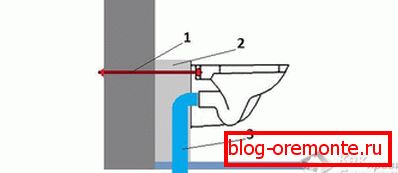
The work process is as follows:
- Metal rods should be fixed in the main wall. It is on them that the toilet will be mounted later. This design can withstand weight up to 500 kg!
- Then set the coupling to drain. The trimming of the coupling is carried out taking into account the height of the bowl.
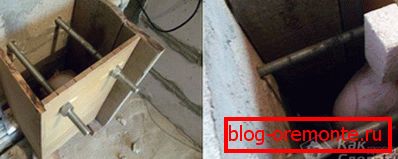
- Then formwork is mounted. On the formwork should be noted attachment points. Holes are made in the right places.
- The length of the rods must also be properly adjusted. To do this, sum up the depth of penetration into the wall and the distance from the wall to the toilet bowl.
- When the formwork and the rods are installed, perform a fitting fitting, setting the toilet bowl.
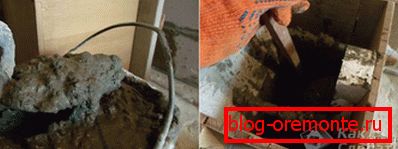
- If everything came together, you can start concreting. Fill the drain hole with foam. At the end of the work you get a monolithic construction with outgoing pins and an open clutch.
Next is the case for small - you need to install the toilet bowl. Pre-veneering concrete structures. Remember that each connection must have a good seal. As for the tank, there is a matter of taste, or rather, the financial capabilities of the family.
We have considered with you the options for installing a wall-mounted toilet: with or without installation. Choose the method that you can afford and afford.
A photo

See also:
Connection of a toilet bowl with a sewer pipe
How to install a toilet with their own hands