Do-it-yourself interior door repair
Interior doors during operation often lose their attractive appearance and receive various microdamages. There is no need to change them to new ones. Most defects can be eliminated personally. By itself, such a design as an interroom door, strong enough. The deformations that appear on its surface do not affect its quality characteristics.
Slots
The most common problem faced by the owners of interior doors is the gap between the box and the walls. Not only are such holes unaesthetic, they also lead to sagging of the door leaf. The doors start to close badly. It is easy to close cracks and gaps; the beginner can quite easily cope with this. Repairing interior doors with their own hands does not take much time, but it will help to save money. In order to learn how to cope with such defects yourself, quite a bit of practice.
To work will require:
- drill;
- dowels;
- polyurethane foam.
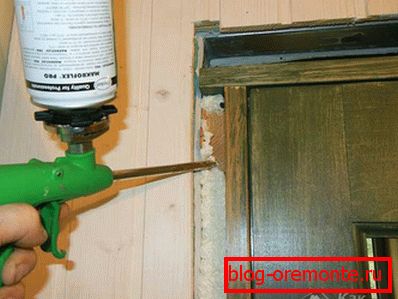
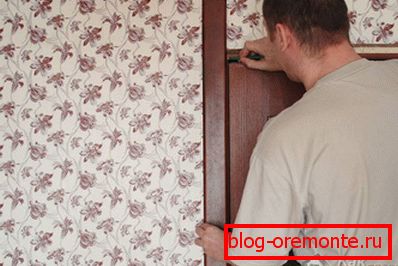
Repair stages
 In the walls of the box must be made 3 holes. All of them should be evenly spaced along the entire length of the walls.
- Making holes, it is necessary to expect that they come under the dowels with a length of 130-150 mm.
- The door frame is securely fixed with dowels through the holes.
- The gaps that remained after the box was strengthened in the opening should be sealed with foam.
- Excess foam can be removed after work.
Often you can cope with the problem by buying a new door trim.
Provisions

Sagging interroom door delivers a lot of inconvenience. She scratches the floor and constantly gets stuck in the doorway. However, to correct this defect can be as follows:
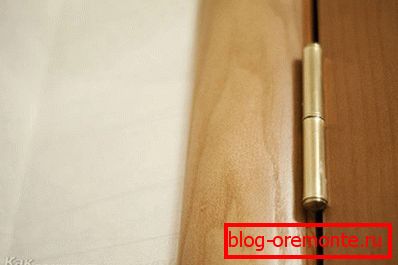
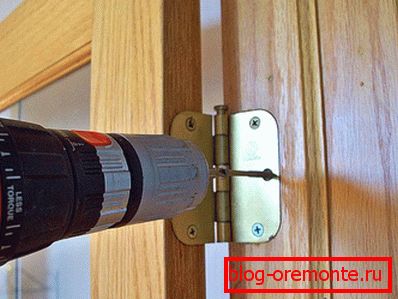
- First you need to check the fastening of the door hinges. Most often sagging happens because the loops are loosened.
- If the loops are really loose, you just need to tighten them.
- If the hinges are reinforced well, but the door still sags, then they can be slightly deepened. To do this, remove the hinges with the door leaf and chisel to increase the depth of the groove. Then it remains only to re-fasten the hinges on the screws.
- If sagging has occurred due to a violation of the door leaf geometry, then it is necessary to return it to the correct shape. To do this, use a planer to process wood piping. Swelled doors are treated the same way.
- Sometimes the doors do not close because the fabric is swollen from contact with a wet surface or due to the increased humidity of the atmosphere in the room. In this case, you can eliminate the defect by treating the harness using a conventional planer. For prevention, it is better to avoid moisture on the surface of the door.
- Doors when closing can form a significant gap with the box. Before you repair interior doors, you need to make sure that the shape of the canvas fits perfectly to the box. Such slits usually indicate that the web is much smaller. To eliminate the opening it is necessary to fill the rail on the door frame. When the rail is fixed, it is processed by a plane and fitted to the door. After that you can paint.
Doors do not close well

- Sometimes the doors do not close because the fabric is swollen from contact with a wet surface or due to the increased humidity of the atmosphere in the room. In this case, you can eliminate the defect by treating the harness using a conventional planer. For prevention, it is better to avoid moisture on the surface of the door.
- Doors when closing can form a significant gap with the box. Before you repair interior doors, you need to make sure that the shape of the canvas fits perfectly to the box. Such slits usually indicate that the web is much smaller. To eliminate the opening it is necessary to fill the rail on the door frame. When the rail is fixed, it is processed by a plane and fitted to the door. After that you can paint.
Cracking
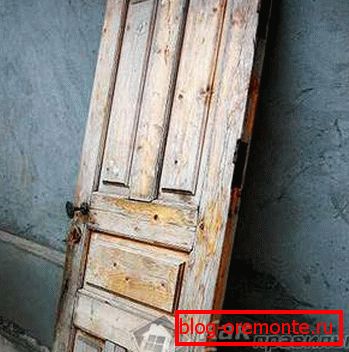 Interior doors are usually made of wood. This material is subject to various environmental influences. It can swell, crack and crack.
Cracked doors are easiest to restore with metal corners. Usually, they repair old wooden doors. However, corners can disturb the appearance of the structure. Therefore, it is better to use another method.
To restore the doors they must be dismantled. The doors are removed from the hinges and fully disassembled. All components of the design are carefully processed with a special adhesive composition. Cloth put in order, masking the cracks and places of drying out. Glued doors must be clamped in the clips and wait until they dry out. Then the canvas is again hung on the hinges in the door frame.
Cracks
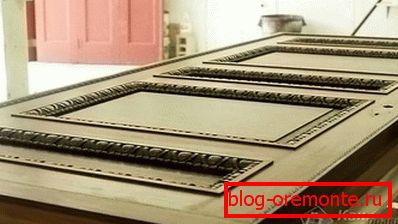
To repair cracks and delaminated areas, you need a good glue and press. As a press, you can use any heavy object, which you can press the canvas on top. Glue composition can fill various defects and voids in the canvas.
If the door has deep cracks, then you need to apply sawdust and varnish. Sawdust perfectly hide such damage.
Installing a new door
Interior doors can serve for a long time without repair. To do this, you only need to regularly monitor them and properly care. All cracks and delamination can be prevented. It is known that such defects in wood tend to grow with time. Therefore, the sooner a small crack is detected and eliminated, the greater the likelihood that it will not spoil the door leaf.
If the door is very old or has many defects, it is sometimes cheaper to buy a new one than to repair it.
- First of all, it is necessary to remove the canvas from the loops.
- Then mount the old door block carefully removed.
- Now you need to deal with the new door. Interior doors more convenient to purchase already assembled. It eliminates the extra work. If the construction is disassembled, then it must be assembled, carefully fitting all the components to each other.
- Installation of loops is made at a distance of 20 cm above and below.
- The next stage is the installation of the lock. Work is carried out using chisels and drills. The height of the lock will be optimal if it is located a meter from the floor.
- Installing the door frame should be made strictly on the level. After installation it is necessary to replace all the openings between the wall and the box. Platbands can be fixed only when the foam dries.
- When the foam has dried, you can remove its excess. After that, the door frames are installed.
Chisels, drills, dowels and screws, water level, mounting foam, wedges, mount will be required for installation. This is the minimum set of materials and accessories. If the door is going at home, then more tools will be needed. Accessories are best purchased with the door. When buying its quality is better to check in advance. It should be remembered that cheap interior doors often have fragile fittings.
Castle repair
Very often, the locks on the interior doors begin to work intermittently, and sometimes even break. The cause of damage may be very different. Therefore, if you want to repair the lock, you should determine the reason for which it failed. Below are the most common causes of breakdowns:
- a part of the broken key remained in the well or garbage got into it;
- the spring or the girders became unusable;
- insufficient lubrication due to which the lock is difficult to open;
- holes and bolts do not match in the bar;
- the key turns, but does not open the lock;
- cylinders wedged;
- loose hinges.
As a rule, the mechanism of the lock of interior doors is simple, so it is quite possible to carry out its repair yourself.

So, for repair, you may need the following basic tool kit:
- set of screwdrivers;
- oil for lubrication;
- Toothbrush;
- tweezers;
- kerosene.
Before proceeding with repair, make sure that the breakdown is actually in the lock mechanism.
Often the reason that the lock does not close or sticks is a skewed door frame. In such cases, it is enough to adjust the combination of the overlay on the frame with the lock bolt or with the tongue tongue and everything will work properly.
In some cases, wear of the hinges may be the cause of the grip of the bolts.

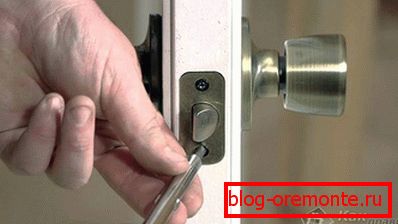
If this is not the problem, you will need to remove the cylinder. His performance check is not verified in the lock. If it is broken, then it should simply be changed to a new one. But there are cases when the locking mechanism is working properly. In this case, the fault should be found in the case of the lock. To disassemble the body of the lock, it should be removed.
If you have a mortise, first unscrew the fixing screw of the core, insert the key into it and twist it to pull out the core. Only then can you remove the lock case. On the housing cover there are small screws. When you unscrew them, do not lose them, set aside. In order not to lose the spring, put the lock on a small flap. When you remove the housing cover, you remove the accumulated dust and dirt from the lock. Also ensure that all parts are intact and not deformed.
If, after all the manipulations, you have assembled a lock, and it does not work anyway, then it’s time to change it completely by purchasing a new lock for the interior door.
Handle repair
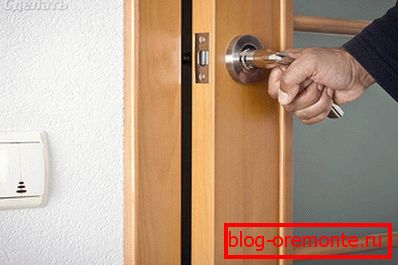
Interior handle is subjected to heavy loads. Especially if you have small children, then their breakdown can be a frequent occurrence, due to skating on the door, catching on the handle, although there are other reasons for breakage of interior handles.
Consider the most common problems that arise during the operation of an interior door:
- Sticks a pen. When you press the handle, you feel resistance. To open the door you have to make an effort, and sometimes even support the door handle.
- Sticks latch. This breakage is found in the design of handles with a lock. The movement of bolts is hampered by both opening and closing.
- Loose handle In this case, there is sagging, the handle itself moves away from the canvas and staggers. With such a breakdown, the entire locking mechanism may also be loosened.
- The handle does not return to its position after pressing. In normal operation, the handle should instantly spring back to its original position.
- The tongue does not move. Fale tongue either sinks or does not work.
All these breakdowns can be fixed on their own at home. For this it is important to know the types of products:
- Stationary. Such models are rarely used today. The handles of the “button” or “shackle” are simply screwed to the door leaf.
- Push. This model has a pressure mechanism. To hide the tongue, the mechanism should be pressed and moved down.
- Swivel. This model uses round knobs. To open such doors, the handle must be turned to one of the sides.

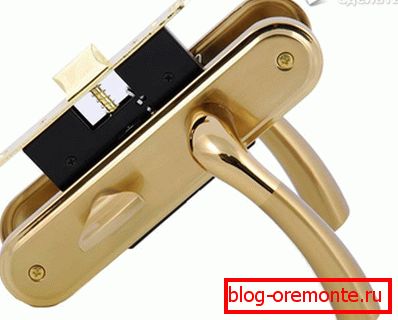
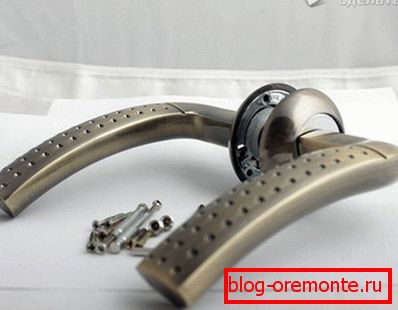
Moreover, it is important to know the components of the handle mechanism:
- Castle. The main element of the bolt.
- Tetrahedral pin. It is displayed outside. In the pin drives the inside, connecting with the handle.
- Lever. A handle that is subject to force to open the door.
- Decorative overlay. Gives the door an attractive appearance.
- Reply part. It is located on the door frame. There are holes in it, which comes in a tongue tongue.
So, if the handle has some damage, then if you deal with all these details, repairs can be made on your own.
The most common failure is a lack of lubrication. To fix this problem is very easy. Disassemble the pen and apply lubricant. You can put the sewing machine oil on the bolt and then turn the knob several times. By doing this work, you can completely prevent the creaking or jamming of the handle. Moreover, lubrication will increase the service life. Sometimes it is necessary to tighten the fastening screws, as well as to correct the elements of accessories. This is in case the lock with the handle is loose.

If this is not enough, then it will be necessary to disassemble the product. To do this, remove the decorative trim. Under it are mounting bolts that should be unscrewed. Then you can get to the inside of the mechanism. It is not necessary to extract it. Now look at the key washer and torsion spring. To view the washer you must remove the retaining ring. Often the problem lies precisely in this mechanism. As for the spring, it sets in motion the tongue. Make sure these items are intact and free from defects. Perhaps the spring will be out of place, it is enough just to correct.
If, after this, the problem was not identified, the whole mechanism would have to be completely removed from the door leaf. If broken elements are found, they must be completely changed. When assembling the lock, be sure to install the parts in the same order as they were disassembled. If the failure does not eliminate, then you may have to call the master or completely replace the opening mechanism.
Glass replacement
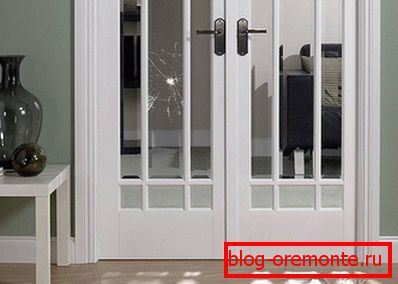
Whatever the glass, the problem with it can be only it has broken or has chipped. Therefore, the glass should be replaced. If you decide to make a replacement yourself, then you should determine the method of its installation, and there are 2 of them:
- Fastening with beadings.
- Installing glass inside the door leaf.
Consider the technology of replacing glass, which is fixed by beadings. So, the works are as follows:
- Gently remove the beadings. To do this, take a flat screwdriver and push the sharp tip into the gap between the bead and the blade near the nail. Also for this work, you can use a knife with a thick blade.
- After that, the screwdriver should be slightly bent or turned. As a result, the bead should move away from the web. Further, such an operation should be performed with each nail on a bead. After that, use pliers to remove the bead.
First, remove the side beadings, after the bottom and at the very end of the top. Observing such a sequence, you can avoid falling out of the glass. If the glass is broken, then the order of removing the glazing beads does not matter.
- After that, carefully remove the damaged glass.
- The opening where the glass stood should be cleaned of debris.
- After make measurements. You should not cut the glass exactly to the size, because of the moisture in the door can swell, and the glass can break.
- If you have the necessary tools, you can cut the glass yourself. If not, contact a workshop for cutting glass.
Optionally, the glass can stick a film with a pattern. This will make the glass much stronger. In this case, the film should be glued on an unspecified glass. When the film is glued, the glass is installed in place and fixed with shtapikami. As you can see, the technology is quite simple.
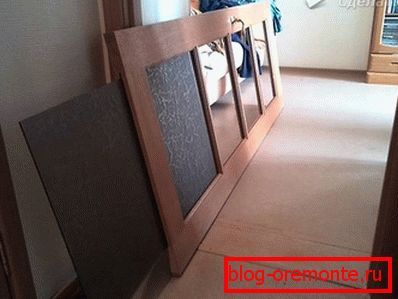
If the glass is inserted inside the door, its replacement becomes more complicated. In this case, the replacement is as follows:
- As a rule, in all new doors glass is inserted into the canvas from above. Therefore, to replace the glass, the door will have to disassemble.
- To do this, remove the door with hinges.
- After that, find special end caps on the end of the door. Under them are self-tapping screws, which fix the protective cover. carefully unscrew them and remove the cover.
- And only after such manipulations, you can get to the glass.
- Damaged glass is removed.
- When performing this work it is necessary not to spoil the seal, which is located in the groove. The sealer is necessary so that when opening / closing the glass does not rattle, and because of this, it can break.
- To avoid spoiling them, lubricate the edges of the glass with soapy water. Then the glass will be much easier to its place.
- After installation, fix the lid in place, tighten the screws and close them with plugs.
- At the end of the work install the door in place.
Video
A few tips on repairing doors in the following video: