Do-it-yourself air conditioner installation: manual
The installation process of the air conditioner can be divided into two stages: preparation, that is, the choice of location, and, in fact, installation. Of course, it is important to do everything correctly, in accordance with the technical documentation.
Independent work will require certain tools. For example, a special pump is required for evacuating the apparatus. In case of lengthening of the freon line, it is necessary to increase the refrigerant volume.
Choice of place
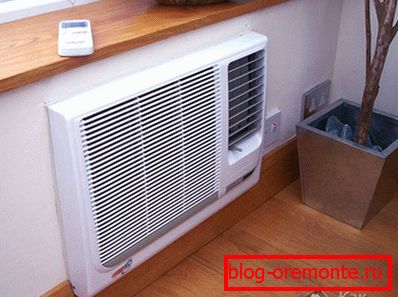
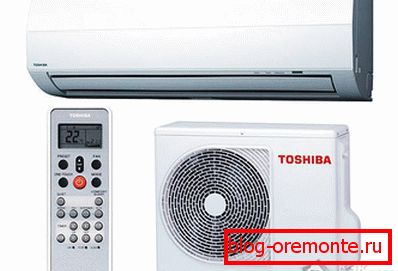
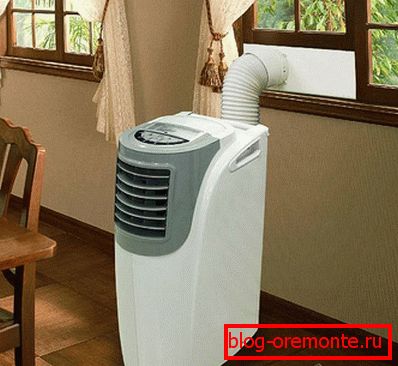
Installation point depends on the specific type of air conditioner: window, mobile, floor or split. The area that it will cool and the interior matter. It is better not to direct it to where people often sit, that is, on sofas, desks and beds.
Indoor unit, it is desirable to have as close as possible to the sill. Indents from the ceiling, walls and floor for free passage of cold air should be 15, 30 and 150 cm respectively.

The outer module is mounted outside the window or to the right of it, but so that the sides do not close the opening. If the device is placed on the ground floor, then it is mounted at a height of not less than 3 m from the ground. The rules also require placing outdoor boxes not under the direct sun and in places well blown by the wind.
The placement of internal and external units should be optimal from the point of view of the Freon route and the condensate drain hose. To do this, consider the thickness and material of the facade walls.
The amount of refrigerant according to standards is designed for a 5–6 m line. With a longer length, coolant is added to the system.
On the other hand, the minimum allowable length is 1.5 m. If the back-to-back modules are suspended, dividing only by the outer wall, the route will have to be increased to the required size, laying a loop behind the outer duct of the air conditioner. It is necessary to dampen the vibration and noise from the operating device.
Stages of work

- Drill holes. It is better to direct openings for the withdrawal of highways with a slight inclination to the street, therefore, the indoor units should be located higher than the outdoor ones. This requirement is due to technological reasons. Not only refrigerant will circulate through the tubes, but also low-temperature oil for normal operation of the device.
The smallest diameter of the wall hole is 5 cm. If there is no suitable drill, you can drill several holes of smaller section - under each drainage and wire. With concrete slabs with frequent retention of reinforcement - this is generally the only possible way. - We mount the outer part. It may require the services of industrial climbers. It is advisable to perform all operations for at least two people, since the device is rather heavy, weighing up to 60 kg, depending on the power. The easiest way is to hang it on ropes attached to the anchor, fastened below and further horizontally from the place of attachment not less than 30 cm. Otherwise, it can be torn out along with part of the wall. Both brackets are fixed with anchor bolts. It is important to accurately observe the horizontal level. If the block is crookedly hanging, the accumulated condensate will not drain into the drainage tube.
- Suspend room module.
- We collect the refrigerant line. Copper tubes are straightened and cut to the required length with a pipe cutter. The most basic thing at this stage is to roll the ends correctly. The rolling device consists of a cone and a vice. The end is clamped in a vice with a spacing of 1.2–1.9 mm. This edge is needed to form a rim under the nut.
Flared tubes together with drainage and electrical cable are wrapped with metallized adhesive tape and connected to the internal air conditioner module according to the instructions.
At this stage it is necessary to install a decorative box. This must be done just before the track is connected to an external unit.
Then the opposite end of the highway must be carefully pulled out, protected from debris and also connected. - The final stage - the removal of moisture or vacuum. This can be done in two ways: a sophisticated high-tech or a simple method of "zilch".
In the first case, you need a vacuum pump and a high pressure hose. One end is connected to the pump, and the other - to the spool of the gas port. To make it clearer, take a look at the picture:
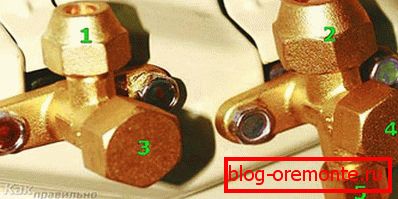
1 - liquid pipe port; 2 - port for a gas tube; 3 and 4 - valves with protective caps; 5 - spool for refilling and bleeding freon.
The pumping process takes 5-7 minutes, depending on the length of the track. After that, you need to open the valve number 4 for the intake of coolant and immediately close it. Part of the freon will flow out. This method is the only available if the length of the pipes is more than 6 meters and there is no possibility to fill the air conditioner with a refrigerant.
With a short route, you can try another method that does not require a vacuum pump. It is necessary to blow the air out of the line with the liquid. To do this, unscrew the caps of valves number 3 and 4, as well as the valve № 5. Valve number 4 must be rotated 90 ° for a few seconds to let in some freon, and then shut off. Now, clicking on the valve number 5, you need to release the mixture of the refrigerant gas almost completely. Almost - because part of it must remain and prevent the ingress of outside air.
After removing the moisture, open the gas and liquid valves until the end and check the tightness of the connections by covering the joints with soapy water.