Diy wood window repair
If you still have wooden windows in your house that you haven’t yet replaced with plastic ones for any reason, then it is quite possible that you were already interested in the question of how to repair wooden windows. Such "self-service" will not just come out cheaper than inviting a specialist, a good master of glazier's carpenter who agrees to tackle your old window, it is very difficult to find nowadays.
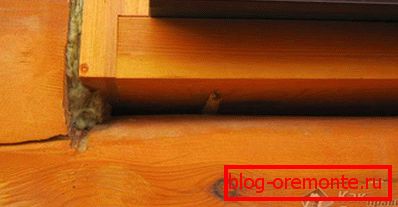
What happened to the window
The most common problems faced by owners of wooden windows are:
- damage to the paint that covered the window;
- the appearance of cracks through which begins to blow too much;
- damage to window fittings;
- the bias of the valves;
- broken glass.
In severe cases, the resuscitation window is not subject and it will be much cheaper to replace it with a new plastic window.
Getting Started
Repair of wooden windows is usually done at the beginning of summer, when the temperature of the air in the street is close to 20-22 degrees and, by opening the window, you will not wind up your apartment or room in the house.
Usually, repair is more like a complete window restoration, although most of the operations listed below can be performed separately (as the need arises).
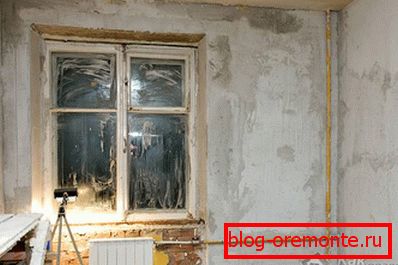
Repair begins with the removal of paper, strips of cloth, cotton wool or old rubber (foam rubber) window sealers, due to which cold air did not penetrate into your room in the winter through the gaps in the wooden window. After that, the surface of the window should be thoroughly cleaned and let it dry (30-40 minutes).
Painting
- Using a spatula, remove peeling paint from the window. Carefully rub the sandpaper minor irregularities (drips) left over from the previous color of wood. Do not forget about the window sill.
- Special putty (with antiseptic) gently align the window surface (putty putty conveniently with a rubber spatula).
- Wait until the putty has completely dried.
- Paint over the edge of the glasses adjacent to the surfaces that you are going to paint.
- Paint the window with a brush.
- Remove the masking tape. If there are drops of paint on the glass in some places, wipe them off with a cloth moistened with a solvent.
Video
Warming
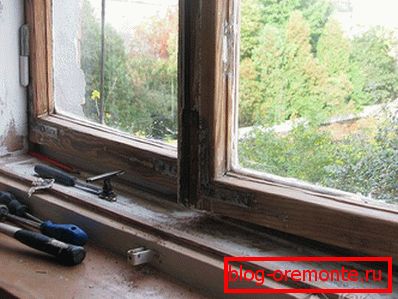
- Mark each of the removed sashes by writing a serial number on it and on the adjacent part of the window frame.
- Carefully remove the flaps from the hinges.
- Remove all old fittings and flaking paint from the casement and frame.
- Sand the surface bumps.
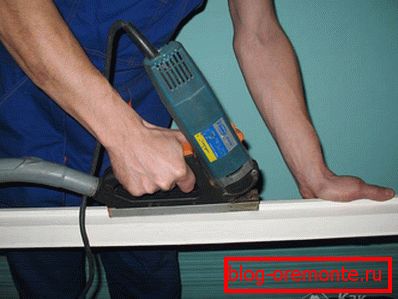
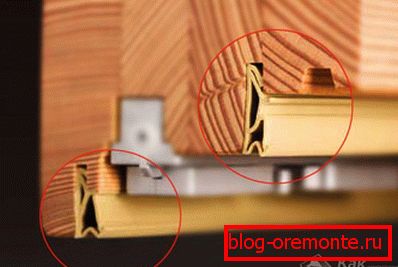
 Cut a thin groove along the perimeter of the flaps with an electric cutter.
- Insert the gasket into the groove using the sealing roller.
- Use a special blade (it looks like a glass scraper in an aquarium) to clean the edge of the glass that adjoins the wooden cover.
- Go through the same places with a silicone sealant from a construction gun.
- Install the new fittings, also processing the holes with a sealant (“fit” the fittings on the fluid sealant so that it takes the desired shape). Remove excess (still liquid) sealant.
- Reinstall the flaps.
- Punch the locks (window handles) into the window box.
- Putty on uneven window surfaces. Paint the window.
Alternatively, the groove for the seal can be cut not on the leaf, but in the window box.
Video
You will learn the secrets of window insulation from the following video:
Loose leaf
Often, sashes after years of age begin to loosen in the corners, where the horizontal and vertical elements join. To fix this problem, you need simple, flat metal corners. Using screws, fasten them to the corners of the leaf (from its inside).
After eliminating the problem, it is necessary to check the evenness of the corners (they should all be at 90 degrees).
Sagging sash

- If the sash suddenly suddenly began to cling to the bottom of the window box:
- Make sure that the sash is really slipping, and not swollen due to water (there must be a gap at the top between the sash and the box).
- Remove the sash from the hinges.
- Put on the bottom of one of the hinges (on the window box) a small washer (it can be put on both hinges or only on the top).
- Reinstall the sash.
- Check how the door closes (you may have to put another washer or replace it with a thinner one in order to achieve an optimal result).
If the sash touches the window box only slightly with its lower part, it will be enough to lubricate it with wax (a regular candle).
Wood defect elimination

Sometimes “extra” holes appear in the wood of the window box or casement (a knot fell out or an old trace of fittings remains, etc.). To eliminate such a defect, carve a chopik of a suitable size from a piece of wood and carefully drive it into the hole, after having first smeared it with glue. Cover and zashpaklyuyte repair place.