Diy screw foundation
Modern technologies somehow completely unnoticeably brought one more innovation to our life, previously available mainly for the military and geologists (lovers of hard-to-reach places), a screw foundation. At the same time, the relative simplicity and speed of creation of such a construction using special piles gradually "moves" aside the tape and columnar foundations we are used to.
But is such a foundation really a universal solution for building a solid and durable foundation for a house? In the article we will tell how to do it, we will give detailed step by step instructions,
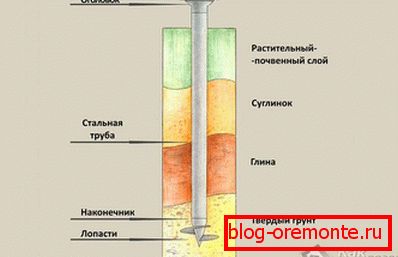
Screw pile
This is a metal pipe (treated with a special compound that slows down the corrosion process), the blade is welded to the lower pointed end. Such a pile is screwed (screwed) into the ground (like a screw into wood), practically without damaging it (only compacting it by immersing the pipe) and, therefore, absolutely not reducing its carrying capacity.
These piles are available in several types:
- with a screw blade (used on soils with poor bearing capacity) or imitation of thread cutting for the most part of the pile length (such piles are usually used in the northern regions, where permafrost is not particularly disturbed when laying the foundation for buildings and structures);
- with a different diameter of the pipe - the larger the diameter, the larger the weight of the building is able to perceive the pile (without its deformation), but you should not forget that it will not be possible to manually tighten the thicker piles (diameter of which exceeds 108 mm);
- with a different blade diameter - for less durable and water-saturated soils, the blade diameter will be larger than for dry and dense soils.
And, of course, the type and shape of the pile also depends on the manufacturer, which produces it.

Screw foundation is as follows:
- in the corners and at the intersection of the inner walls, as well as along the length of the wall of the structure, piles are screwed into the ground (the pile step varies from 1 to 3 meters);
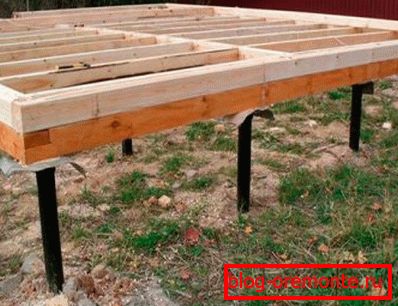
- from above all piles are cut to the same level and fastened with either metal or wooden beams to create a single rigid structure - a grillage;
- between the ground level and the bottom of the building (grillage) there is a freely ventilated space.
Advantages and disadvantages

This is a fairly simple design. However, here are waiting for you "pitfalls":
- Piles should be chosen strictly in accordance with the calculation made by the designer on the basis of hydrogeological surveys on your land plot, the depth of soil freezing and the weight of the future building and the weight of snow cover on the building in winter (otherwise you risk or overpay for piles of greater length or diameter, or get a completely unstable design, which "lead" in a year);
- depending on the ground, it is quite difficult to screw the pile into the ground manually (even if 4-5 people take part in this process);
- the presence of trees, tall shrubs, fences or other buildings in the immediate vicinity of the foundation site creates problems for manual piling;
- Not all firms do their job efficiently, observing technology.
However, the screw base has advantages:
- no bulk excavation work is required;
- can be installed on any terrain, without prior leveling;
- Piling into the ground is performed at almost any time of the year.
Basics can be arranged on any soils with the exception of rocky ones, since the rock itself is an excellent solid base (for a band or columnar one).
Preparatory work

It is quite possible to make the basis for a small building (garage, gazebo, veranda, one-story wooden frame house):
- You can weld the pile yourself using the drawings posted on the Internet, or weld the pile in a similar way (for this you will need to order a calculation and then purchase one recommended pile at the factory);
- also independently (with the help of friends) you can immerse the piles in the ground, guided by the arrangement of available drawings, and perform a grillage.
For the screw base you should not save on material. Piles should be made only from new pipes of the required thickness, while they should be thoroughly cleaned of rust and covered with a protective compound. Particular attention is paid to the quality of the welding joint at the point of attachment of the blade, since on sufficiently dense soils, the seam may burst without sustaining the load applied to the pile.
To facilitate the process of screwing in the pile in its upper part (which you then cut off with a “grinder”), you must make two holes - you will be able to thread “bars” into them with which the pile is screwed into the ground.
Plot marking

Installation should be carried out as accurately and competently as possible. The maximum permissible error in the vertical section and between the piles is no more than 2 cm. Otherwise, in the future you may be faced with the need to repair the grillage due to its sagging. And this, in turn, will lead to a violation of the load-bearing wall and even to the building skew.
The basis on the screw piles should be located so that the load on it and on the ground is distributed as evenly as possible. So take a plan of the house and break it into rectangles. On their sides and diagonals should be placed blocks of supports, taking into account the required distance between them. With all this, each pile should be in the center of all the supporting beams at home.
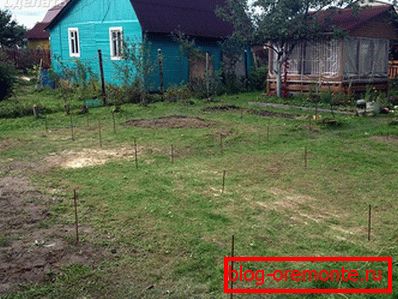
So, break the house plan into rectangles, having previously determined the size of each of them. So, you can calculate the number of piles and distribute them over the area so as to evenly distribute the load on the foundation. After the completion of the planning, transfer the markings from paper to the surface of the earth on which the house will stand on piles. In the installation points of piles hammer in pegs.
Stages of work
Works are performed in the following sequence:
- Dig the leader hole for each pile (just remove the top layer of earth with grass in this place), the depth of which should not exceed 10-15 cm, and the width should be 2-3 cm larger than the blade diameter. Some professionals advise doing without digging leader-hole, which increases the stability of the pile, but at the same time increases the efforts to screw it into the ground manually. You can not dig deep holes and just install piles in them, deepening them only a few tens of centimeters. One of the necessary conditions for high-quality immersion of screw piles is the intact soil around it, which allows the pile to transfer the load from the structure not only to the lower end and the blade, but also to its entire lateral surface.
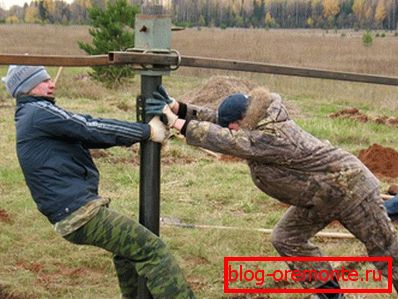
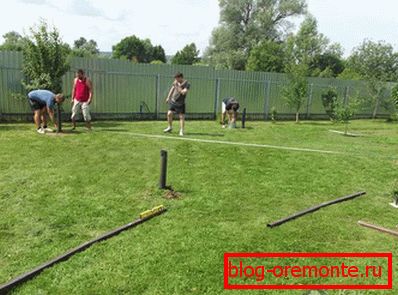
- Install the pile and together with the helpers with the help of a special rod screw it into the ground, constantly checking the verticality of its position. The pile should sink into the ground below the level of soil freezing in winter.
- Align the top of all the piles under one level (mark it on each pile with the help of a level), cut off the excess with a "grinder".
- Pour concrete into the pile (this will increase its strength and reduce the rate of metal corrosion).
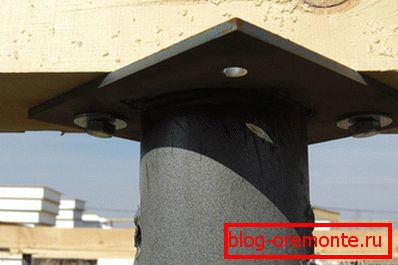
- Weld a metal plate (not less than 8-10 mm thick) protruding beyond the pile boundary several centimeters from all sides to the top of each pile.
- Perform a grillage by attaching the beams to the plate using welding or bolts.
Video
Learn all about arranging a screw foundation by watching the following video: