Diy polymer floors
Durability and wear resistance, aesthetics - these are just a few of the requirements for a floor device. Thanks to modern building technologies and materials, an extensive selection of floor finishes is available. Along with the usual and popular laminate flooring, tiles, linoleum and parquet, a rather unusual way to finish the floor - self-leveling polymer floors entered the dwellings. Polymer floors can be arranged on a different basis: cement screed, durable chipboard, plywood and other wooden materials on a solid base, metal, after applying a special primer.
In the article we will talk about how to make self-leveling polymer floors with your own hands in the apartment, as well as in the garage.
Types of polymer bases
The basis of the synthetic coating used in homes, apartments and offices is one of the polymers.
Epoxy resin - together with additional components creates a durable, resistant to abrasion and chemical attack coating.

Polyurethane - a smooth, resilient floor is able to withstand any deformation.

Methyl methacrylate floors are created by mixing acrylic resins and hardeners. They are highly resistant to ultraviolet and moisture resistance, using dyes to create unique color combinations. Hardening of the floor takes 2 hours, and the service life is up to 40 years. With all the positive characteristics of this type of self-leveling floor is rarely used, the reason for this was the high cost and harmful fumes occurring in the process of pouring.
Features and Benefits:
- Hygiene and ease of care.
- Resistance to mechanical stress.
- Seamless technology fill.
- Ability to perform polymer floors independently.
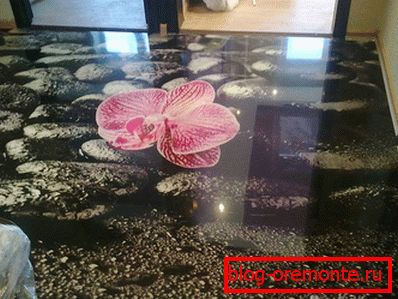
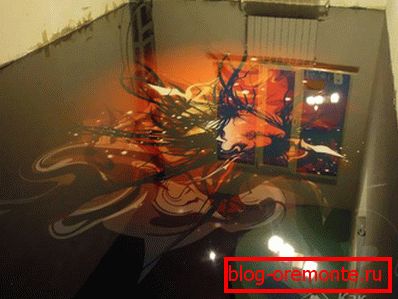
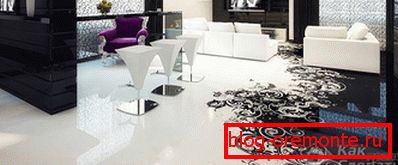
- A variety of colors.
- Immunity to chemical reagents.
- High curing speed for self-leveling floor reduces repair time.
- Durable use.
Foundation preparation
Basic requirements for the preparation of the base - the correction of defects and surface cleaning. If there is an old coating, it must be completely removed. The entire area of the subfloor is thoroughly cleaned of debris and dust (you should use a vacuum cleaner). After cleaning the existing defects become well visible. The existing cracks and cracks are puttied, the protrusions go astray. The best method of surface treatment is the use of a grinder. If the polymer floor has to be poured onto ceramic tiles, its surface is deprived of smoothness with sandpaper or emery paper.
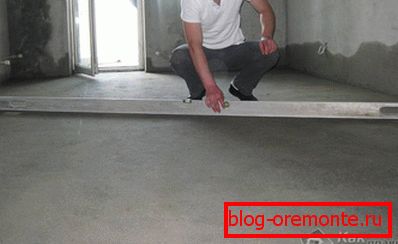
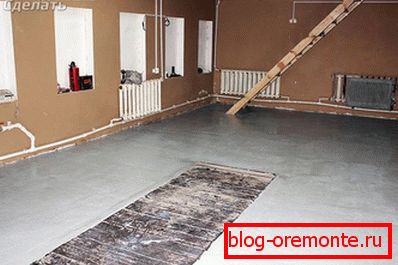
It is necessary to measure the horizontal level of the base: if its difference does not exceed 4 mm, then it is possible to start the production of a polymeric floor. With significant fluctuations in the level of the surface will have to level the sand-cement screed and to postpone further work until it dries.
In the overwhelming majority of cases, poorly prepared foundation, which caused the detachment, is to blame for the poor-quality filling of the self-leveling floor.
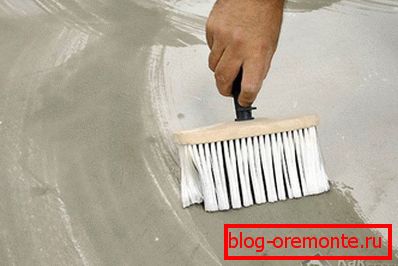
After drying, the screed requires thorough priming, which increases the adhesion between the base and the floor, and also reduces the absorption of the polymer mixture, and, consequently, the consumption of expensive composition. It is better to apply the primer in two layers, taking a break of at least 4 hours between them. The composition is applied with a roller. That the liquid mix of a bulk floor did not leak near a wall, this site is glued by a damper tape. Also along the perimeter of the room set wooden slats that will save space for the temperature of the seam.
Preparation of the solution
For work you will need:
- Drill with a nozzle.
- Wide trowel.
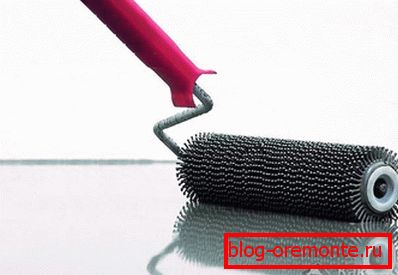
- The roller with the needle insert on the long handle.
- Big bucket.

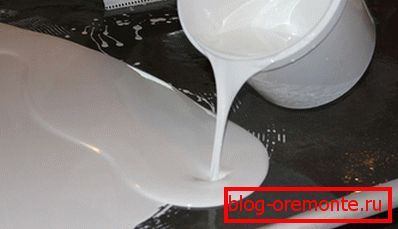
It's time to prepare a working solution. This process is described in the instructions on the packaging, to obtain an excellent result should strictly follow the recommendations of the manufacturer. To create a polymeric floor you need two components, one of which is a hardener. Mixing occurs in high capacity. Heat is generated during the reaction, so it is recommended to lower the tank in advance, where it is mixed into the tank with cold water in order to slow down the reaction somewhat.
Beginners can mix the composition in a bucket, alternately filling two components. The nozzle with spatulas is selected for the drill, and during operation low mixer speed is used. The mixing process takes about two minutes.
Installation
Filling of the floor should occur at a temperature not lower than + 10 ° C, at a lower temperature value, chemical processes will slow down, and the polymer will spread badly on the surface of the base. High temperatures will cause the components to cure too quickly and prevent the fill from being completed properly.
In the process of curing the floor should not be exposed to drafts and direct sunlight. The top layer of the polymer coating should not dry before the rest of the mass, otherwise there will be cracks.
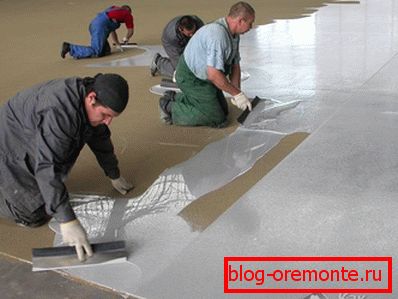
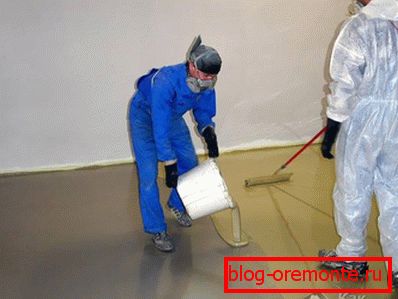
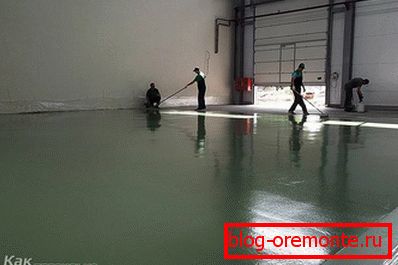
The liquid polymer is poured in a corner remote from the entrance and helps the wooden rover spread over the surface. The work is carried out in strips, without stopping, the composition quickly hardens in the tank. It is good to connect an assistant to this process, because it will be difficult for one person without experience to be in time. In the process of pouring, the solution is rolled by a needle roller, which removes air bubbles. Work ends at the entrance to the room. You should not walk in a fresh composition, otherwise there will be traces of shoes.
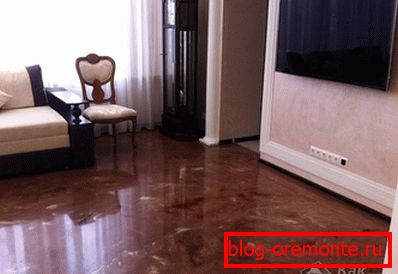
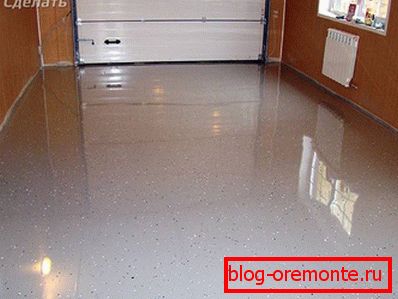
After the composition has dried out (the process, depending on the polymer, takes several hours or days) the wooden strips are removed around the perimeter, and the seams are filled with sealant and closed with a plinth. The finishing layer of the self-leveling floor is the coating with two layers of varnish, it gives the surface gloss and smoothness, and also increases wear resistance. Using different types of varnish: matte, colorless, glossy or color - you can achieve the desired effect.
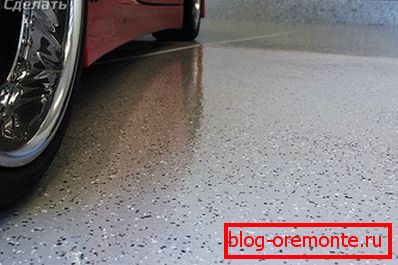
Bulk floor in the garage
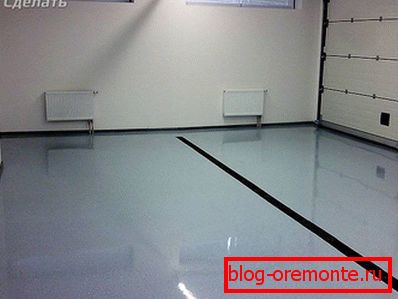
Self-leveling floors - it is quite expensive, therefore, for the arrangement of garages used less frequently. However, the cost of this technique pays off with high quality finished floor covering.
Benefits
Among some advantages of self-leveling floors it is worth noting:
- Resistance to aggressive substances, which are many in the garage.
- Огнеупорность.
- Resists frost, abrasion and vibration.
- Easy to care.
- Bulk floors do not dust.
- Long service life - up to 50 years.
- Beautiful appearance.
- The material does not slip.
- The coating can be applied markup.
Among this large number of advantages, there is one drawback of coverage - a price that may not be affordable for everyone.
Species
Often, self-leveling floors used for garages call all protective polymer coatings:
- thin polymer coatings;
- concrete impregnation;
- thick polymer coating with sand.
The most economical option for self-leveling floor - polyurethane impregnation. This is one of the most reliable types of garage coatings. It looks like lacquered concrete. For a more attractive flooring, you can apply color markings on it.
Technology

The first thing you can do is sweep the rough surface. If the floor was wooden, then you need to dismantle it along with the lags. Having cleared a basis of garbage and dust, you will be able to estimate quality of the basis of a floor. If there are cracks and chips on it, then this is a bad signal, indicating the destruction of the material. All damage to the screed must be repaired.
In some cases, before pouring the self-leveling floor in the garage, you need to perform a cement screed. It is advisable, if the floor is strongly broken, there are large differences in height or in the absence of a screed as such.
If you still need to make a screed, then pay special attention to the arrangement of waterproofing. In addition, to improve the strength characteristics of the floor in the garage, which is very important in this room, make reinforcement. To do this, you can use a galvanized mesh laid in solution.
After the screed has dried or the base of the floor has been cleaned, it must be primed. For what?
- The primer will improve the strength of the base.
- This ensures that the screed adheres to the polymer floor.
- Surface protection against the appearance / reproduction of microorganisms.
Apply a damper tape around the garage perimeter, which will serve as a cushioning layer. This is done to the height of the polymer flooring.
Now you need to install beacons / guides. If you have a small garage, you can use angles, pipes or metal profiles as guides. Lay them in such a way that the upper edges of the guides are in the same plane. For these purposes, you can use long screws. Divide the floor into square / rectangular areas. Screw the screws into the vertices of the rectangles / squares. To do this, you first need to ream the tie and insert dowels into the holes. Lift the lighthouse as needed. Do this with a solution.
Now you should prepare the polymer mixture according to the instructions provided by the manufacturer. Stir it thoroughly. To do this, you can use an electric drill with a special nozzle mixer. It is important that the drill works at low speed, otherwise many air bubbles will form in the mixture. And this will adversely affect the quality of the polymer floor.
Filling polymer is quick because it dries quickly. Therefore, the best way to do this work is to prepare the mixture based on a rectangle / square exposed by the beacons — pour it and level it.
At the end of the casting, you need to roll the mass with a studded roller. Thus, the air which has got to polymer will be removed and surplus of moisture. It is possible to operate a bulk floor only its full drying. The time it takes to do this depends on the temperature in the garage.
It’s not worth drying the floor artificially. When the room is heated, a crust forms on the polymer. In this case, the thickness of the self-leveling floor will remain viscous. As a result, the floor in the garage under the weight of the car over time simply prosyad.
Work on the device of a polymeric floor has a lot of difficulties and nuances, but it is quite accessible to be done on its own. In compliance with the technology will help the training video.
Video
The process of pouring the self-leveling floor can be viewed in the video below:
A photo