Diy plastic window repair
It would seem that plastic windows entered our life quite recently, but as it turned out, they do not serve people forever (or at least a couple of decades) without repair. And since it is quite expensive to call the master due to a small problem (the window does not close or the mechanism is broken), many owners prefer to repair plastic windows, so to speak, at home.
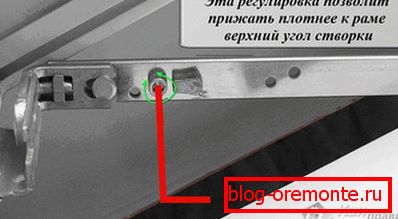
Fittings may vary depending on the brand of manufacturer. Now we will consider one of the options for repairing plastic windows, when you see a metal “tongue” located at a small angle at the end of the open sash of your window.
Slack shutter
The most common situation that every fifth person faces is slackening of the sash, as a result of which it begins to touch the bottom of the window sash. To eliminate this problem you will need a hexagon of a suitable size. We start repair:
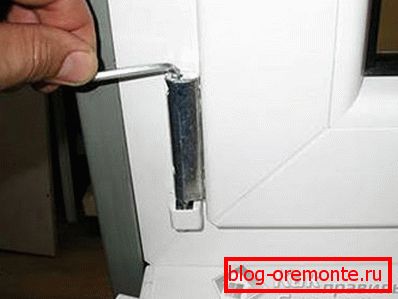 Open the sagging sash.
- At the end of the window (where the upper loop) we find the hole for the hexagon.
- We insert the hexagon into this hole and turn on ourselves (by a quarter or a half turn) - this movement will slightly raise the outer edge of the flap.
- We close and check whether it has ceased to cling to the lower edge of the window. If there is still a sagging, repeat the process (that is, turn the hexagon another half turn).
- Check the result.
- If the window still does not close easily enough, without contacting the lower part, you should raise it a little more, but in the loop.
- Remove the protective plastic cap from the bottom hinge (with the sash closed).
- We insert a hexagon in a loop from above (strictly vertically).
- Turn the hexagon clockwise (half a turn or a whole turn).
- Check the purity of the closing. If the bottom edge still clings, repeat the last action again.
If the sash, when you try to close it, touches the central vertical part of the window sash:
- Open the window.
- At the bottom of the lower loop of the window sash (look from the end) we find the hole for the hexagon.
- Turn the hexagon in one direction or the other, thus shifting the bottom of the sash to the left or right to the desired position.
- If necessary, the upper part is adjusted in the same way (through the upper loop).
Loose fit
The elimination of a not very tight fit of the sash also applies to the repair of plastic windows, which is easy to do yourself:
 Open the window.
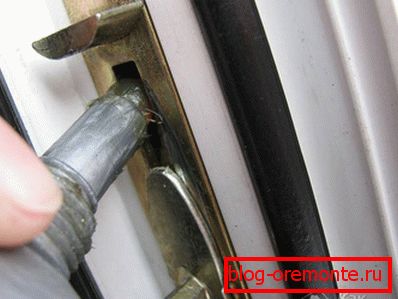
- Find “clamps” at the vertical end - metal protrusions of a slightly oval shape.
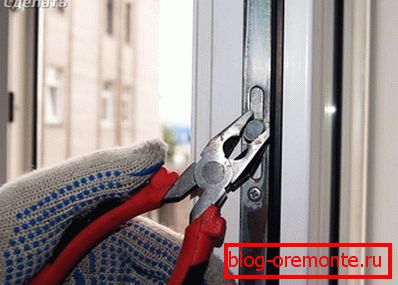
- Take the pliers and gently turn the clamp:
- if you put it horizontally, it will be as tight as possible,
- the vertical position of the "oval" - minimally snug fit.
You can also adjust the degree of fit of the sash with a hexagon and a T-shaped clamp located on the window rack.
If it blows in place of the lower loop canopy:
- Remove the plastic cap from the loop (with the window closed).
- At the bottom of the loop, find a small hole under the "asterisk" (labeled "T").
- Take the appropriate nozzle on the screwdriver, insert it into the hole and turn it clockwise slightly (this will press the sash against the cover).
Replacing the handle
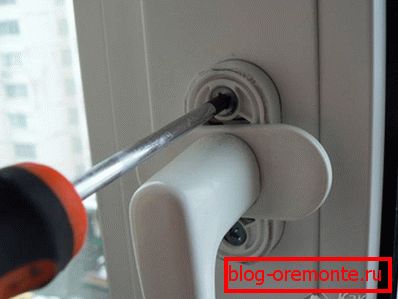
- Gently rotate the decorative plate at the base (you will see two bolts below it).
- Remove the bolts, remove the old handle and put a new one in its place.
The handle does not turn

The reason that the handle stops turning when the window is closed or you have to apply a certain force to perform this action is the displacement of the turning “tongue” located at the end of the sash relative to its “response” (at the window cover). In this case, it is necessary to adjust the position (the methods of adjustment were described above) so that the “tongue” rests on its “response” when the window is closed.
If the handle does not turn when the sash is open, then you just need to press a finger on the "tongue", pressing it in a vertical position.
Double glazing replacement
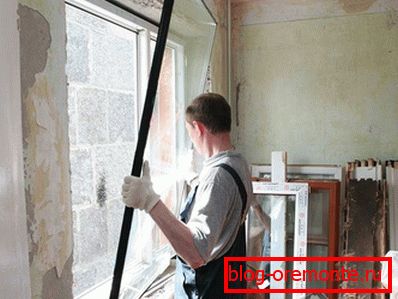
But in the case when it is necessary to replace the glass unit, and especially if your window is at a sufficient height from the ground level (on the second or upper floors of a multi-storey building), it is not recommended to carry out repairs yourself. This is exactly the situation when you should contact the service center and entrust the solution of the problem to professionals.
The leaf does not close

If you have a wedge in the open position, do not be alarmed. As a rule, the cause of this is the drawdown of the blocker. It is installed on the window fittings in order to prevent the breakage of the window. When you turn the handle in the tilt or tilt or tilt position, the locking device works, so that the handle does not turn. But due to failures in the operation of this device, the window may not close or open. Before you disable the locking mechanism, you must determine the brand of fittings.
AUBI
To disable the locking mechanism you need to set the sash in a vertical position. If it is in a tilt-and-turn position, then the locking mechanism installed on the upper hinge also will not allow turning the handle. The metal plate with a spring is located in the area of the handle. Press it with your fingers to the seal, and then turn it.
GU, Roto, Maco and Winkhaus
Under the handle there is a metal plate. It sticks out at an angle to the frame. To turn the handle, push the plate, after which it will be in the position parallel to the leaf.
If the window is not closed, then check whether the locking mechanism is in contact with the counter element located on the frame.
With thermal expansion of window frames, the blocker may slip. To remove a malfunction, you should find a counter element on the frame, for which, when functioning correctly, a blocking mechanism clings. Remove the screws that secure this item. Place a plastic lining under it. You can also use a lining of any other material. And then tighten the screws. Thus, the lock will again engage with the counter element.
Adjusting the operation of the clamping mechanism

Over time, the sealing gum on the sash loses volume, as a result of which gaps form in the windows, leading to heat loss and deterioration of sound insulation in the house / apartment. It may seem that the best solution to the problem is to replace the seal. But in fact, the downforce can be increased without these actions.
Change the pressure of the clamping mechanism twice a year. This is due to the low and high temperatures in the cold / warm season. Thus, the voltage in the hardware will decrease, which will increase the operating life of the rubber gasket.
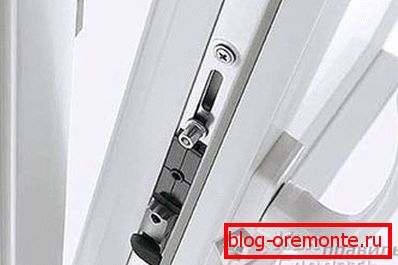
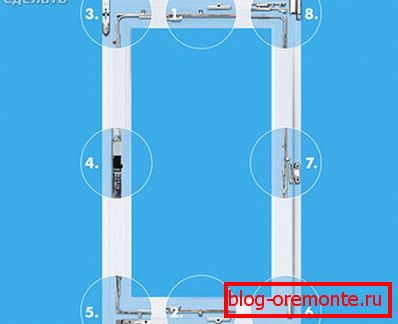
Special cylinders are installed at the end of the sash. They are located in the slots of the metal plugs. They are called eccentrics or trunnions. Mounted on the frame are reciprocal elements / hooks, which include eccentrics / pins in the process of turning the knob, as a result of which the shutter is pressed tightly against the frame. The adjustment of the force of the clamping mechanism is carried out by moving the response hooks or by scrolling the eccentrics / trunnions.
To adjust the sash closing, turn the protruding part of the trunnion to the inside of the window. So, there is a weakening of the clamping mechanism. Opposite actions will increase this action.
The way of setting the eccentric may differ depending on the manufacturer of fittings:
- There is a slot in the trunnion that can be turned with a flat screwdriver.
- The eccentric is rolled with pliers from the end surface. If you have enough strength, you can do it by hand.
Adjustment should be carried out carefully so as not to damage the axle attachment mechanism.
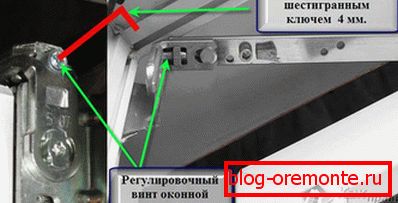
If the cylinders on the face cannot be adjusted, then change the position of the counterpart / hook. It is mounted on two bolts with a hex key. If you loosen the bolts, you can slightly move the hook to the side of the room, which will reduce the pressure, or to the side of the street, which will strengthen it.

After loosening / strengthening the clamping device, you can go to the sheds. Consider windows with the fanlight system that allows you to open a window in the airing mode. In this case, in order to adjust the clamp, you need to remove the plastic cap from the lower canopy. On the shed you will see two hex bolts and groped for one hidden bolt. With their help, you can change the position of the sash in relation to the frame.
To adjust the frame clamp you will need to adjust the bolt extending perpendicular to the window plane. It is better to configure it with the window closed. To strengthen the clamping mechanism - roll it clockwise and vice versa.
If the upper part is not fixed on the canopy, but on the structure - scissors, then to access the adjusting bolts you need to open it.
On the side of the side of the handle there is a lever / clip lock. Click on it and in parallel scroll the handle, having established it in the mode of airing. The sash will be held on the lower shed and scissor mechanism, because it will come out of the groove by the upper corner. This will allow you to get to the head, so you adjust the pressure of the upper part. In the usual position, the mechanism comes to an end. It is located on the underside of the lever that holds the sash. Turn the bolt slightly. The setting is the same as the pin adjustment. This sequence is described above.