Distributing pipes in the bathroom with their own hands
If it seems to you that distributing pipes in the bathroom is too complicated a process, then you are mistaken. Modern technologies have turned it into a system of fairly simple and accessible to all actions, provided that you have the desire to do everything yourself.
Engineering Communication
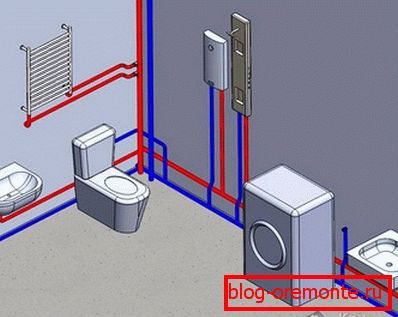
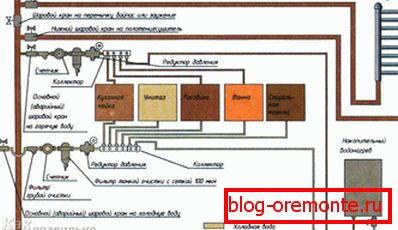
For starters, you should decide? What kind of sanitary appliances and communications you will need in the bathroom (or a combined bathroom):
- bath or shower with tray - it is necessary to connect hot and cold water and sewage;
- sink - cold and hot water plus sewage;
- toilet - cold water and sewage;
- washing machine-cold water and sewage.
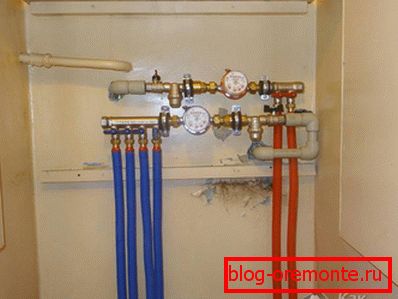
Now calculate the required number of valves that block the water:
- one common on hot water is a must
- one common on cold water is a must
- on the cold water supply to the washing machine - necessarily,
- on the cold water supply to the toilet - if desired (in case the tank starts to pass water and you don’t want to shut off the entire system).
Pipe layout
Having decided on the number of sanitary devices that you are going to connect to the water supply and sewage systems, you should first purchase them. Decide where and what exactly will be located, noting where they are located on the floor (so that the plumber does not interfere, it is better to remove it from the bathroom after that, if possible).
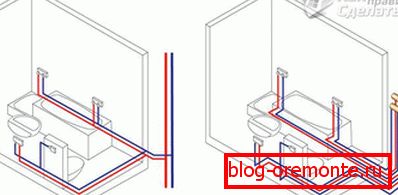
Then take a piece of paper and draw a wiring diagram on it. Try to follow the following principles:
- undesirable intersections
- both the water supply system and the sewage system should be laid as close as possible to each other, so that later they can be closed with a box,
- After installing the plumbing in your place, you should get to the connections with flexible hoses quite easily.
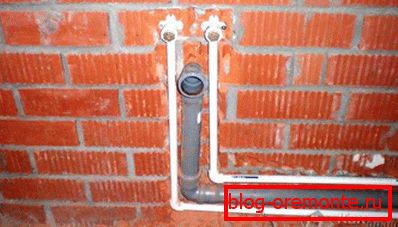
Try not to complicate the installation of pipes in the bathroom. Everything should be as simple as possible:
- the main pipes are laid on the bottom above the floor;
- water pipes run from them through tees perpendicularly upwards;
- sewers may not have a vertical part and represent only a "tee", which includes a flexible hose.
Water pipes

To build a system of polypropylene water pipes, you will need a special tool, commonly called "soldering iron". There is no point in buying it for one-time work, it is much easier to rent it for a couple of days (this service is usually provided by specialized stores). It is quite simple to work with him, but one should not forget that he is very hot, so be careful and be sure to read the instructions if you use it for the first time. You may even need the first time an assistant who will hold the soldering iron while you heat the pipes and fittings, and then put it aside so that you will not burn yourself.

To connect the pipes to each other, as well as turn them at the right angle, you will need PVC fittings (they are sold in the same specialized stores). Pick them exactly the diameter of the pipe. They are not too expensive, so take them with a reserve of 1-2 pieces in case you can not solder them exactly on the first attempt.
Connections made using the "soldering iron" are one-piece, and to redo them, you have to cut off the defective part. If the length is less than necessary, increase it using a “clutch”.

To complete the routing, you will need to connect to the “American” end releases - these are fittings, on the one hand, into which the pipe is soldered, and on the other, a flexible hose is connected through the threads.
Wiring in the bathroom can be done in two ways:
- Moving from the extreme sanitary device in the direction of the main water riser.
- Soldering the pipes, moving from the riser to the plumbing fixtures.
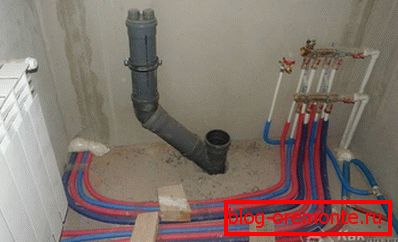
Sewer pipes
But when assembling the sewer pipes, you do not need a “soldering iron” - they are simply inserted one into the other (independently or with the help of fittings). Assembling the sewer system is quite easy and simple, moreover, it is always possible to disassemble and redo everything.
When performing the wiring in the bathroom, the main thing to remember are three basic principles:
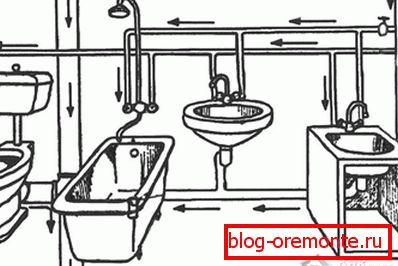
- sewer pipes should have a slope from the sanitary device to the main riser (at least 3 centimeters in height per meter of length);
- pipes leading from the bath, shower, washing machine and sink should have a diameter of 50 mm; and sewage, going from the toilet - 110 mm;
- Sewer pipes should be connected to each other in such a way that a smaller diameter is inserted into a fitting or a pipe of a larger diameter, and not vice versa.
The sewer pipe layout should always be as simple as possible. Try to connect all the plumbing equipment in series so that “intersections” do not occur, in which, while simultaneously draining water from two devices, a “jam” can occur.
If you have any doubts that you can easily clean the sewage through the drain holes in the bath or sink, install an additional fitting tee on the sewer pipe, closing its upper hole with a special stopper. Later it is through him that you will clean the pipes. After you close the box, do not forget to leave them access for maintenance.
When connecting the sewer pipes to each other, be sure to check that there are rubber gaskets in all joints (without them, the drains will leak out and an unpleasant smell will spread).
Pipes should be inserted one into the other (or into the fitting) to the maximum possible depth.
To make the slope permanent, attach them to the walls with special clamps, thus fixing each section.
Video
For more details on how to do the plumbing layout, see below:
A photo