Closed gazebo do it yourself
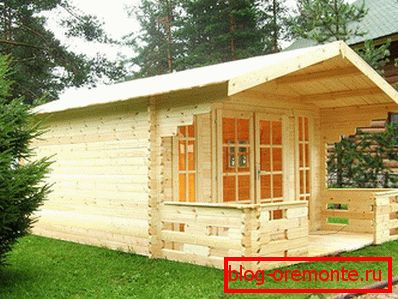
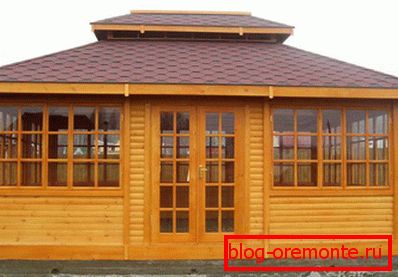
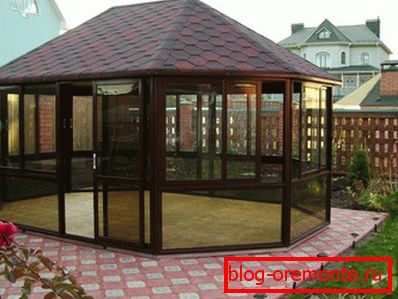
Our time is filled with vanity, noise and other worries. Therefore, the construction of a cozy and quiet corner, where you can get away from problems and where you can just relax from the daily routine, is gaining much popularity. This place can be called a gazebo, which not only decorates your site, but is also a great place where you can have fun and have a great time with your family or friends. The simplest option for the construction of such a building is an open gazebo. Build it quickly and it does not make much effort. However, it has its drawbacks. Such a room is not protected from the weather and cold, so in the winter it is simply impossible to use a gazebo. Another thing - a gazebo closed, which is completely fenced from the external environment. It has a floor, walls, roof and is fully glazed. The construction of such an arbor will be more expensive and you need to build it longer, but your efforts will not be in vain, because you can use it all year round. Such a closed gazebo will serve you for a long time and will become a reliable haven.
Some features and benefits
Despite the fact that building a closed gazebo with your own hands will be a little longer and more expensive than the usual one, it has many advantages. If you want to build a gazebo for home or for giving, you should know its advantages and features. Here are some of them:
- Design.
- Convenience.
- Communications.
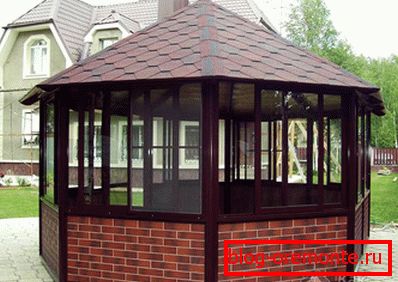
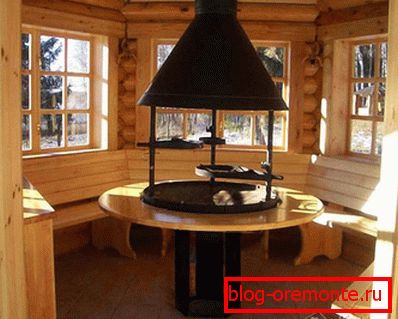
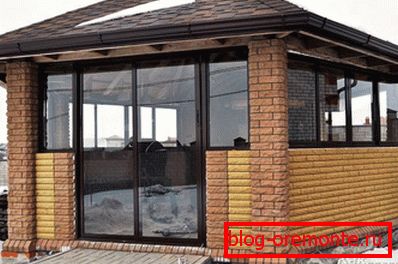
The open gazebo includes only bearing supports and the roof, while in the closed gazebo there are necessarily wall panels that are sheathed with glass. As walls can be used wood, forged products, as well as brick construction. It turns out that the building is completely fenced from external influence, therefore neither rain, nor strong wind, nor snow or leaves and other debris will get inside. Such an arbor can be equipped with beautiful furniture, paintings, mirrors, lamps and even a TV. It is enough just to warm the building, and it is ready for the cold period. Thus, for you the season of kebabs can last for a very long time. Moreover, the construction of such an arbor can be done with a barbecue or barbecue. And this is not the limit, if you have enough imagination, you can do everything you can think of, if, of course, you have the means to do so.
As you can see, a closed gazebo differs in many ways from an open one, and these differences only endow such a structure with its advantages. So, if you intend to build such a multifunctional room on your plot, let's consider what material it can be built from and what are the features of each of them.
What materials are used
The first question that arises in any construction of a house, shed, gazebo, or any other construction - from which to build? Building material is the foundation of the whole building, so that the construction will be long, reliable and durable, you need to choose the right material. The gazebo is easier because it is much smaller than a house or cottage, however, it is important to choose the right material and know which one is better for each individual situation.
The most common materials for the construction of closed gazebos include:
- brick;
- tree;
- metal.
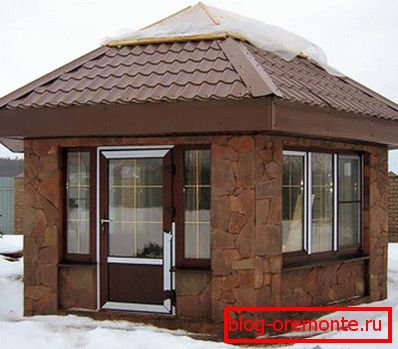
In some cases, to make such a winter gazebo, walls are built of sandstone or wild stone. But they do it only when it is required by the general concept of country design, depending on the design.
But which material is better to choose, because all these options are good in their own way? Let's find out how they differ from each other, and what material is right for you.
Guaranteed strength and durability

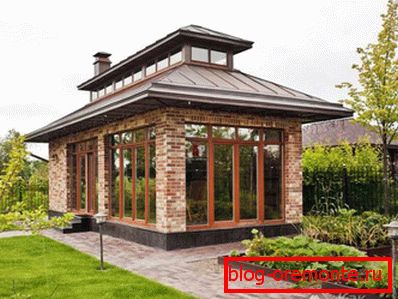
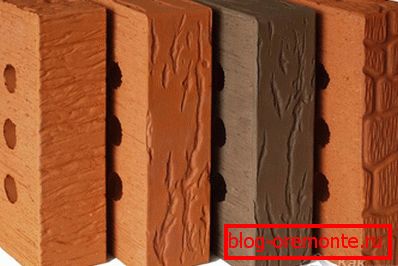
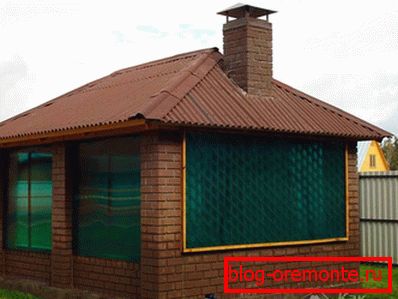
Brick is a classic and traditional material that has been used for many centuries. Architectural styles such as Rococo, Baroque, Gothic or Empire, which were widespread in the eighteenth and nineteenth centuries, involve the use of solid, sturdy and durable brick structures. If the walls of your closed arbor will be made of brick, then they will stand for a very long time.

Depending on the overall landscape design of your manor, you can use ordinary red brick or silicate, which have different colors. But note that materials from silicate will retain heat inside a lot less than from natural red bricks.
In the case when you are not going to use the gazebo often in the winter, or your climate is warm enough, you can build a gazebo of silicate brick by plastering the walls. This option will significantly reduce all the costs of the construction of the gazebo. As a result, it can turn out beautiful and effective.
If we talk about the advantages of this material over the others, then we can note the following advantages:
- durability and strength;
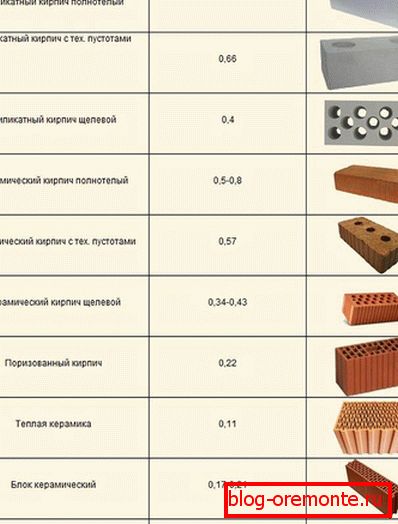
- low thermal conductivity, which makes the room warm;
- the ability to build various architectural forms, depending on the design;
- many options for internal and external decoration of the room;
- the ability to combine various materials, for example, brick with wood, brick with stone;
- high resistance to moisture and other adverse natural influences, such as snow, wind, rain and frost;
- environmental friendliness of the future construction, as sand is made from natural materials such as sand, clay and water;
- bricks are not rotting, and due to the structure of the material it can "breathe", passing air;
- high frost resistance - the ability of a material to carry freezing and thawing in a water-saturated state;
- high fire resistance, which is very important, especially when it is planned to build a brazier or barbecue in the gazebo;
- good noise insulation, thanks to which it will be quiet and calm in the gazebo;
- universality of application and aesthetics of the material, allowing to make any design.
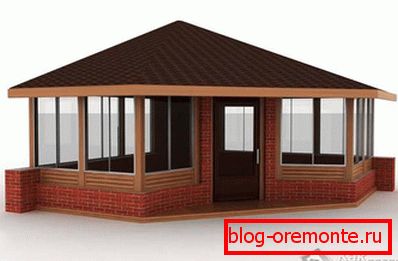
Depending on the desire, the architecture and the form of the building can be varied. The most common options are square, hexagon and rhombus.
But, like any material, brick has its drawbacks. Of the minuses can be noted:
- the high cost of the whole building, as they say, you have to pay for the quality. Yet, despite the high price, this is offset by durability, reliability and durability;
- Since a brick building has a large mass, a brick building requires a reliable and powerful monolithic or strip foundation, which will also affect the cost of the project;
- the complexity of the work. If you compare, then make the same gazebo of wood will be much easier, because not everyone can perform brickwork. However, if you follow the instructions, you can do all the work, even without skills in the work.
If you do everything right - to build walls, adhering to technology, then such a gazebo can be used not just as a place of rest with family and friends, but even as a full-fledged place for living or receiving guests.
Environmental friendliness and natural nobility
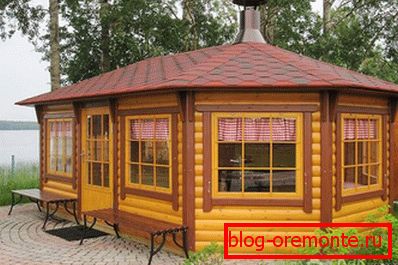
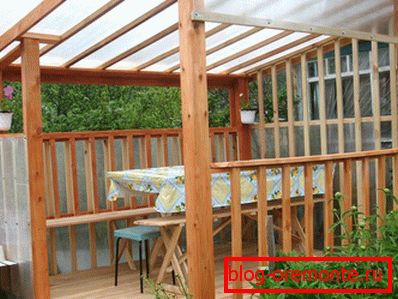
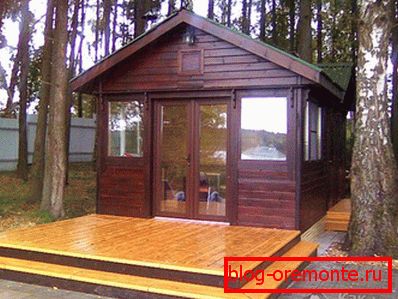
Nothing can compare with the charm and naturalness of such material as wood. Nature itself gave it to us, so the material is fairly affordable and inexpensive. The presence of various textures, shades, as well as the healing aroma of wood make the gazebo an ideal place to relax, where you can spend many hours. Wood constructions will fit perfectly into the overall picture of your site, especially if it is made in the style of country or Scandinavian style.
To make a tree arbor, use:
- Planed timber.
- Thin slats for plating.
- Glued laminated timber.
- Round logs.
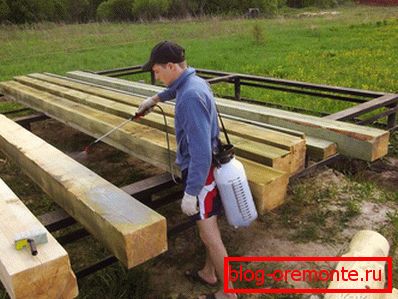
When a grill or barbecue is provided in the construction project, it is important to create enhanced fire safety conditions, as well as to take care of setting up a safe platform for installing a barbecue or barbecue. Moreover, it is important to treat the wood itself with special anti-decay agents and increase resistance to fire. Wood is the most affordable material that anyone can afford. It is easy to work with wood and process it, which will help to realize any of your fantasies. With the material prepared in advance, a tree arbor can be built in just a few days without much effort. The design itself will be simple and easy.
Among the other advantages of such an arbor are:
- magnificent natural appearance;
- short time to complete all construction works;
- low weight of the finished structure, which will save money on the construction of the foundation, as it can be lightened;
- ecological purity of the material;
- high frost resistance;
- low thermal conductivity, which also contributes to the preservation of heat;
- the healing properties of individual wood species;
- low price.
But, compared to brick, wood has several disadvantages:
- it is subject to decay and absorbs moisture well, which reduces the life of the building, so you have to handle the product with special protective agents;
- with frequent adverse weather conditions, the design can be easily deformed;
- low refractoriness;
- short for the life of the building.
Wood is a great material, but it requires special handling and protection. If you live in a rainy region where a large amount of precipitation falls, it is better to think about building a gazebo of brick or metal.
Metal use
Metal - durable and not afraid of the vagaries of weather material. The metal gazebo can be made of ordinary shaped pipes, which can be bought at affordable prices, or from durable forged elements. The main advantage of a metal arbor is that it can be installed on any base, even on the ground. The design will have exceptional durability and fire safety.
Only it should be noted that under the sun the metal will be very hot, transferring heat inside the room. Therefore, it is important to provide good ventilation inside. Moreover, you have to carefully care for the gazebo to protect the metal from corrosion.
Which material for the work to choose, decide for yourself. It all depends on the region in which you live, the purposes for which the gazebo will be built, the availability of funds and personal considerations. Having made a choice, you can begin to address the main issue of how to make a closed gazebo on your own. But before you do this, you must first prepare a little.
Project development

Any builder knows that the main task before starting all work is to plan everything carefully. Preparation is an important part, so it can not be neglected. If all the details are thought out in advance, it is possible not only to significantly reduce all costs, but also to simplify your task during construction, as well as speed it up.
First, you need to make drawings of your future gazebo, to know how it will look, and what will be the design. Transfer all your fantasies to paper, taking into account all desired sizes. If designing is not your forte, or you cannot decide on a design, use the help of the world wide web, where everything has been done for you for a long time. There you can find many ready-made drawings and choose the one that you like the most.
Also at the design stage, you need to decide on such questions:
- Selection and preparation of material from which the arbor will be built.
- View of the foundation to be arranged. Heavy closed gazebos need to be built on a solid monolithic, belt or slab foundation.
- What type of roof is ideal for your chosen arbor.
- The choice of architecture built, as it can be different, it is better to choose one that would be harmoniously combined with the overall design of the dacha or house.
- If the construction of a barbecue or barbecue is planned, it is necessary to plan in advance the type, placement and construction.
- Each closed gazebo with a barbecue or barbecue should be equipped with a good ventilation system and chimney, as it is clearly spelled out in the fire safety regulations.
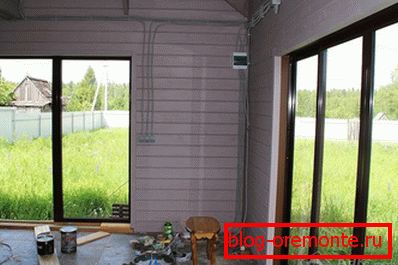
- In the future, to eliminate various misunderstandings when installing lighting fixtures and installing a washbasin, it is important to design electrical and water supplies if you want to have communications in the gazebo.
- At the design stage, it is important to think over the glazing variant and the design of the windows.
Pre-select a place on the site where your resting place will be located. You should not build a gazebo in the immediate vicinity of your home, but do not place it on the border with the area of your neighbors, especially if they are unfriendly, so as not to annoy them and not spoil the mood for yourself.
Designs with a large area - 20 m2 and more, it is better to install in open areas, and small buildings - up to 5 m2will look great in a picturesque, shaded corner of your garden.
Adhering to all these points, you will plan and plan everything in advance, then your further work will bring only pleasure, and it can be done quickly and efficiently. Next we look at how you can build the two most popular versions of closed pavilions. Using these instructions, you can build any other arbor, since the principle of operation will be the same.
Step-by-step brick construction instructions
Brick gazebo is a reliable and durable building, and if you make it right, then you can not think that it will soon collapse or rot. The difference between this design and the others is that it has the greatest weight, so it is important to make a reliable basis for it. To build brick walls, you need some knowledge about the technology of its laying. But about all this you will learn further in the details. For convenience, all the work can be divided into stages, following which you can build a good gazebo.
Stage 1: Foundation Building
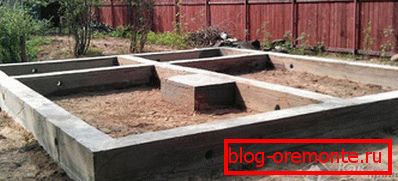
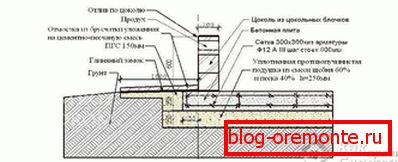
For a heavy brick gazebo, you need to make a quality base that can withstand the entire load and does not sag over time. It is best to make a strip or monolithic foundation. Ribbon foundation repeats the location of all bearing walls.
- To do this, first prepare a place: clean everything from debris, remove the roots of trees and everything that will interfere, and also remove the top layer of fertile soil.
- Then, focusing on the drawings, mark the area with pegs and rope. All you need to check the level and tape measure to match the size.
- Now dig a trench, below the depth of soil freezing. Also, the type of soil and the weight of the building itself will affect the depth of the foundation. When the soil is loose and viscous, the foundation must be deepened or made slab.
- On the leveled and tamped bottom of the trench you need to make a pillow of sand and rubble. Pour the first layer of wet sand (5-10 cm), tamp it down. The second layer will consist of rubble, which is also filled with a layer of 5–10 cm and compacted. Fill all with water to seal the pillow.
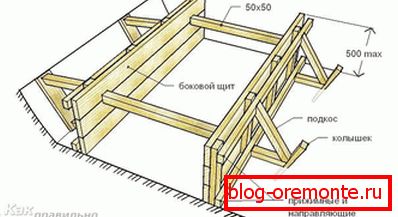 Take the old boards or plywood and make the formwork on top of the trench. For reliability, the foundation can be reinforced. To do this, tie a 10 mm thick mesh of reinforcement rods and fix it below the formwork.
- Order or mix concrete solution yourself and fill the foundation. It is important to do this evenly, in several layers, to walk with a vibrator, thereby expelling air from concrete. Level the surface with a trowel, and leave the concrete until fully cured, covering it with plastic wrap to protect it from possible precipitation. On the 10th day, the formwork can be removed, and in a month the concrete will completely harden and will be strong enough.
If the gazebo is at some elevation from the ground, then you need to take care of the construction of steps.

If you want to make a solid foundation that looks like a solid platform, then the sequence of works is similar.
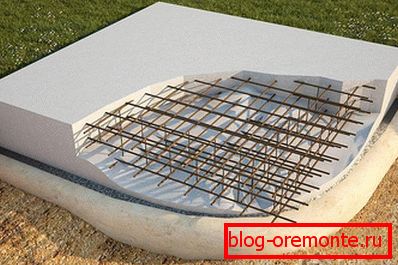
- Site preparation. It is cleared of all excess and removed the top layer of soil. The thickness of the monolithic slab can vary from 15 to 40 cm.
- Digging of the pit based on the size, depending on the type of soil and the mass of the building. Sand and gravel fall to the bottom, everything is tamped and leveled to a level so that the foundation does not deform or collapse.
- Installation of formwork. Sometimes, instead of pouring concrete, they simply put in place monolithic slabs, but for this you will have to hire special equipment, since you cannot lift such a slab yourself. To do everything yourself at the edges of the pit, install solid formwork. It must be tough and well fortified.
- Reinforcement. Steel wire knit special mesh of the rods of fittings O14 or 16 mm cross-wise, in two rows and settled on the prepared base.
- Pouring the foundation. The solution is mixed and everything is poured with high-quality concrete and leveled by level.
When the plan provides for water supply, it is important to provide a sewage system along which water will flow into the cesspool. It is better to lay pipes at the stage before pouring in order not to make holes in the ready-made concrete.
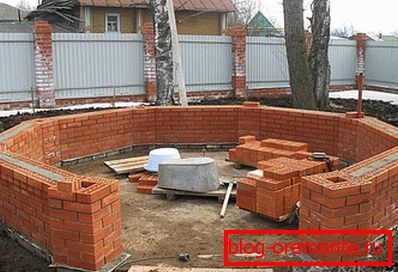
Stage 2: Walling
When a solid foundation is ready, you can start laying the walls of a closed gazebo. In fact, the walls of such an arbor are pillars at all corners, which are interconnected by brickwork below and several rows from above. Before laying the first row of bricks on the foundation, lay on it, folded in half, a layer of roofing material for waterproofing.
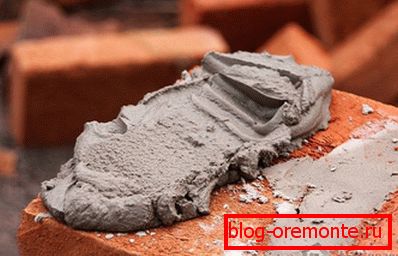
Now you need to knead the cement-sand mortar. The ratio of components is 1: 3. The first row of bricks is laid out on the mortar, which must be carefully checked by level, since the quality of the arbor and its appearance depend on it. We recommend pre-placing bricks without mortar.
Do not forget to select a place where the doors of your arbor will be located.
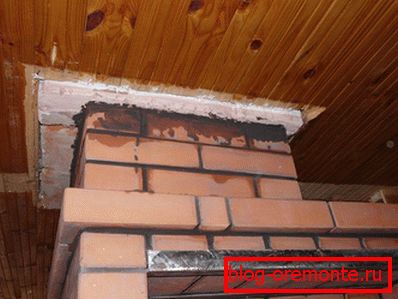
a photo. Four bricks are laid out around the pipe. Between them and the tube is formed a space that needs to be filled with cement mortar. Pour all you need in small portions.
The laying of the partitions is done to the required level, and the pillars are erected to the desired height. Then between the pillars is made of brick strapping. Between the pillars there is a corner where bricks will be laid.
If a barbecue stove or a barbecue grill is planned in the gazebo, it should be erected at this stage in a previously prepared place, and in the roof you should provide a place for the chimney.
Stage 3: roofing
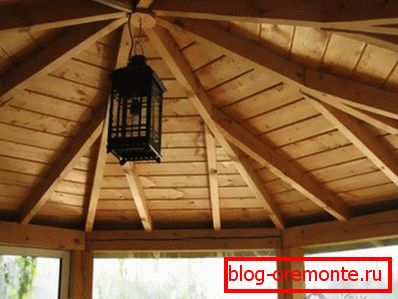
The roof for a gazebo can be different: hip, duo-pitch, hipped, convex or tower. Her choice depends entirely on your desire and must be made at the design stage. It is important to know that it is preferable to choose lightweight materials for a roof device so that their weight can withstand walls.
The easiest way to make a roof of wooden timber. To do this, you need to make a strapping by installing a mauerlat along the entire perimeter — a supporting beam that will distribute the entire roof load on the walls. Now you need to install a truss system. On the mauerlat rafters are installed and securely fixed. Then a crate is made on which the roofing material will be installed. The step of the strips depends on the selected roofing material - if it is soft, the slats need to be sealed to each other, if the material is hard - the step can be much wider.
As a material for the roof, you can use:
- soft or hard shingles;
- slate;
- polycarbonate.
They are all lightweight, easy to install and have excellent performance.
Stage 4: glazing
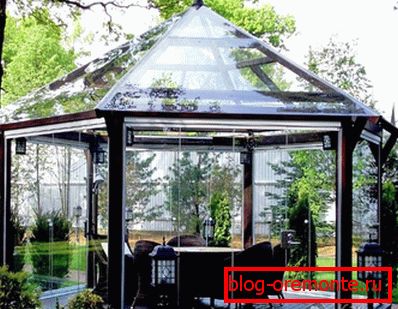
In conclusion, your gazebo needs good glazing that will protect the room from snow, wind, rain and insects. Here, too, will have to choose: to make a warm glazing or cold. The choice depends on the purpose for which the gazebo is built, and the climate in your area. If the arbor will be used all year round, and you equip it with furniture and other elements, it is better to make a warm glazing to reduce heat loss. To do this, you can use plastic windows with double-glazed windows or aluminum profile, which is lighter, but more expensive. When you plan to be in the gazebo only in summer, spring and autumn, you can make cold glazing, which will be much cheaper.
It is necessary to measure the distance from the wall to the wall and from the ceiling to the wall to find out which frame size to order. All the data you need to write and contact a specialized company that can not only make the windows you need, but also install them immediately. Only for this you have to pay a little extra. Glazing frames can be made of wood, aluminum or plastic. Their choice is yours.
And so, the gazebo is almost ready, it remains only to install the doors, a reliable lock, carry out communications, make the floor and finish the floor as desired. And at the end you can show yourself by making the interior you want.
If you want to warm up the whole room separately in the winter, you can take care of infrared heaters or buy an electric fireplace.
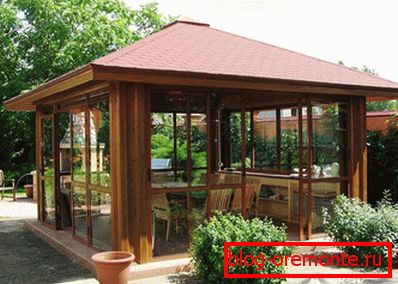
Step by step instructions for the construction of wood
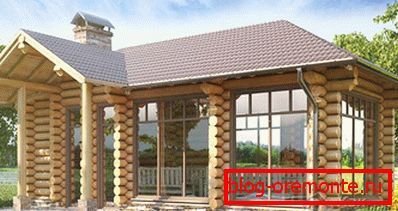
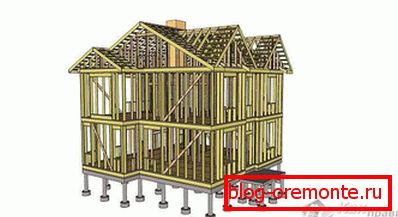
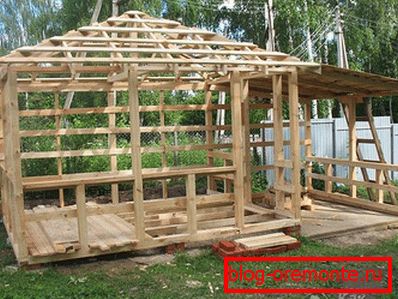
The second no less popular option for the construction of a closed gazebo - the construction of wood. It is possible to make such an arbor out of scrap materials that each owner may have. For example, we consider a frame gazebo with a gable roof, which can be simply and quickly built independently.
- First you need to prepare a place for the foundation. Since the weight of this arbor is significantly less than the brick one, there is no point in making a deep and powerful foundation. You can make a shallow, tapered foundation, a columnar foundation, or even a foundation of tires.
- 1 or 2 layers of roofing material are laid on the foundation, and the laying-ups are installed - horizontally laid bars, which will evenly distribute the load on the foundation. They need to be fixed to the foundation with anchors.
- Place the supporting pillars on the rails and screw them to the rails with nogs at an angle. You can also use a reinforced corner. Temporarily put the jib. The supporting pillars must stand on all corners, and if the gazebo is large, you need to additionally put a few more, in 1–1.5 m increments.
- With the help of the level all the pillars must be aligned and correctly set. Then you can do the top trim. Since you work with a tree, all the elements need to be fixed with nails or screws.
- Now you can make the bottom trim and fasten a board that will serve as a railing. With this arbor will be even stronger.
- The space between the bottom trim and railings need to sheathe, making crates.
- Places where the supporting pillars are connected to the upper strapping should be reinforced with stitches in order to give strength to the structure.
- Next, proceed to the installation of roofing elements. First, install truss legs, connect them with jumpers between each other and reinforce the corners of the gazebo and install the ridge.
- The gazebo facade can be sheathed with clapboard, polycarbonate, block-house or boards. This stage can be done at the end of all work.
- Gables can be sewn up with the same material as the bottom of the arbor.
- Make roof overhangs, sew them up and install end strips.
- Screw the OSB sheets on the roof in a staggered manner (you can also use the boards, closely nailed to each other), the choice is yours.
- Lay on the basis of metal roofing, soft roofing or profiled sheet.
- It remains only to glaze the windows and your gazebo will be ready.

You can paint it, equip it with everything you need. In such a gazebo, you can install a barbecue or grill, but before that you need to choose in advance the place where they will stand. In this area it is better to make a solid foundation, if the construction is heavy. Also when installing the roof you need to take care of the chimney.
So, you could build a closed gazebo by yourself. This is a simple budget option that anyone can perform. This gazebo will be a worthy decoration of your site, and you can enjoy your rest at any time of the day.
Having considered these options of arbors, you will be able to decide which of them to build - wood or brick. But, most importantly, despite your choice, you will be able to build such a construction yourself, saving your money. As a result, you will have the opportunity to relax all year round from the problems, stress and fast pace of this life. Moreover, if you competently warm and equip such an arbor, you can get residential square meters, where you can accommodate a friend or relative for a few days.
Video
Here is the winter arbor option:
A photo