Clinker tiles for interior walls
The interior decoration of the walls can be made of various materials - the benefit is that the choice is large enough. If earlier all the surfaces were tried to be as smooth as possible, now it is irrelevant, especially when the clinker tiles were used for interior walls. What is this material, and how to work with it? Answers to these, as well as other questions, can be obtained by reading the article.
What is clinker
Based on several different grades of clay, which are mixed to ensure uniform properties of the raw materials. If the clay is too greasy, then sand is used to deplete it. The mixture is crushed, and it is given the desired shape using a belt press. Depending on the grade, clinker may have a smooth surface, textured embossing or a sandy coating. After drying, the billet tiles are passed through a tunnel kiln through heating, firing, and cooling. At the final stage, the tile is tapped in separate drying chambers.
Advantages and disadvantages of the material
The brick tile has advantages and disadvantages, about which it is important to know to anyone who has decided to use this facing material.
Positive traits
- The tile is durable and resistant to abrasion, which is a great advantage when facing the floor.
- If the room is flooded with sunlight, then you will not have to worry that some of the cladding material will burn out and its shade will become lighter.
- Clinker does not care about exposure to chemicals, as it has a low porosity.
- When contaminated material is easy to clean.
- Even a non-professional can cope with laying brick tiles.
- This is an environmentally friendly material.
Something that is not quite good
- The tile is wear-resistant, but at the same time it is also fragile (first of all it concerns budget-grade materials or fakes, but for interior work this is not so important).
- High price.
- Most likely to buy a fake, so it is better to invite a specialist to help him figure it out.
- You need to use high-quality, but expensive grout, and its consumption is considerable.
Color and purpose
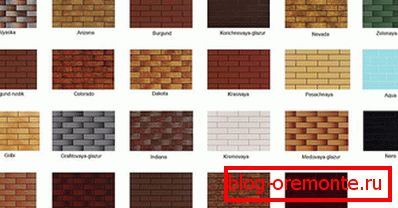
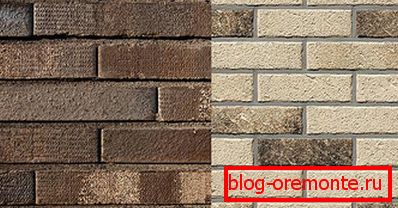
The choice is large, but not limitless - about 90 shades of different colors. As for the purpose, for the interior decoration of residential premises 2 types are used:
- Tile finishing ordinary. It is in this segment that the most colors and shades are observed. Designed for interior decoration with moderate humidity, as the material is porous. It is successfully used both in the kitchen and in the living room and similar areas.
- The tile is moisture resistant. This material with minimal water absorption, which is not afraid of significant temperature drops. It is possible to use not only for facing of a bath, but even in a sauna.
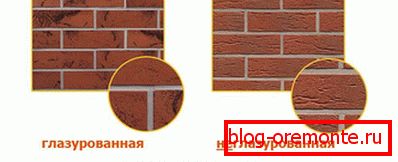
Glazed tiles are not only more beautiful, but also have a higher degree of moisture resistance.
Types of clinker tiles
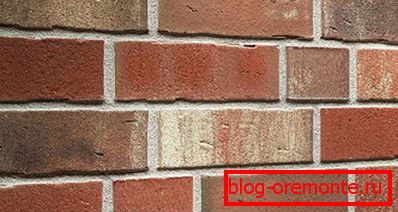
Tile texture can be:
- Smooth. This type of tile is most common. It is easy to wash, but because of the slipperiness used for wall covering.
- Rough. This tile is also in demand for decorating the walls in those rooms, but since it is not easy to wash off the dirt from such a surface, it is better not to use it in the kitchen.
- Glazed. The glaze is applied on a flat surface, so this smooth tile looks very original.
- Rustic It looks like a roughly treated stone. Often used to finish a wall of a room to emphasize the chosen style.
Clinker tiles stand out against the general background for their roughness, so it will be original to look indoors only with a skillful design approach to its use.
By what criteria to choose
Now we will consider how to choose a clinker tile. As for quality, we have already figured out, now we will touch on the design techniques.
Tile size
The appearance of interior decoration has a significant impact on the visual perception of the room, but the use of clinker tiles makes the wall more expressive and visually brings it closer. So, if you fully veneer a small room, then it will seem tiny, so it is better to finish any one wall. A large room can be fully veneered with clinker, and it does not seem small.
The size of the tile used is also important. For small rooms, brick-sized clinker can be purchased, while in larger rooms it is better to use more dimensional facing material.
When choosing, you need to take into account the created style.
In order for the clinker tiles in the interior of the room to look original, besides the size, you need to take into account its color, scope and chosen interior style.
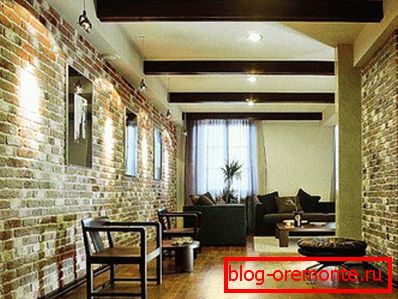
Loft. This style is very specific, resembling a room in which it had long been necessary to plaster walls and hide communications — this is how abandoned enterprises and warehouses that received a second life looked like at one time. It is this effect that is achieved when one or all of the walls look as if the repair has not yet begun. If you use too dark clinker, the situation can turn out to be oppressive, and even very good lighting will not correct the situation.
Techno. In the style of techno tile plays the same role, but the surface of the facing material should be smooth, the color is varied, and the shape is geometrically correct.
Country Style or Country. This is a generalized concept, because in each country, their concepts of the village, and the villages themselves are different. For example, in the English style natural color is welcomed, and to create a German and Dutch style, you will need to purchase a bright red clinker tile.
The house can be not only rural, but also hunting. In such houses there is usually a fireplace. When transferring the style to urban apartments, they began to install false-fireplaces, and the use of clinker allowed to make the original lining. In this style there must be a combination of brick walls and natural wood.
Rustic. The style involves the use of large, roughly treated tiles in a large room. Aged clinker is very suitable for this purpose, but it is better that the tile be of different shades.
Great thing. In this style, preference is given to smooth surfaces, so tiles are rarely used. If you want to highlight a fragment, then you should select a clinker that emphasizes the overall background.

Gothic. This style is characterized by black and dark colors, so small brickwork (in combination with black grout for joints) can emphasize the preferences and tastes of the owner.
Minimalism. Clinker is used to highlight a zone and helps focus attention on planes. You can use any tile.
The stage of preparation of the walls and adhesive composition

So, the choice is made, now you can proceed to the preparatory activities. In order for the work to be done qualitatively, and the result was pleasing to the eye, one should responsibly approach the cleaning of the walls. If on the surface remains lime, pieces of old wallpaper or grease stains, then in these places the tile will stay bad, or even completely fall off.
Upon completion of the cleaning, it is necessary to check the flatness of the walls with a building level, and if the drop is too substantial (more than 2 mm per 1 m), then you will have to apply forces to level the surface. Before installing the wall tiles should be primed.

For the installation of clinker tiles indoors, it is not necessary to acquire glue with enhanced fixation, since extreme conditions, such as with external finishing, will not arise. In addition, given the peculiarity of the material with which to work, you need to completely abandon the hard mixes, preferring elastic.
The solution that was kneaded more than 30 minutes ago and did not have time to use, you need to throw it away, and in no case do not mix the dry mixture into it.
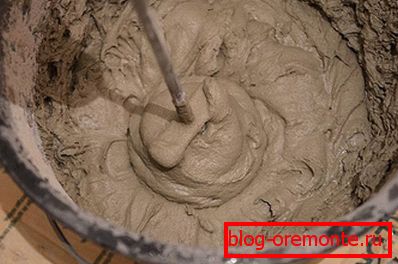
You need to mix the mixture with a mixer - this will guarantee the absence of lumps. First, water is poured into the container, and then the dry mixture is gradually poured out. The consistency of the solution should be brought to the state of thick cream, then let it "ripen" for 5–10 minutes. You should not make a large batch, as the solution can be used for half an hour, after which it loses its adhesive properties.
Installation of a brick tile
To do the job you need the following tool:
- laser or water level;
- smooth trowel;
- notched trowel;
- rubber mallet;
- tile cutter;
- Bulgarian with a diamond disc;
- diamond crown;
- crosses or other material with the help of which the necessary interrow gap will be set.
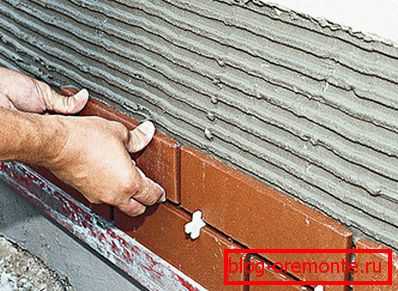
Initially, the marking is applied to the walls using the existing level, and already on it will be laying tiles. For ease of installation, a CD profile can be fixed to the wall as a support for the first row of cladding material.
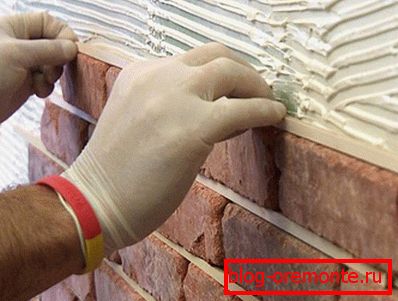
A thin layer of adhesive is applied to the wall. Also tile is coated with a solution that literally needs to be pressed into it. After that, the solution is added, leveled with a comb spatula on the tile, and now it can be glued to the wall, leveled and tapped with a rubber hammer. This is how the entire row is glued. After that, the rule is to check how smooth the top edge is, and, if necessary, trim it. Approximately in the middle, you need to draw a vertical line from the seam, which will be a guideline for each odd row - the junction of tiles will pass along it. The next day, you can perform grouting.
As you can see, the cladding of the walls with clinker tiles may well be made by a non-specialist.