Broken roof do it yourself
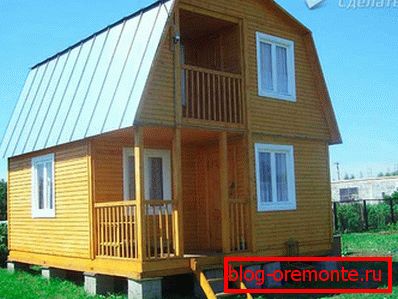
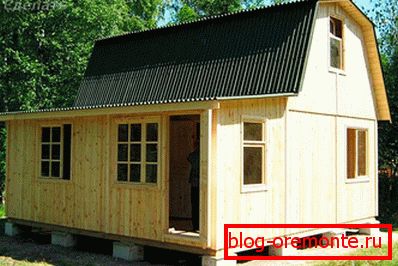
Among the variety of roof designs a special place is occupied by a sloping gable roof. Its feature is in dividing the slope into several planes, making it possible to use the space under the roof for the attic device. Having a room under the roof will reduce the overall heat loss of the house. A broken roof with its own hands can be properly built only if you have competent calculations and follow all the standards for construction.
How to choose the angle
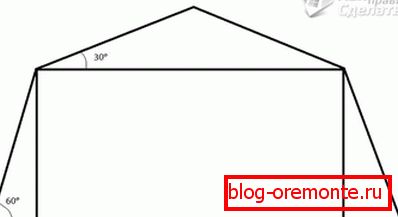
When choosing the angle at which the roof slopes are installed, it is necessary to consider:
- type of roofing;
- rainfall and wind force;
- purpose of the room - for residential premises the height of the ridge should not be placed below 2.5 meters.
The optimal value for the upper slopes is 30–45 degrees, for the lower - 60 degrees.
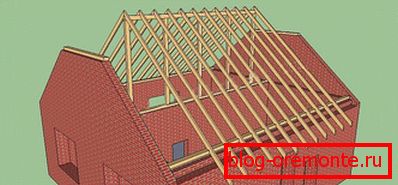
Drafting
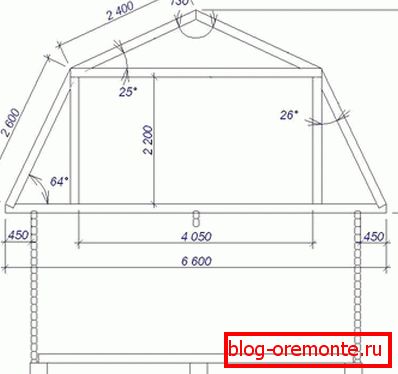
Any construction begins with a drawing, and such a complex structure as a broken roof, will require the preparation of a detailed scheme with all dimensions and calculations. You can get started with viewing photos and diagrams that will help you understand how to build a broken roof structure. Knowing the size of the building, the type of roofing and insulation material, it is possible to calculate the dimensions of the components for the truss system using special calculators.
The consumption of material for roofing, as well as waterproofing is calculated by the size of the roof area, which is calculated by adding the value of all ramps. Insulation layer for mansard roof must be at least 20 cm.
Material

Before you make a broken roof, pick up quality material for its construction. To do this, acquire dry glued timber, the moisture content of which is 18–22%. Before installation, it is subject to mandatory treatment with an antiseptic and an anti-burning agent. Processing compositions carried out in open space, the funds are applied in two layers.
- bar for a power plate 200 × 200 mm, for struts 50 × 100 mm;
- board 50 × 150 mm;
- unedged board;
- metal brackets, corners, bolts, nails, screws;
- slats for lathing 25? 50 mm;
- vapor barrier membrane, insulation, waterproofing;
- roofing material.
Stages of construction
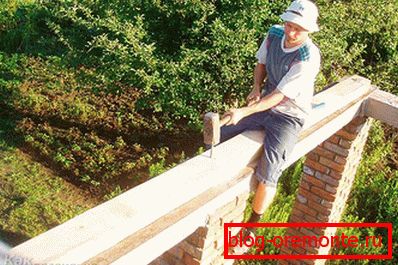
Reward. The installation of truss construction is supposed at the stage of wall construction. In the top row, special pins are laid for subsequent mounting of the mauerlat, which is the basis of the roof. This timber is laid along the entire perimeter of the walls, prepared studs are inserted into the drilled holes and twisted with nuts. The stud spacing is two meters, the best option if they are located between the rafters. Under the mauerlat the roofing felt keeps within, providing protection against moisture. For reliable retention of the structure using wire strapping.
Beams. Thick timber with a cross section of 200 × 200 mm is placed directly on the mauerlat or in special pockets left in the wall masonry. The edges of the beams located on the masonry are coated with mastic. The beam will serve as a support for vertical posts. To the mauerlat they are attached with metal corners. Requires strict adherence to the horizontal level to get a quality basis for the roof. You can change the position of the beam by placing boards.
Installation of rafters. The first to exhibit vertical feet on the gables. Their level is controlled by a plumb line. Racks are temporarily fixed with struts. Between the exposed rafters, they tighten the cord and install all the remaining supports in increments equal to the location of the beams. Girders from the board are stacked on the racks; they are fastened with angles and screws. On top of the girders, longitudinal fasteners are fastened connecting the racks and completing the upper trim. Before the final installation of the remaining rafters, the inlays are supported by struts.
Lower rafters are installed with support on the girder and power plate. To facilitate the work on the preparation of bars, pre-running template. A thin board is applied to the girder and sawing is performed at the desired angle. All lower rafters are trimmed on the model and installed. The lower part, lying on the Mauerlate, is cut out on the spot. For fastening use plates or corners, twisting them with screws or hammering with nails.
Before installing the top hanging rafters, it is necessary to outline the center of the roof. To do this, use a temporary rack, fixed at the center of the power plate and gable end. The top edge of the board will mark the center of the roof. A base is applied to this board for the template on which the sawnings of the upper rafters will be performed, the second edge of the workpiece rests on the girder.
All the upper rafters have the same size, so they are filed in one pattern. The upper ends of the rafters are connected with scraps of boards, plates or bots. The lower part is inserted with gash in the girder and fastened with corners. Each rafter leg is supported by a suspension strut of 25 × 150 mm in size, which is attached to the junction of the rafters and to the fastener.
The lower rafters strengthen the constant struts. To do this, use the board 50? 150 mm, cut the lower end at an angle and install it on the beam, the upper one is attached to the rafter with a bolt or stud. Installing all the struts, remove temporary props.
Crate and Roofing Cake
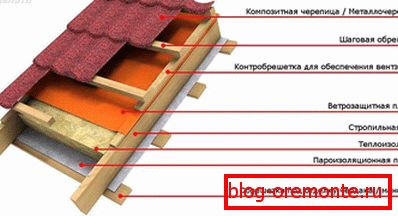
After the installation of the truss construction is completed, it is necessary to correctly lay down all the layers of the roofing pie. Initially, the rafters sheathe vapor barrier membrane, starting from the bottom of the roof. The joints of the material are taped. Then stack insulation. Between the layer of insulation roofing it is necessary to install air ducts for ventilation of the space. Poor quality airing will cause condensation and moisture. The roof covering should be selected taking into account its heat-insulating qualities, therefore the use of metal is not desirable. As a heater, choose non-flammable safe materials that are not exposed to moisture. These materials include polystyrene foam and foamed glass. After insulation, waterproofing is performed.
Lathing is performed directly under the selected type of roofing.
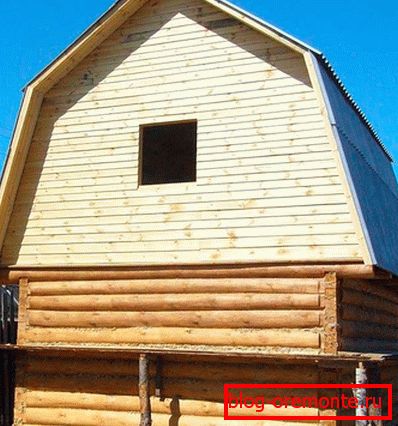
The device of a broken roof will not only give the house a special look, but will also provide additional living space. Watching videos with explanations of the construction nuances will help you get the job done right.
We recommend to read:
- filing overhangs clapboard;
- how to sheathe house siding.
Video
In this video, the author shows and tells how he did the truss system of the roof roof:
A photo