Bath in the country with their own hands: step by step
A trip to the cottage is a joyful event, as there you can take a garden or landscaping the site, and then relax, take a steam bath in the bath, provided that it is there. We will tell you how to make a bath in the country with your own hands, demonstrate the drawings, diagrams and photo instructions. We'll have to work hard, but it's worth it.
In your imagination, you probably already see how you approach the bath, open the door and get into a warm and cozy dressing room, and then into the steam room. Yes! That's the way it will be, but a little later. First you need:
- choose a suitable project;
- familiarize yourself with the stages of construction;
- buy building material;
- build a bath and bring all communications;
- perform interior trim and only then soared.
If, after reading the introduction, you have not lost the desire to make a bath in the country, then we will continue the topic, considering all the stages of construction.
Choosing a place for the construction of baths

Often, the dacha plots are not large, but apart from personal preferences and convenience, there are norms that must be adhered to. Consider the preferences first.
- It would be better to put the bath on a hill, which will significantly simplify the organization of water discharge.
- Well, when the bath is located next to a pond or river.
- The rays of the setting sun, penetrating into the steam room through the window, will relieve stress, but at the same time it is necessary to do so that the entrance to the bath is clearly visible from the window of the country house. This way you can watch the bathing room and the children, especially when a swimming pool is built before the entrance.
- Bath can be done in the form of an extension to the house.
In order to avoid conflicts with the authorities or neighbors, you must comply with the requirements of SNiP 30-02-97. Paying attention to section 6, paragraphs 6, 7 and 8, you will find comprehensive information on the placement of the building on the site, but we will give only those numbers that you need in order to choose the optimal place for a bath.
Considering the fire safety measures for buildings located on opposite sides of the passage, it is necessary to adhere to the distances indicated in the table:
| The material from which the supporting and enclosing structures are made | The distance, which directly depends on the material used in the construction of the structure | |||
| I | II | III | ||
| I | Non-combustible materials belong to this category. | 6 m | 8 m | 10 m |
| II | The same buildings using wooden elements | 8 m | 8 m | 10 m |
| III | Wooden and similar structures | 10 m | 10 m | 15 m |
With regard to the requirements regarding the distance to the neighboring area, they are also unequivocal.
| № | The minimum allowable distance between buildings located in the neighboring area | Distance |
| 1 | Garden house | 3 m |
| 2 | Various household outbuildings (including a bathhouse) | 1 m |
It is also important to take into account the requirements of the location of the buildings on the site - the shower, bath and sauna should be at least 8 m away from the garden house.
By the way, non-observance of these norms may lead to court proceedings with a neighbor and demolition or transfer of a bath to another place.
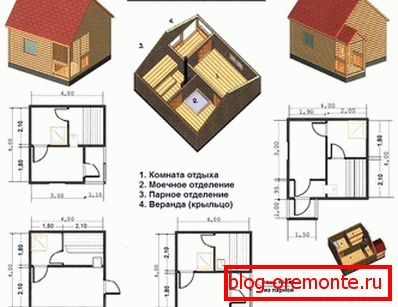
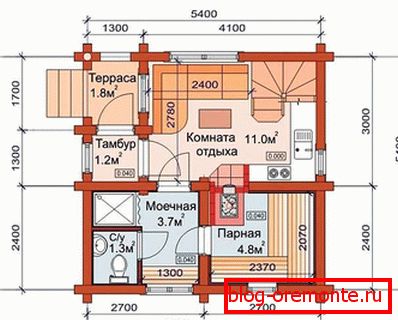
Project Baths
When choosing a bath project, it is important to consider the material from which it will be built. There may be several types of structure:
- Frame bath.
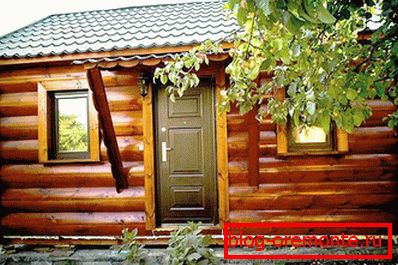
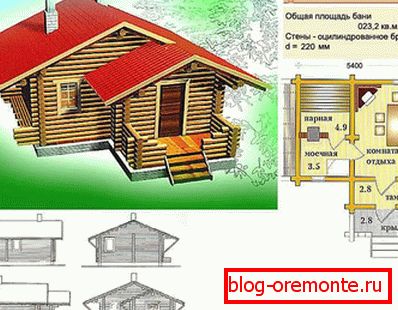
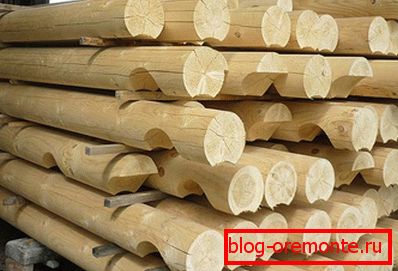
- Wooden bath (из бруса или оцилиндрованного бревна).
- Bath of brick, stone or blocks.
- The structure of arbolita.
Having decided on the material, when choosing a project, make sure that it suits you by all criteria.
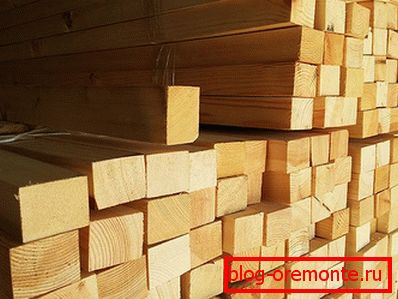
Material selection
So, choosing a suitable project, in accordance with its requirements you need to prepare building materials.
- Most often gardeners prefer to build frame structures, as they are the cheapest and successfully cope with their task. In addition, in view of the small weight of such a structure, the foundation will also not have to be spent much.
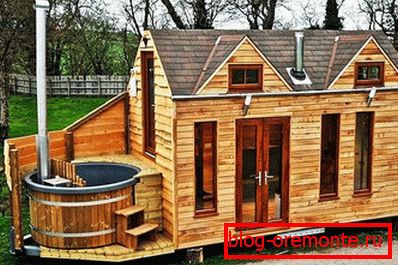
- The most favorite buildings are wooden. The cost of such a building will be somewhat higher, and the foundation will need to be made stronger, unlike the frame structure. Built in the country a good wooden bath does not need insulation.
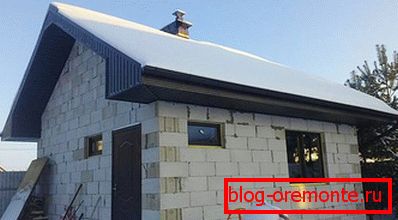
- Stone and brick are rarely used for the construction of baths in the country. This is due to the fact that for such a heavy structure a strong foundation is needed, and the walls freeze over during long absences and such a bath should be heated for a long time. The exceptions are buildings of foam and gas blocks. The strength of the foundation is not so high, the walls are warm, but it is important to consider that this building material is very hygroscopic, so it must be protected from moisture.
- Wood concrete is also often used in the construction of baths. Walls can be monolithic or erected from blocks. The structure is warm, durable and inexpensive.
Wall materials
Since our article deals with several possible uses of various building materials, we consider them separately.
Frame structure
The walls of this bath are made in lattice construction. For the walls of the frame will require:
- A bar of various section, the sizes and which quantity is specified in the project.
- Insulating material with high thermal insulation qualities to fill the frame. Again, you need to adhere to the requirements for the use of a warming material, but here you need to take into account that the documentation often indicates one type of material, but not all possible ones. If the specified material is too expensive, then you can refer to the forums to clarify what is acceptable in your area.
- Material for lining the frame outside and inside. Most often, OSB boards, edged boards, siding, or block house are used for building exterior cladding, while lining is used from the inside.
Wooden bath
For walling can be used:
- Natural barked tree.
- Cut timber.
- Profiled timber.
- Glued laminated timber.
- Round logs.
Bath of brick, stone or blocks
The walls of this bath can be made of such materials:
- Brick (ceramic or silicate).
- Stone (rubble, limestone, rakushnyak).
- Block (foam, slag, gas blocks).
Arbolite structure
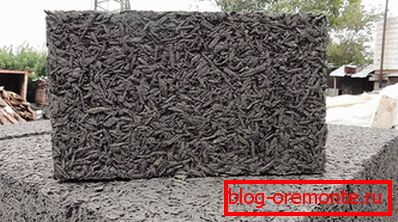
If there is an opportunity to purchase sawdust cheaply (and maybe there are some of its own), then at home it is quite possible to make wood concrete blocks of rather high quality. Also, this building material in the form of finished blocks is on sale. The walls are built very quickly. Another advantage of using arbolit is the possibility of manufacturing monolithic walls by pouring cement-shaving solution into the formwork.
Materials for the ceiling in the bath
A waiting room and a rest room are warm rooms, therefore it is recommended to use materials with low thermal conductivity - aspen, linden or alder.
For covering the ceiling of the steam room, it is preferable to use wooden lining, as it is able to withstand high temperatures. In this room you can not use products made of pine or spruce, when heated from this wood resin begins to stand out. Also, the ceiling should not be hemmed with sheets of hardboard and chipboard, as moisture and high temperature contribute to the release of vapors that can cause harm to human health.
Materials for insulation and vapor barrier
External insulation is advisable to perform only on condition that the bath is heated. It is unlikely that someone will be in the country to do this luxury, so we are considering materials for the internal insulation of unheated bath.
The frame bath does not need to be warmed, since the thermal insulation is embedded inside the structure. In a wooden bath you need to make a crate, which is inserted into the insulation. Other types of baths need warming, made by a more complex technology.
To perform the work, mineral wool is required, the thickness of which is selected depending on the material used in the construction of the bath and the climatic conditions. A layer of at least 50 mm is usually laid. Insulation can be in the form of mats or in rolls.
As for the vapor barrier, it is important to know that this is not waterproofing. Each has its own purpose. Even an inexpensive vapor barrier will fulfill its role, while waterproofing, used for other purposes, can negate all the works.
What you need to especially pay attention to is not to get a fake.
Decoration Materials
Since we are talking about a bath in the country, let's not talk about elegant types of decoration. The best option would be to use wood: clapboard or the like cladding materials.
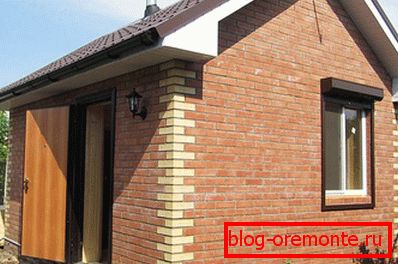
As for the exterior, it can be any material that is used for covering houses. If the bath is made of rounded logs, then it would be unwise to close the already beautiful facade with something else.
Construction of the bath
Now we will look at how a bath can be built in the country with its own hands. It is clear that the work will be easier to perform with an assistant, which may be someone from family members. At the initial stage of work, some instructions can be given to children. Of course, they will do far from everything and not as quickly as we would like, but if they feel they need them, then they will be more careful with the bath built with their participation.
But let's be realistic, small children will help a little, and if you build alone, it will be a long-term construction, especially since some work alone will not work. In the course of reading the article, you will see when and how many assistants you may need - this will help you plan everything.
Markup
So, the plan has been chosen, we have decided on the location, now we will start marking on the ground. To do this, in accordance with the scale specified in the project, transfer the contour of the bath to the terrain. In the place where the corner of the building will be, a long peg (or reinforcement) is hammered, and the lengths of two walls at an angle of 90 ° are measured from it. The following pegs are hammered there, and the distances of other walls are measured from them. Finally, the last is hammered - the fourth peg.
Теперь, когда есть обозначенный периметр будущего строения, нужно проверить насколько прямыми получились углы. Для этого необходимо выполнить проверку по осям ? измерить расстояние от одного колышка до другого. Floorученные данные должны совпадать. Если это не так, то плоскость нужно сдвинуть, «укоротив» самую длинную ось. После этого нужно будет проверить не только оси, но и другие размеры, и, при необходимости, вновь подкорректировать.
If the foundation is tape, then a small discrepancy can be left, but for the pile or column foundation, the marking must be very accurately performed.
So we designated the dimensions of the bath in accordance with the design data. Further marking is performed depending on what the foundation will be. More information about this can be found in the table.
| Foundation type | Where used and how markup is performed |
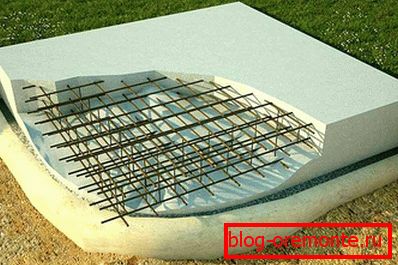
| Slab
| Due to its high cost, this type of foundation is made only in cases where it cannot be avoided. The marking is carried out according to the size of the building or slightly larger, when it is necessary that the foundation be wider and longer than the bath. |
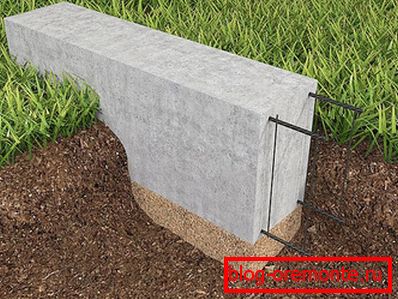
| Tape
| A very common type of foundation. Relatively inexpensive and durable. The marking is carried out in such a way that the concrete poured into the tape runs along the perimeter of the building and under the relocations. |
| Column
| This type of foundation is also often found. Mainly used for the installation of wooden buildings on it. Depending on the size of the bath, markup is performed by the number of manufactured supports. |
| Screw
| Считается что такой вид фундамента новый, но это ошибочное заключение, сделанное на основании того, что его стали недавно использовать в гражданском строительстве. Screw фундамент прошел проверку временем, так как военные его уже давно начали использовать. Преимуществом устройства фундамента на винтовых сваях является быстрота и несложность его монтажа. Второе преимущество в том, что нет необходимости выполнять земляные работы, поэтому участок останется чистым. Кроме того, с его помощью можно возвести баню даже на участке, имеющем существенный уклон. Marking is done by the number of piles and no deviation to the side is allowed. |

Weigh the pros and cons, and then make the final decision regarding the choice of foundation type.
Foundation casting
The manufacture of shallow strip foundations is acceptable under the following conditions:
- The soil is dry and non-flowing.
- The groundwater level is quite low.
- In winter, the frost is not very strong.
- The buildings are not heavy.
Do not seek to guess the type of foundation for a heavy structure. If you are not sure, invite specialists who, having performed the appropriate checks, will give an exact answer.
Let's start with the simpler and most often manufactured for the bath shallow foundation.
- We have external markings, now we need to perform internal ones, taking into account the fact that the width of the foundation should be at least 50 cm, and should extend beyond the limits of the building by 5? 10 cm on each side. Therefore, if the bath is 3? 4 m, then the largest size along the outer perimeter will be 3.2? 4.2 m.
- It is important to consider the installation location of the furnace and at the same time make the foundation for it.
- For convenience, in the corners you need to install designs of wood, similar to benches. They need to be set in the same plane along the height of the future formwork and attach a measuring cord to them. How to do this is shown in the illustration.

- You need to remove the fertile topsoil and put it aside, then dig a trench, the clay from which you can then use as bedding.
- As for the trench depth, in some cases it can be as much as 35 cm. Much depends on the depth of freezing and the soil itself. You need to get to the durable clay layer and in no case dwell on the ground. Therefore, most often the depth is within 50? 60 cm.
- The bottom of the trench needs to be leveled by checking its horizontal level.
- Now it's sandbagging. It is necessary to pour a layer of sand at least 15 cm thick inside the trench, moisten it with water and tamp it well. For this, it would be more convenient to use vibrotamper, but it can also be done manually, with the help of a weighty bar with handles nailed to it.
- The next layer is filled with gravel of the middle fraction and is also carefully rammed.
- Now it was the turn of the formwork, the height of which should reach the tensioned cord. You can make it from scrap materials or wood, harvested for other purposes, since this temporary structure will be dismantled shortly after the foundation is cast. Finished shields need to be installed along the trench and well fixed, otherwise the poured concrete can move them.

- In order not to stain the boards, and in order to prevent concrete from flowing out through the gaps, the formwork is covered from the inside with plastic wrap, which needs to be fixed with a stapler or thin nails.
- Now it is necessary to make the frame of metal or plastic reinforcement, fastened with knitting wire.
- The fabricated frame should not reach the edges of 5 cm. It should be carefully lowered into the trench so as not to tear the film protecting the formwork. To raise the frame above the bedding, you need to put pieces of granite under it, as it, unlike a brick, will not crumble under the influence of moisture.
- If any communications pass through the foundation, then they need to leave holes, in which the sleeves will help, as was done in the photo above. The same applies to the manufacture of products.
- Plan your time so that the foundation is poured with concrete for the day, as breaks are unacceptable here - then the tape will not be monolithic. It is convenient to deliver the concrete with a mixer and pour directly from it, otherwise it will have to be kneaded in a concrete mixer, on the basis that cement of the M400 brand will require 1 bucket, sand - 3, crushed stone (or gravel) - 5 buckets.
- The foundation poured with concrete should be compacted with a vibrator or pierced. After shrinking, you need to add some concrete and level the pad. If a base is made for a wooden house, then foundation bolts should be fixed in the non-frozen concrete.
- Not earlier than in a week you can remove the formwork.
It should be remembered that the concrete has not yet gained full strength, so you need to treat it with care or wait 28 days, and only then build a bath.
Video: building a foundation for a bath
Masonry walls
When building a bath of blocks, stone or brick, you need to level the foundation with a cement-sand mortar, and lay a roofing felt folded in it twice. Masonry starts from the corners. Having installed the first blocks on the cement-sand mortar, you need to make sure that they are in the same plane and only after that a string is drawn on the upper outer edge, which serves as a guideline for laying a number of building materials.
When laying the next row, the masonry mixture may be different: a brick and shell wall is built on the cement-sand mortar, whereas the mixtures recommended by the manufacturer are used for the laying of lightweight blocks.
Having installed the lintels above the doors and windows, you need to install the formwork on top and make armored belts, securing the foundation bolts in it for the subsequent mounting of the power plate. After the concrete has hardened, it will be possible to start making the roof.
Construction of the frame of the bath
The basis of this bath is a frame made of wood, which is insulated and sheathed with various types of finishing materials. You need to choose quality materials and follow the sequence of their installation.
For the manufacture of the frame will be needed boards from well-dried larch, aspen or linden, because this wood has low thermal conductivity. Shields manufactured will be resistant to deformation.
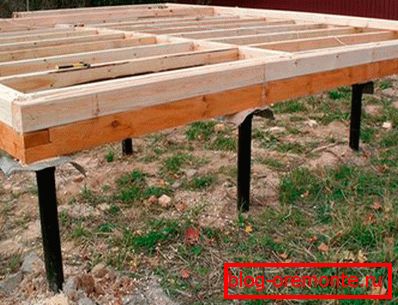
On the foundation is the skeleton of the lower trim of a timber 100? 100 mm. At the ends of the bars need to make cuts in half the thickness and fasten with each other with screws. If bars of 50 × 100 mm are used, then the frame can be assembled end to end with the help of metal corners. The size of the bar used depends on the type of foundation, design and size of the bath.
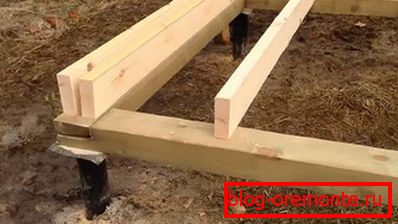
- At the next stage, an end strapping board is installed, and floor joists are attached to it just next to it. The bar is used 50? 100 mm.
- On the opposite side, the logs are cut so that the second end trim can be installed.
- Lags need to be arranged so that between them the prepared heater becomes closely, then the butt boards are nailed.
- The frame of the walls is assembled from a timber of 50 × 100 mm, and then installed in its place, all parts are fastened together in a single structure.
To ensure the vapor barrier of the frame bath, you need to use a vapor barrier film that will avoid the accumulation of moisture inside the frame. Mineral wool or fiberglass is used as a thermal insulation material. They are able to provide a high level of sealing without disturbing the natural air exchange.
Insulation and wall cladding is preferable to perform after the installation of the roof. This approach will protect the wood and insulation from getting wet.
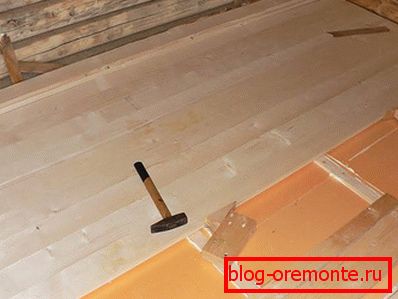
Floor

If in the frame bath it remains only to warm the floor and lay the floorboard, then for other buildings will have to work harder? you need to install logs, make a rough floor, fix the vapor barrier, put insulation, perform waterproofing, lay the floorboard, which in a few years will have to be changed. Given that the cottage in the country will not be thoroughly dried due to lack of time for it, because after the weekend you will need to quickly go to the city, then if there is such an opportunity, it would be preferable to make a concrete floor and revetted it with tiles. On it are stacked wooden shields that can be brought out to dry in the barn and quietly go home.
It is clear that for a frame and other structure installed on a columnar or pile foundation, only a wooden floor with insulation is acceptable. More details about this process are described in the following two videos.
Video: how to install floor beams, make insulation and ensure the drain in the bath
Roof construction
Above any bath should be a reliable roof, but the options for its creation may be different. In any case, you need to lay waterproofing and then insulation, think about the type of roof and the choice of a suitable roofing material. Without waterproofing, steam penetrates unhindered into the attic, and, settling on beams and rafters, will contribute to their rapid destruction. In addition, the condensate formed on the roofing material will begin to drain on the insulation, which will affect the properties and durability of the latter.
A great influence on the choice of the type of roof has a type of terrain, since it is necessary to take into account the technical parameters of the building.
- So, in the holiday village, especially when it is located among tall trees, you can safely make a high gable roof.
- If the dacha is located in the steppe zone blown by all winds, then the slope for the roof should be made minimal.
- With a small bath and a small snow load the roof can be made shed. The same roof is often made in the bath attached to the house.
To avoid extremes and errors, we recommend that all calculations be performed in an online calculator. So you will have a clear idea of what type of material is suitable for a particular type of roof and how much it is required.
Video: how to make a roof bath
Interior and exterior finish
Although wood is most often used for interior decoration, not all wood is suitable for this purpose. It is necessary to choose the right material, especially for the steam room, in which high temperature is created at high humidity. Immediately it should be said that for the finishing of this room it is impossible to use sawn from pine, as well as fiberboard, chipboard and linoleum. Therefore, you need to buy lining of larch or linden.
As for other premises, the conditions there are not so extreme, so there are no such high requirements for the material used? that you can not use in the steam room, it is perfect for a rest room and a waiting room. Pine wall paneling in the dressing room will give off a pleasant aroma and create a feeling of comfort.
Finishing wooden and brick bath clapboard is almost the same. First, the crate is fastened to the wall, and the lining is mounted on it. An exception is the steam room, in which the heat-reflecting foil should be under the crate.
Exterior finish is performed not only to make the bath beautiful, but also to protect it. For finishing the bath from the outside you can use the following materials:
- Imitation timber.
- Siding.
- Linen
- Block house.
- Facade tiles.
- Paint.
You need to choose the appropriate material and decorate the facade.
Ventilation in the bath
Sometimes there is still such an opinion that good ventilation in the steam room is useless, because through it all the heat comes out, and it is made very weak, or it is completely absent. But there is another extreme, when the ventilation process is not controlled, and the heat evaporates from the bath. In such a steamy room at the top is very hot, and his legs feel cold.
In fact, during the adoption of bath procedures, the air in the room should be updated 2–3 times per hour, but this is not enough, since the ventilation must be properly done. Usually the inlet is located near the bottom of the boiler, and the exhaust under the ceiling on the opposite side. While the steam room is warming up, the exhaust window is closed. Then it opens, and the warm air begins to rapidly out of the room. As a result, the steam room becomes cool and uncomfortable. You can make the ventilation, as in the diagram.
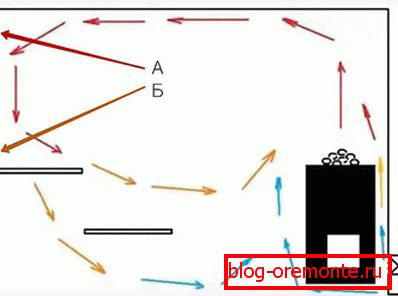
Such a device allows you to keep warm air under the ceiling, and half-cooled outside through an opening below (B) comes out, so it will be comfortable in the steam room. When you need to thoroughly ventilate the steam room, the upper vent opens (A).
In addition to the steam room, ventilation is necessary in every room of the bath. In order not to lose precious heat in vain, it is possible to make it possible to close the ventilation openings during those hours when there is no need for airing.
Furniture
Floorог и всю мебель для дачной бани можно изготовить самостоятельно. Если нет желания что-то еще мастерить, то в сети есть множество предложений по продаже всего необходимого для дачи.
With a great desire to save on furniture, you can revise the old stocks. Maybe there is something that needs to be repaired, but there is no way that hands can reach it? After a small restoration of such furniture can serve a considerable time. The main requirement is not to use furniture made of chipboard, since this material will deteriorate very quickly due to high humidity.
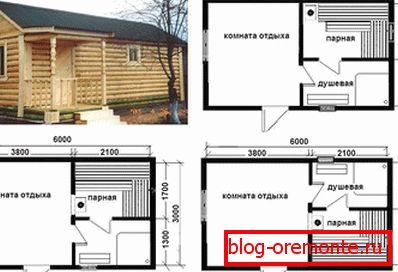
Scheme

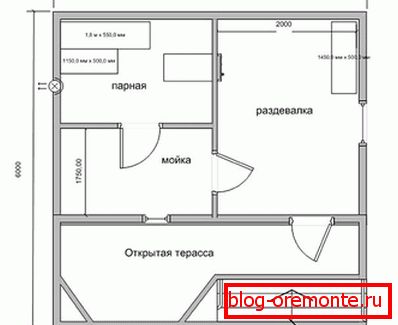
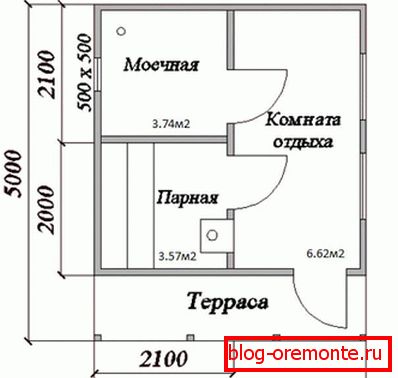
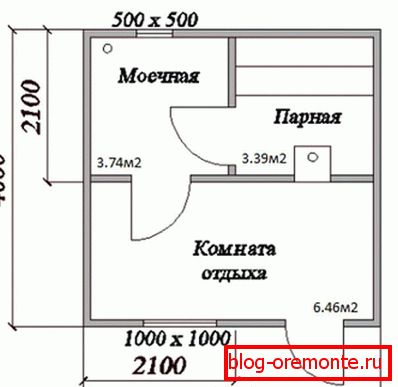


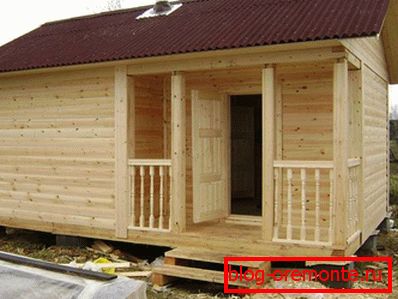
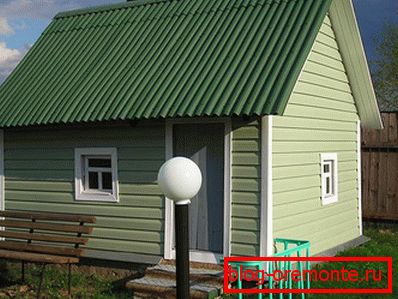
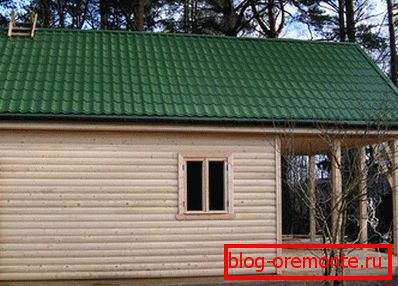
Photo: original baths