Arbor of metal with their own hands
Metal gazebo is a durable and reliable design, which, provided proper arrangement, design and planning will be a great addition to the dacha. Today, a large number of types and shapes of metal arbor structures have been developed. Therefore, to find a suitable option for you will not be problematic. Although the market offers ready-made arbor designs, remember that making a metal gazebo with your own hands will not only save your family budget, but also enjoy the fruits of your hands. We suggest you to study the guide to the construction of the gazebo.
Types and methods of assembly
The gazebo can be constructed of different shapes - rectangular, square, hexagonal, octahedral, round. In addition, you can install a metal arbor in two ways:
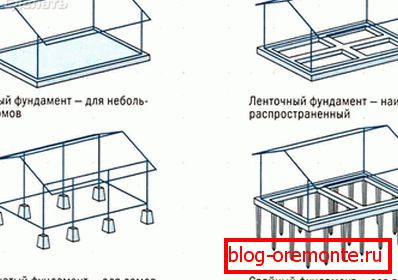
- Pipes are concreted into the ground. After the concrete hardens, the whole construction of the arbor is welded to the posts. At some distance from the ground, the lower strapping is made, on which the flooring is laid. It is also possible to lay paving slabs on the base or to concrete the site. For such an arbor does not need a foundation.
- The shallow-depth tape or column base is made. Himself arbor frame is made separately. It is installed on the ready-made foundation and secured with anchors.
Which of these technologies is more practical? If we talk about the reliability and quality of fastening, then the first option is more practical, since the posts are securely fixed in concrete, and this option is also cheaper. There is no need to make the foundation. But, on the other hand, this option is more suitable only for the summer period. Without the floor in the winter can not do, so the second option is better, since it is possible to build a closed metal gazebo.
Connection methods
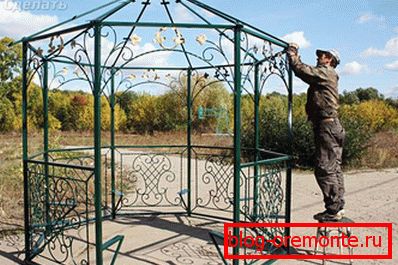
Mostly metal products are assembled by welding. This installation method is reliable and fast. However, if you need to build a collapsible gazebo, its individual modules are connected with bolts. Usually such arbors are covered with an awning or a light roof is made. All elements of the structure - railings, roofing and risers are assembled very quickly. The advantage of such an arbor is that it does not require much space for its storage.
What metal do
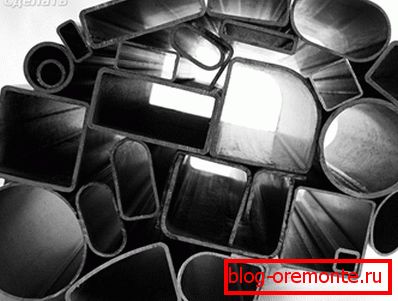
In most cases, metal arbors are made of shaped tube. The thickness of its wall should not be less than 2 mm, but not too thick. If you plan to use round pipes, the wall should be similar to the pipe. In contrast to the profile, round pipes are cheaper. But when working with them, skills are required, as a sufficiently high qualification of the welder is required to weld round pipes with a beautiful and durable seam.
Although steel pipes are primarily used, it is often, especially for collapsible arbor structures, aluminum profiles are used. As a result, the gazebo will turn out much easier, but at a cost more expensive.
We offer you to get acquainted with the process of manufacturing metal arbors of shaped pipes.
The calculation of the material and the size of the arbor
First of all, you need to make purchases of the material. For arbor racks need the following profile pipes:
- 50? 50 mm if the slate, shingles, metal or professional sheet will be laid on the roof;
- 75? 75 mm if the roof tile will fit tile or slate.
For jumpers, a thinner profile is possible: 50? 50 mm - maximum, minimum - 20? 30 mm. If you plan to build a large arbor, then, accordingly, the cross section of the profile is better to take a large one and vice versa. Also consider the weight of the material that will be sheathed arbor frame.
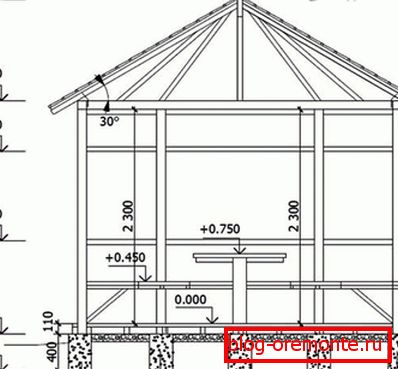
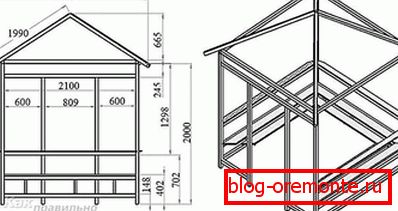
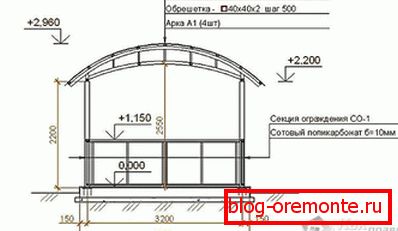
To make a square metal gazebo, with a size of 3000 × 3000 mm and a height of 2200 mm, such a set of material is required:
- pipes for tying 12 m - 50? 50? 2 mm;
- profile tube for jumpers in this name: 30 m - 40? 20? 2 mm, 6 m - 20? 20? 2 mm and 14 m - 40? 40? 2 mm.
- metal strips of 2 m 20? 4 mm.
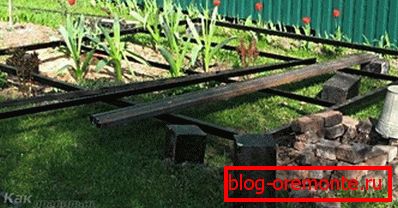
Step-by-step instruction: marking and mounting pillars
From the surface of the soil at the construction site, remove the fertile soil layer. If the water leaves the site well, the pit is filled with sand and soil, preferably without vegetation. If the soil is predominantly clay, then clay is also filled in to be removed.
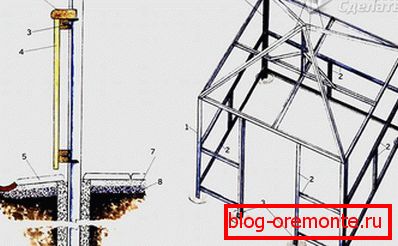
Next, a pit is made for installation of pipes up to 90 cm deep. You install a pipe into it, fill it with rubble of large fraction or construction debris. After that align the support pillars vertically. In an equal position, they should be fixed and then proceed to concreting.
If M400 cement is used for concreting, sand is added in the measurement of 3-4 parts. At the same time, the concrete must be liquid in order to fill the entire pit covered with rubble.
For working with metal it is very convenient to use a level or plumb with a magnet. You set the measurement object in the right place and without any problems expose the support column by level.
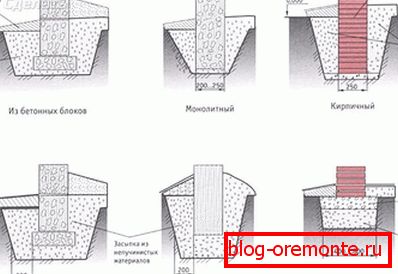
Another option for the manufacture of the foundation is to install the blocks on which the gazebo will be installed. With this performance, the structure will be raised from the ground level. The blocks are installed necessarily in the corners and in a staggered manner in the middle. This will prevent the pipe from sagging. When the edge of 50 mm 3 m pipe without support sags. Blocks are aligned horizontally. To do this, you can drive in the corners of the pegs and pull a string between them.
All this hassle with the installation of supports can be avoided if the support columns are simply concreted into the ground. But in this case, the lower strapping will need to be welded to level.
Racks and lower strapping
When the blocks are installed, suitable pipes are laid around the perimeter. For the bottom strapping is enough pipe 50? 50 mm, but can be more. Be sure to check the horizontal level of the pipes. In the corners of the pipe weld. After that, to install the floor of the boards, weld the jumpers from the pipe section of 40 × 20 mm.

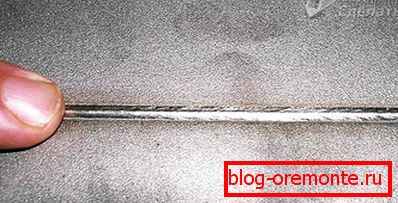
All pipes should be primed. Treat the welding points especially carefully.
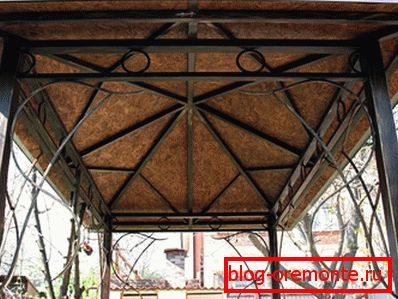
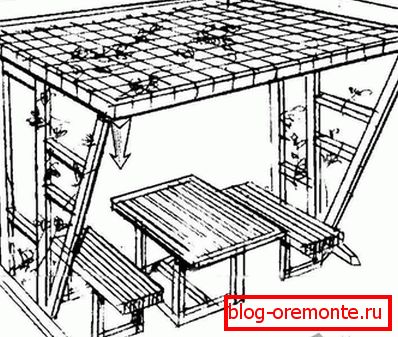
So that it was possible to stand upright in full height in the gazebo, the racks are made with a height of 2200 mm. In order for the racks to have the necessary rigidity and to stand securely, you should weld the mounting brackets from a metal strip, as shown in the illustration.

Having established a rack on level, clamp clamps the boars and weld them by welding. Also scald the pipe at the base.
Railing and top trim
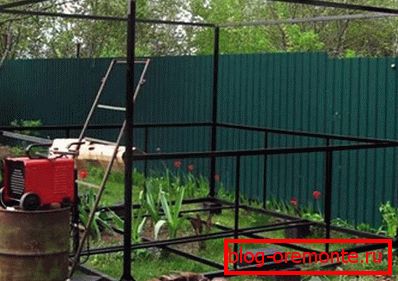
In our arbor, the height of the railing will be equal to 900 mm. You can make the design without railings - it does not matter, for example, solid sew of polycarbonate. For the middle piping (for the railing) and the top, a pipe with a cross section of 40 × 20 mm is used. So that the rigidity between the bottom strapping and the railing was sufficient, you can weld the vertical posts 950 mm from the same pipe.
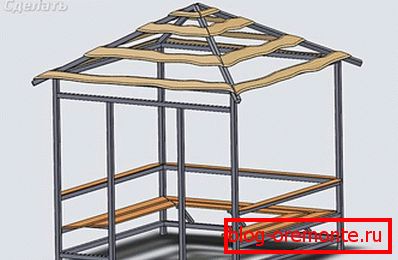
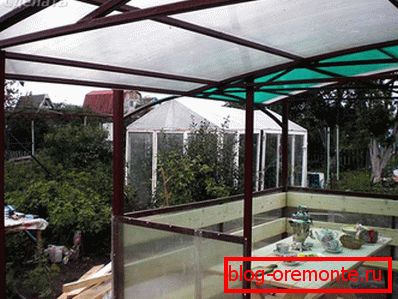
We make a roof
In our case, the roof of the gazebo will be covered with shingles. For this, the truss construction is made of wood. For the frame used timber 75? 40 mm. To batten under the tile, you can use the wall paneling. For a more presentable view from the bottom, the paneling can be replaced with moisture-resistant plywood.
At the open end of the profile pipe, hammer a piece of wood not less than 100 mm deep on the rack. On top of it should remain a length of up to 70 mm. To these traffic jams will be carried out rafters. Therefore, traffic jams can be cut at the root and at the desired angle.
Another option for attaching rafters is to weld a support of a metal angle to a given angle of a roof to the posts. At the corner a hole is drilled through which the truss system will be fixed.
Rafters are cut in the amount of 4 pcs. 2.5 m. All the rafters are connected at one point above. They can be knocked down with nails or screws. At the same time, trace around the corner; for this, the ends of the beam are trimmed to the angle. For better reliability, the rafters can be connected to each other with a stainless angle.
Before installing the rafters, treat them with antiseptic against rotting. They can also be treated with stain and varnish or paint in any color. This will greatly simplify the work, since it will not be necessary to do all this at a height.
In the center of the upper strapping secure transverse beam. From him perpendicularly install the rack towards the upper trusses of the trusses. This will significantly enhance the design of the roof. After installing and fixing the rafters, you can make a crate, and plywood or lining is laid on top. The final touch in the arrangement of the roof will be the laying of shingles. Her laying is done from the bottom up, and nailed with small nails.
Final finish
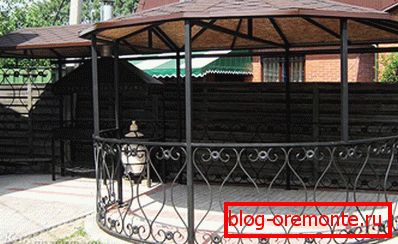
At the last stage, the flooring is made of a board of 70? 40 mm. Small gaps are needed between the board, which will allow the wood to swell with changes in humidity. Given this, the floorboard is not recommended for flooring in the gazebo. As for the sides of the gazebo, for its decoration, you can use a variety of options. For example, weld forging elements, close the railing with polycarbonate, etc.
So, we learned how to make a gazebo out of metal using a shaped tube. If you have your own experience in performing such works, then leave comments at the end of this article. Also the drawings provided can help you. Starting from them, you will be able to design your arbor of metal.
Video
Additional instructions for making a metal gazebo are provided in the video:
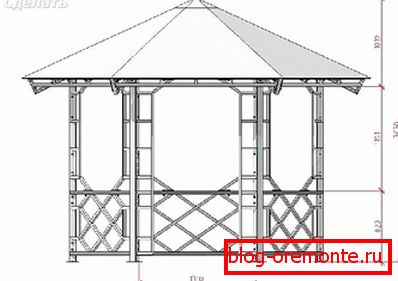
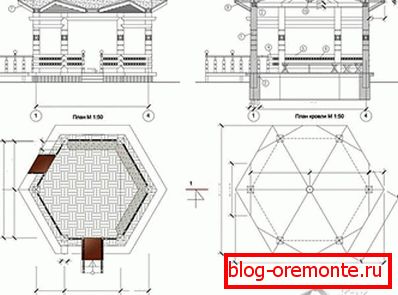
Scheme
These schemes will help you design a pergola on your own:
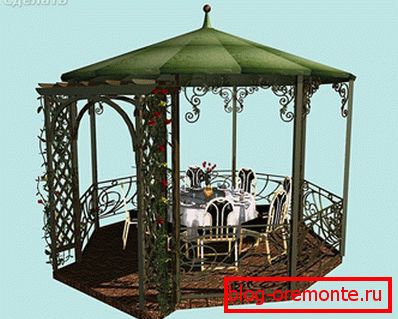
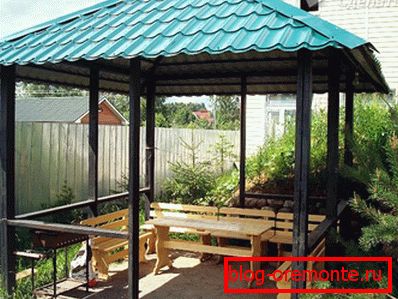
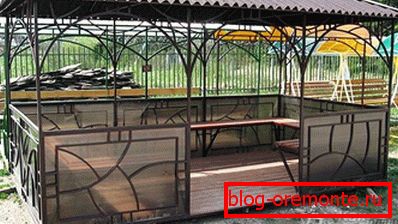
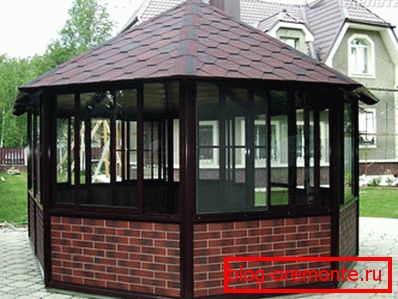
A photo
![]()