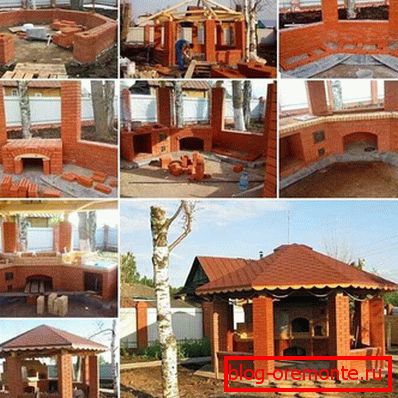
Arbor of bricks with their own hands
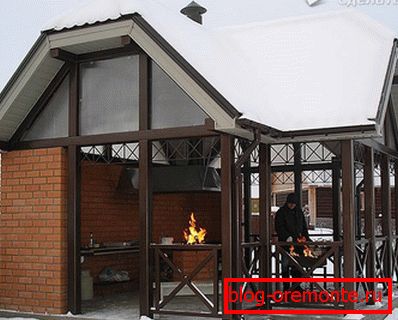
Nowadays, people buy cottages, often not only to grow vegetables and fruits there, but to be able to relax in the lap of nature, sit with best friends or family. Such places, as well as homes in the private sector within the city, help to escape from the hustle and bustle of city life, admire the fresh greenery. However, bad weather or scorching sun may somewhat impair rest. If you make a gazebo on the backyard, then it will be possible to have a comfortable time in it, not only in summer, but also in winter.
Conceiving construction, everyone makes his own plan of exactly how this structure will look. Someone is easier to build something inexpensive and simple, as a rule, it is a light type of structure, and someone prefers structures of more durable material. After reading this article, you will learn how to build a brick arbor on your own.
Beginning of work

First you need to perform a number of preparatory work. After creating a project on which it will be possible to realize all your desires regarding the arbor and decide on its location, you can proceed to the construction process itself. Before the foundation is constructed, it is necessary to clear a place under the perimeter and outline the corners. It is necessary to remove about 200 mm of fertile soil, which can then be used for other purposes.
It is important to determine the construction site on the basis of operational functionality - if there is a grill, where there will be smoke, whether the gazebo will be in harmony with the environment and nearby buildings, and so on.
Foundation device
![]()
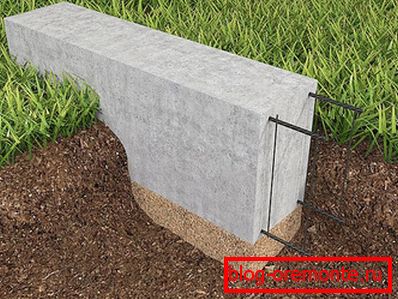
Then you can proceed to the device foundation. Given that our building will have considerable weight, the creation of this part of the building must be taken seriously. The foundation must be strong enough to withstand the weight of the walls and roof, but at the same time it should not be done such as if a one-story house will stand in the place of an arbor. Requires accurate and correct calculation.
One of the requirements for the foundation is its resistance to precipitation. For the foundation, you can use building materials that are not afraid of moisture, corrosion, as well as various insects - stones, bricks or concrete poured into the formwork are best suited. With a wall thickness of 140 mm (the thickness of the brick laid flat and plaster on both sides), the width of the foundation can be taken to be similar.
The foundation should not be too deep, but this criterion depends on the soil on which it is built. In clayey soil, it is enough to go deep by 20–30 cm, and for sand or base, where the bedding of clay or another solid layer is below, it is necessary to make a deeper foundation, sometimes up to half a meter. Considering the type of soil, it is necessary to take into account whether there is ground water on the site where the arbor will be built and whether they do not flow too high to ground level.
One person will cope with the construction of the foundation, and he does not have to be an expert in the design of such structures. The correct proportions when building a mortar for laying a brick foundation or the ratio of substances in concrete will help to make this work front correctly, easily and quickly.

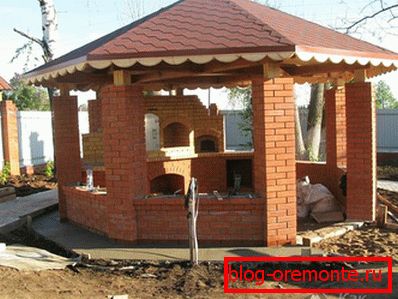
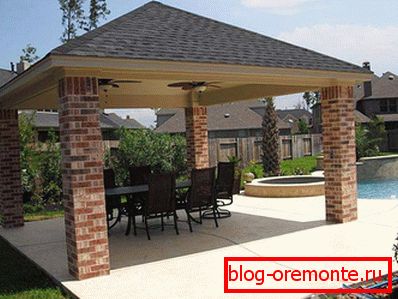
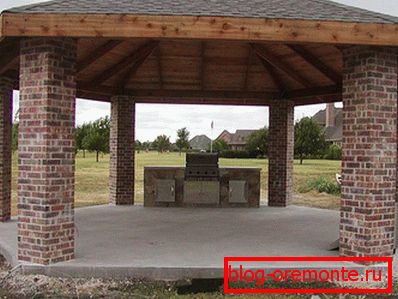
The type of gazebo and its shape will influence how to make the foundation. So, if the walls are not solid, for example, there will be fences only behind and a little on each side, and columns are installed in front, then you do not need to build a solid closed foundation - it is needed only under the columns and where you plan to build walls. If you plan to place a fireplace or a barbecue, it would be useful to build a simple foundation for these structures. If the walls are from all sides, then the foundation will repeat the shape of the walls. Properly constructed foundation - a pledge of smooth walls.
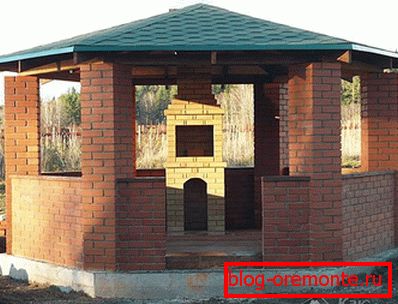
Masonry walls

Walling is the next important stage of construction. The best material that is distinguished by its high strength and durability - the qualities required for such construction is brick. Despite the fact that for brickwork the consumption of cement-sand mixture increases, such a wall can stand for dozens of years, you can fasten nails and dowels in it (to hang shelves for dishes or towel hooks). The thermal conductivity of bricks is lower than that of foam blocks, which does not interfere with keeping warm and dry in a fully closed gazebo
The disadvantage of brickwork in addition to the high consumption of cement and sand is the long duration of the work, as well as the presence of skills of the bricklayer. Of course, crooked brickwork can be leveled with plaster or various finishing materials, but this is not an option. If you use a few useful tips, the laying of bricks can be made more or less even, even without experience and skills.
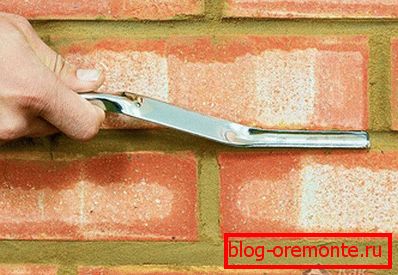
It is necessary at the edges of one wall to put the entire height of the square beacon. Small bars or metal CD profiles will do. By placing them on a level so that their horizontals are even from all sides, you can fix the beacons. A line is drawn between them, which is strongly stretched by the level of the first row of bricks. The evenness of the fishing line is checked using the construction level.
Before you use a level, you need to check it, if the instrument is not shot down. For this, a horizontal surface is selected and a level is attached to it. We remember where the bubble is located, which determines the level, after which the instrument is turned over by the other side. If the bubble in the second case is in the same place where it was first, then the tool is working, if not - it is better to replace the construction level with a new one, which also does not hurt to check before buying.
Prior to the laying of the walls, it is necessary to determine which engineering communications will be connected to the gazebo and laid in it. For example, laying sewage and water supply, if they are, it is better to work on the foundation device, it is better to lay the electrical wiring before the plaster, so you don’t have to make the grooves, and for ventilation, if there is a hood under the barbecue, leave a hole a little more than 110 mm in the wall .
To make it easier to make the above hole, you can lay a 110 mm sewer pipe in the wall, lay it in with masonry, and when the cement hardens, hold a 100 mm metal corrugation inside the pipe and fix it with a cement-sand mortar.
Roof structure
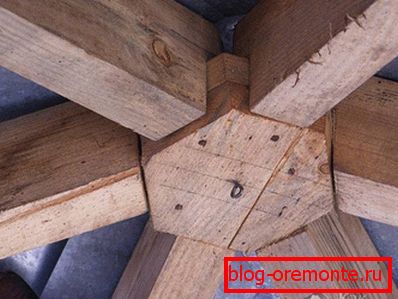
Now let's talk in more detail about the roof of the gazebo. In order to fix the truss structure to the walls, it is most convenient to lay metal rods in the places where it is planned to fix the rafters during the laying. These brackets can be welded brackets, which will later be fixed rafters. If metal pillars are inserted into the wall in advance before the laying, then the rafters can also be attached to them.
On top of the rafters perform crate - often for this use wooden slats with a thickness of 40 mm, which are nailed to the rafters. On the crate, you can mount any roofing - asbestos cement sheets, decking, metal tile and more. The main thing is to remember that each sheet goes to the next one with an overlap of at least one wave - so that water does not flow through the roof after rain or from melting snow.
Finishing work
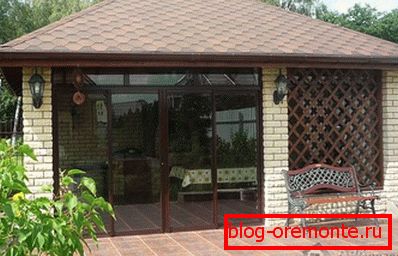
The main front of the interior is to perform interior and exterior finishing work. The interior work can be attributed floor screed, plaster walls, ceiling device, in some cases - installation of a fireplace or barbecue (it all depends on the choice of the owner and the type of gazebo - it is closed or open type). Some exterior works are also needed - exterior finish, blind area device and weir fixing.
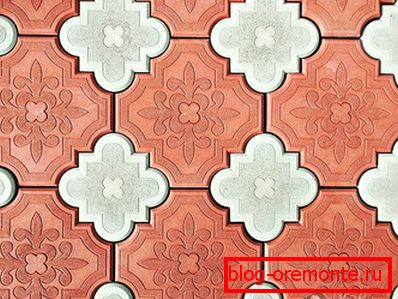
For flooring in the gazebo, which will last a long time and will be beautiful, you can use ordinary paving slabs. How to make a blind area? For this, a 50 cm wide construction will be suitable. Its level should be below the floor covering, and the blind area itself should have a slope to the side of the street so that water from precipitation can flow along it. To construct a blind area, you will need to make a formwork of boards or a metal square profile. The thickness of the blind area must be at least 10 cm, it is desirable to make a sand pillow under it, with a similar thickness - the clay will not allow moisture to penetrate under the arbor foundation, and will not allow the walls to melt.
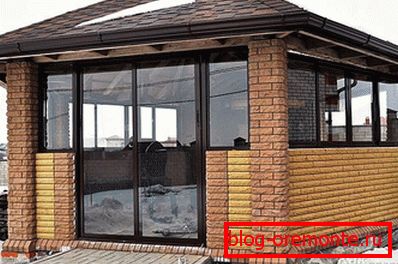
If the walls were lined up perfectly, then the optimum thickness of the plaster inside and outside the walls will be 10 mm. Inside the walls can be glued tiles. You can also revet the walls with plastic panels or wooden clapboard. Outside, the walls are putty and painted with water-based paint. If you plan to use in the winter, then the walls should be insulated with sheets of polystyrene foam 100 mm thick, then apply a reinforcing mesh and level the surface with glue-cement, then apply putty and cover with water emulsion.
In general, to build such a structure is not so difficult, if you follow all the above tips. If some work fails to do it yourself or there is no certainty that they will be executed correctly, it is better to contact the specialists. In this case, the cost of the work will be higher, but the gazebo will be more durable, even and beautiful.
Also read:
- How to independently build a gazebo.
- Construction of a wooden arbor.
- Production of a six-sided arbor.
- We make a gazebo from polycarbonate.
- How to make a gazebo from the profile pipe.
- Device and construction of arbors with barbecue.
Video
Watch a video about a brick arbor with a brazier:
This video shows the laying of brick pillars.
A photo