Aluminum ceiling diy
High humidity and constant temperature drops are the eternal companions of kitchens and bathrooms. High performance, presentable appearance and ease of installation - these are just some of the positive features in favor of aluminum slatted ceilings. We invite you to familiarize yourself with the features of this design and its installation technology. In this article we will tell you how to make an aluminum ceiling with your own hands, show photos and video instructions.
Specifications
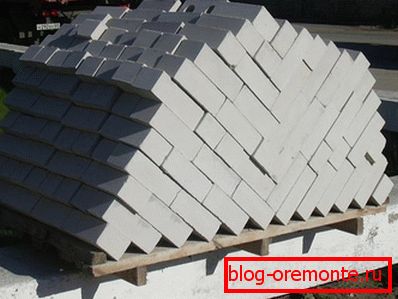
Rack ceilings are one type of suspended ceilings. The suspension system allows you to mount rails made of different materials, including aluminum. They are made of plastic, aluminum or steel tape, having a thickness of 0.4–0.7 mm, a length of up to 6 m and a width of 50–300 mm.
If you order billets for the rack ceiling according to individual dimensions, then you will be given the length of the slats with an accuracy of up to 1 mm.
Installation of aluminum rack ceiling is made only after plastering and subsequent complete drying of the walls and floor finishing.
Types of rails
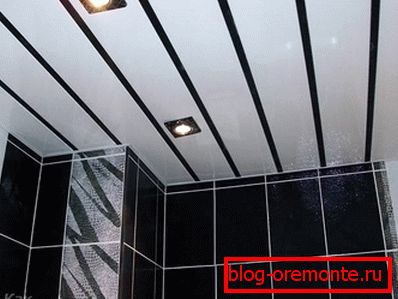
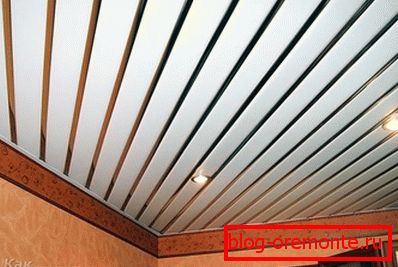
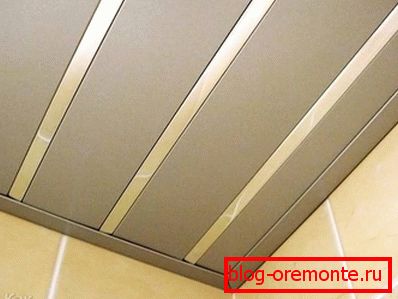
If you decide to install a ceiling made of aluminum panels in the bathroom or in the kitchen, then you will not regret it a bit as it is not only reliable and durable, but also fits into almost any design. A large assortment of rails can satisfy even the most demanding customers. Reiki are smooth and perforated, matte and glossy. They mimic the texture of wood and even skin. As for the shape of the rails, they are rounded and rectangular. A huge number of colors and shades is simply amazing. Reiki set along, across the ceiling and even diagonally. Thus, you can visually reduce or increase the space.
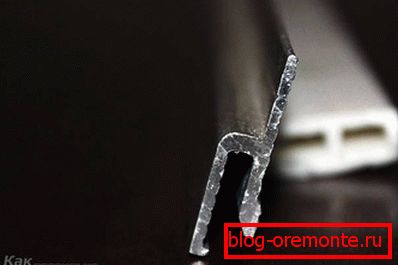
Such ceilings are still distinguished by inter-river joints. With open mounting, small gaps remain between the slats, equal to 15 mm. The decorative profile is mounted on them. When docked, aluminum panels overlap each other. There are also such slats, which are joined closely, so that you get a deaf joint, that is, without gaps.
What is a suspension system

Comb or universal carrier tire, corner profile, as well as adjustable suspension - these are the main components of the suspension system. The comb represents a level from galvanization with special clamps in which mount and fasten laths.
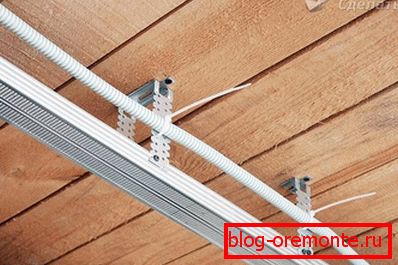
As for the suspension, it consists of a rod and a bracket. In this case, the rod is attached to the main ceiling, and the bracket - to the carrier comb. Installation of a suspended ceiling is carried out at a distance of 5–12 cm from the main one. This distance is determined individually, depending on the communications located on the ceiling and personal preferences.
Calculation and purchase of materials
If you have already decided on the color and type of ceiling, then you need to calculate the amount of materials:
- Measure the perimeter of the ceiling. This measurement will indicate the required amount of purchase of the U-shaped profile, which is fixed on the walls, which will help to accurately adjoin the ceiling to the walls.
- Calculate the length of the combs. To do this, you should mark the ceiling, perpendicular to the direction of the decorative panels, in increments of up to 1 m.
- Determine the area of the ceiling. To do this, calculate the total area of the room.
After that you can buy the necessary set of materials for arranging the aluminum ceiling, according to the calculations you have made.
Instruments

Before proceeding with the installation of an aluminum slatted ceiling, you will need to assemble the following tools and materials:
- Ceiling kit with profiles, panels and stringers.
- Perforator.
- Dowel-nails and screws.
- Suspension elements.
- Construction level, tape measure, marker and ruler.
- Screwdriver.
- Pliers.
- Drill.
- Knife and scissors for metal.
Markup
If you mark the ceiling correctly, the installation will take place without any difficulty. So first of all, mark the perimeter. This is necessary for mounting the U-shaped profile. If you are dealing with a perfect ceiling, then you are extremely lucky. In this case, you just need to put a line at the desired height from the ceiling.
In the process of marking the perimeter on the ceiling, which has a different level, you will have to carry out more complex calculations. The indent from the edge of the wall in this case will completely depend on the filling of the interceiling space.
If no communications are hidden in the ceiling, then the distance from the draft ceiling should be minimal, namely 5 cm. But, before you mark up, decide whether you want to install lighting devices on the ceiling. If so, an indent of 5 cm will not be enough.
Now make a markup for stringers. All the lines you have planned should be parallel to the side wall and between each other, and perpendicular to the end wall and the direction of the individual panels.
Fastening bearing elements
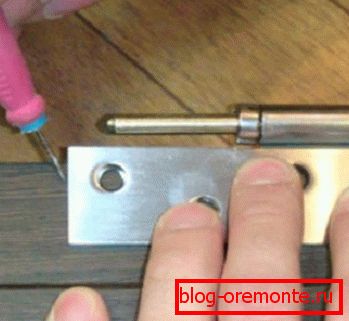
Fix the U-shaped profile with dowels. Set aside from the edges of 5 cm, and then make holes with a drill. The step between them for fasteners should be approximately 0.5 m.
Holes should be drilled from the outside of the profile. This event will allow you to avoid the formation of burrs, which subsequently prevent the profile against the wall. Prepare the hangers in accordance with the markings. Adjustable hangers make it possible to level the ceiling. The extreme points should be located at a distance of 30–40 cm from the end walls. Intermediate points should be performed in 1.2–1.5 m increments. Fix the stringers to which aluminum strips will subsequently be attached. A small gap of about 1 cm should remain between the profile attached to the wall and the stringers. It is important to observe this condition so that at temperature drops the finished ceiling does not deform.
Assembly
Before installing the ceiling structure, cut the panels of a given length. It is important to make them 3-5 mm shorter than the distance between the profiles into which the end sides of the panels will later be inserted. Now it is time to assemble the surface of the ceiling. Insert the panels into the stringers until a characteristic click indicates that the rails are fixed on the comb.
If the last panel does not fit, then nothing remains but to cut it. Mark the cut points, then make perpendicular cuts on the removable side of the panel. Panel segments formed by notches should be broken off by bending / unbending aluminum. Fill the rail in profile, bolted to the wall, cut off the side, and fix the other edge on the stringers.
To make this process faster, set the trimmed panel to the last but one and shorten the last panel by 14 mm.
When installing the rails in series, you must diagonally wind them into profiles that are bolted to the wall. In contrast, the last panel must first be shifted to the side, getting the first edge of it in profile as much as possible. Thus, both ends of the panel are evenly positioned in relation to the wall. Now you can fix the panel on the carrier rail.
Additional recommendations
Spotlights better harmonize well with slatted ceilings. For this pre-made holes for them. Draw a circle of the desired diameter in the place of installation of the lamp. From the center of the circle to the outside line, make cuts along the radius. To do this you will need scissors for metal. Curl the petals to the inside of the ceiling. Installation of the lamp will be better if you make narrow petals.
When installing a slatted ceiling made of aluminum, make sure that the process does not disrupt the integrity of the finishing layer of the panels. Scuffing, scratches and other mechanical damage will only worsen the appearance of the finished ceiling.
Anodizing panels gives the most stable and durable coating, as opposed to other types of decorative finishes.
Features of operation

Aluminum ceilings get dirty in the kitchen more quickly. However, to care for them is quite simple. They are not afraid of water. This means that the surfaces of such ceilings can be sponge-washed in a soapy solution.
Rack aluminum ceilings are environmentally safe, so they can be used even in the bedroom and children's room.
When choosing aluminum ceilings, it is better to purchase high-quality ceiling coverings with a protective film. It will protect the ceiling from temperature extremes, dirt, moisture and dirt. When properly installed, your ceiling will retain its appearance for a long time. The installation of a slatted ceiling resembles a designer's assembly. If you already have experience in this matter, we invite you to share it in the comments to the article. Have questions? In this case, ask them to our site specialist.
Video
We invite you to see step-by-step instructions on how to make an aluminum ceiling by yourself: