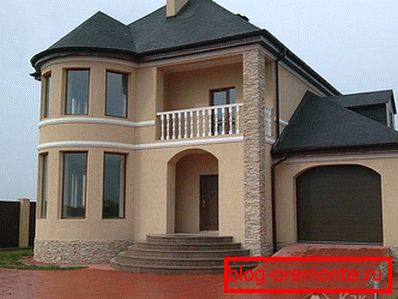
Adobe house with your own hands
Many people would like to spend a minimum of money on a good project. In fact, this is a reality, not a myth. To verify this, you need to learn how to build a cob house yourself. To implement such a project will need a strong desire. Building materials can already be said to be underfoot.
Is it all rainbow
Before you take the first steps towards the project, it is necessary to analyze, having learned all about the pitfalls that can be encountered on the way to the desired goal. On the positive scales, you can set up such arguments:
- free of charge of building blocks;
- no need to use special equipment;
- excellent thermal insulation;
- perfect vapor permeability;
- ease of construction;
- good sound insulation;
- service life can be 100 years.
Other bowl of scales:
- poor moisture resistance;
- in some cases, there is a high probability of ignition;
- high labor costs in the manufacture of blocks;
- such designs are loved by rodents;
Building such a house is more of a creative process. There are basic principles, but there are no ideally precise guidelines that can be followed. You are not tied to any particular form. There is the advantage of complete self-design of literally everything.
What is saman
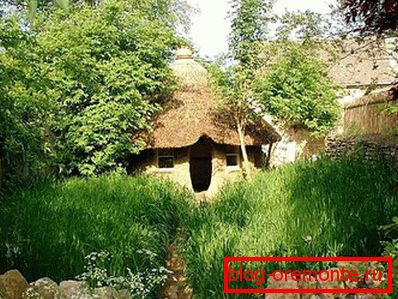
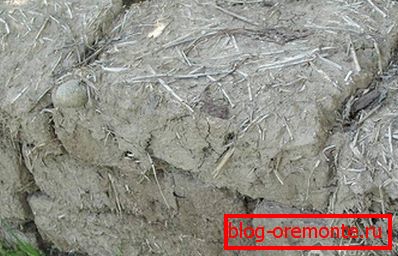
The construction technology originated several thousand years ago, when there were no plants for the production of concrete floors, cement, etc. People used what was available and widely distributed. But it cannot be said that building from adobe is an out-of-date method. On the contrary, there are names that are used in everyday life: clay concrete, raw bricks, etc.
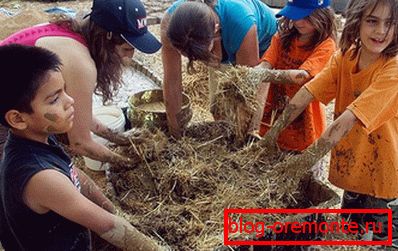
So what is it? In the classical sense - a mixture of water, straw and clay. Various plant stems (usually fibrous) can be used as filler. There may be additives from sand, animal dung, lime and ordinary earth. Today, cement, plasticizers, synthetic fibers, antiseptic compounds and much more have been added to the mix. All this in order to improve certain qualities and compensate for deficiencies.
Component analysis

As noted above, the main component is clay. But not everyone is suitable for quality work. In order that subsequently cracks were not formed, clay should not be too fat. Also, it should not be too dry, otherwise there will not be a good setting, and all efforts will go down the drain. It can be brought under the order or get it yourself. In the second case, you will save a lot, but you will need to analyze its quality. To do this you will need:
- Determine how deep the clay layer is. This can be done by experience, digging a hole and looking at the cut. Or you can get data from land surveyors in your area.
- For further action you will need to take 3 or more glass bottles, liquid soap or salt and water.
- Wells are made in several places of the planned fence using a hand drill. Usually it is necessary to go deep by 1–1.5 m
- A plate is installed on each pit so as not to confuse the place from which the sample was taken.
- Clay is crushed and placed on the bottom of the jar. Each vessel is also marked with a label that corresponds to the well used.
- 40 grams of salt or 200 grams of liquid soap is added, filled to the top of the jar with water and closed with a plastic cap.
- With enough effort, you need to shake it for 10 minutes so that the clay is well dissolved. If inside there are still chunks of soil, then you need to leave the suspension for a while, so that it is well soaked.
- Now you need to pick the most even surface and put the banks on it. It is better if it is some kind of elevation, for example, a table, then it will be more convenient to conduct observations.
- After waiting a minute, you can see the first precipitation - it is coarse sand or silt. Now you need to make a mark with a marker, tape or other suitable material.
- After 10 minutes or a little more, the next layer begins to settle - this is fine sand, the latest one will sink to the bottom of the clay.
- When the water has already become as transparent as possible and no floating particles are left in it, one more mark of the upper level of sediment is made.
- It is measured from the bottom to the top mark. Where the value is greatest, that material is the best. By the number you can determine from which well the fence was made.
This method does not take a lot of time and effort, but makes it possible to accurately assess the composition of the building material as accurately as possible. The highest index is such a composition in which there is the smallest amount of impurities of fine sand. The ideal option is the area where there are layers of red clay, it has excellent plasticity, which greatly facilitates the preparation of the solution.

There are some signs by which it is possible to determine the places where the clay lies precisely:
- Near rivers and lakes.
- Marshland, where there is a small layer of water. The liquid is just held by a layer of clay, which does not allow it to be completely absorbed.
- You can determine the water level in the well. If it is low, then most likely this terrain is also suitable.
- Clay soils are a favorite place for the growth of sedge and mint. Therefore, with their abundant availability, it is possible to judge the possible presence of quality material.
- It would be useful to ask those who have already built a house from adobe or are laying stoves.
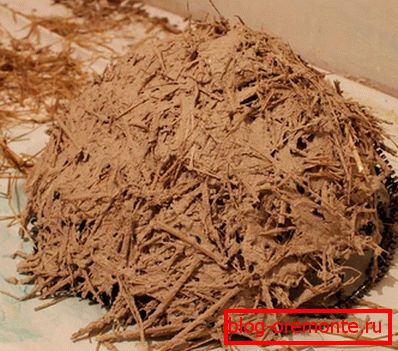
Clay - the main, but not the only component. The filler plays an important role. His choice also needs to be taken seriously. The best option would be the stalks of winter wheat. This is due to the presence of a large amount of waxy substance. It repels moisture and prevents rotting, which is a requirement. With regard to the spring this can not be said. Stems must be from a fresh crop.
If it is not possible to harvest the stems of a fresh crop, then the main requirement will be their good drying and the absence of fungus or rot. In the absence of straw, the use of hay is allowed, but necessarily from grasses that have a hard stem. Flax can be used, but it is advisable not to use synthetic fibers.
Choosing sand, do not dwell on the sea. The fact is that it has rounded shapes, which will adversely affect the viscosity of the final product. Usually chosen career coarse. It does not matter if in your case it is impossible to find such an option. Undesirable, but it can be replaced by the usual river.
Manufacturing blocks
Clay itself has a high viscosity, so it is a little problematic to dig it out, and then mix it with the necessary components. To facilitate the task itself, you need to think in advance about the workpiece. This is usually done in the fall. In winter, under the influence of frost and absorbed moisture, the material disintegrates into smaller parts, which are easier to work with. The preparatory stage is carried out as follows:
- From a cut board (you can use another durable material that will be resistant to moisture) knocks the box. Its dimensions can be, for example, 1 × 1.5 × 2 m (height, width and length).
- Clay is placed in the middle. In order to ensure the desired effect in the future, it should be placed in layers of 30 cm. After each one is laid, the surface is wetted with plenty of water.
- To the top you must leave a gap of 20 cm. It is closed with the help of straw. It will serve as a barrier to the evaporation of liquid in warm weather.
- The whole construction is covered with roofing felt or thick plastic wrap. In this state, the material is left for the whole winter so that the required natural processes take place.
- In the spring, when the temperature begins to rise and during the day has no negative values, it is necessary to open the shoulder and remove the straw. After that, you need to tighten the film again. In this case, there will be some similarity of the greenhouse effect, which will contribute to the rapid defrosting of the material, as well as prevent its drying, will remain elastic and sticky.
There are a large number of tables that show what the ratio of components should be. But the fact is that, depending on the area, the clay itself will differ significantly. What is ideal for one case may be a negative decision for another. This is because it is often difficult to predict shrinkage parameters.

It is better to determine the quality of the prepared mixture empirically. The first thing is mixed clay and sand. Water is added in portions so that the composition remains sufficiently thick. A small part is taken and rolled into the ball in the palms. If during this procedure the product sticks and the part remains on the hands, then it is necessary to add more sand. In the case when to form a lump does not work, then you need to add more clay. The second part of the test is carried out after the ball froze. It is necessary to throw up and give it free to fall to the ground. If its shape has not changed and no cracks have appeared, then you can start manufacturing the main blocks. In the case when it crumbled into pieces - you need to add clay, changed the shape, but remained intact - more sand.
These actions helped to determine the optimal proportions for a particular case. Then you can proceed to the preparation of the bulk for construction. The kneading can be done in a construction trough, on a dense polyethylene film or tarpaulin. The most convenient way to do this is in the pit. It is necessary to dig a hole 50 cm deep. The depth of the depression is 1.5 m, width 2.5 m. It should not be filled to the brim, but to a height of 30–35 cm. If you make the layer larger, then it will be difficult to mix it well, which will to the poor quality of the final product. If these dimensions are observed, for one output, it will turn out to produce about 60 blocks with dimensions of 20 × 20 × 40 cm.

Before laying each component it is necessary to prepare a well well. To do this, its bottom and walls are tamped with the help of available tools. The entire area is covered with a film in such a way that it will overlap to the surface, which will prevent it from slipping. First of all, clay is poured, its layer should be 20–25 cm. From above, the space is covered with water so that the clay is completely submerged. In this state, everything is left for the night. This is necessary so that the material becomes as supple as possible and all the lumps soften. The next day, before the start of preparations, it is necessary to trample the clay well, so that the water passes to the lower layers. Next, add sand, mix well, then straw.
In order to speed up the process, the foundation pit can be made larger, and the mixing of the components can be made not by the forces of people, but by animals, for example, horses. But we must remember that it will have to constantly send, because it will follow its tracks, as a result of which the batch will not be carried out. You can use mechanical tools, such as a walk-behind tractor, but it’s worth considering that a large amount of clay will stick to the wheels, which is difficult to clean. If it is produced in a concrete mixer, then 2 or 3 stones up to 10 kg are put in first, they will ensure good mixing of sand and clay. The straw will need to be added not in containers, but with an external batch.

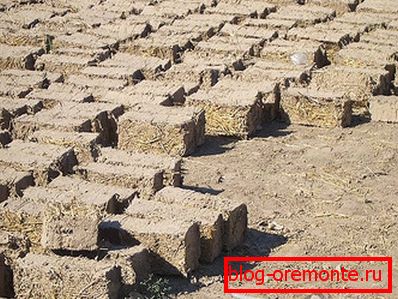
As it was written above, the optimal size for the blocks is 20 × 20 × 40 cm. But before proceeding to the manufacture of the finishing form, you need to make a trial. Usually it is made of a cut board 3 cm thick. The inner space should correspond to the size of the future brick. The surface must be well ground to ensure that the mortar is easily separated. A small batch is made and several blocks are made. They are left for 7 days, after which the sides are measured in order to calculate how much shrinkage has occurred. Finite forms can be made with this gap.
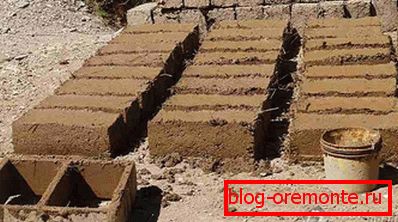
Before pouring the mixture into the mold, it is necessary to moisten the walls with water and sprinkle with a chop or other suitable substance. Inside the clay is well rammed to remove all voids as much as possible. After removing the molding sample, the bricks are left for 3 days, it is better to cover them with a film, roofing material or slate. There must be a space between them so that they do not lie flush. After this period, all elements are transferred under the shed and stored for 10–15 days until full readiness.
What is the basis
In the end, blocks of clay are obtained by weight less than those of cement or silicate. Therefore, there is no need for them to build a massive foundation, but we must not forget that the determining factor is also the condition of the soil in a particular area. In order to make the base with a small deepening, you will need to carry out such work:
- The plot is marked according to the plan drawing. And it is cleaned from garbage.
- The fishing line is tightened and fixed, which will serve as a guideline for excavation. It is best to stretch two for each side to the width of the future foundation. In this case, it is harder to move and easier to comply with the required dimensions.
- Be sure to check the diagonal, because they allow you to observe the correct geometry.
- A trench is being dug to a depth of 70 cm. Because Saber is a very plastic material that can be molded along the way, that is, it is possible to make semi-archs or rounded corners.
- The bottom is well rammed, sand is poured to a height of 20–25 cm, rammed, moistened with water, the missing level is filled and rammed again.
- The inner walls are closed with roofing paper. It is laid in such a way that it can be bent to the surface with an overlap of at least 10 cm.
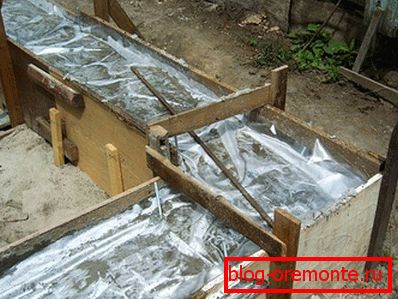
- Exposure formwork, which can be made of edged boards or laminated plywood. It is well fixed with struts and braces.
- At the bottom are placed coasters under the crate. Their height should be at least 5 cm in order for the concrete to cover it from below.
- The metal frame is made of reinforcement with ribs, the diameter of which is 12 mm. Its height is selected taking into account the size of the foundation, as well as that it is at least recessed into concrete by 5 cm. Cross rods are fixed every 40 cm. The fastest way is to connect all the components using knitting wire.
- Concrete is poured and well rammed with a vibrator. Also, it must be leveled with a trowel or a rule in order to get approximately the same plane along the entire perimeter.
- In order for the building to gain its full strength will take about a month. This time can be just spent on manufacturing the required number of blocks.
- Upstairs must be laid several layers of roofing material, which are coated with bitumen mastic. This will prevent wet walls.
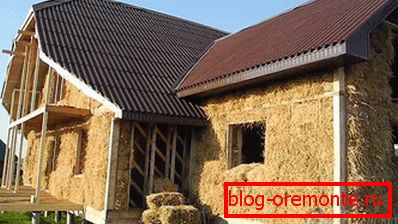
We build walls
It is a pleasure to build from such material. It is easy to process to the required dimensions with an ax. To make the walls smooth, you must comply with the following requirements:
- The laying, as well as any other block material, begins with corners. To do this, you must first determine the highest level. This is done with the help of a hydro level. One part of it is installed in one of the corners, and the second moves along the rest, where the spread is higher, and from there it should be begun.
- Using the bubble level, the first block is set in all planes. It will serve as a guide. Already on it exhibited the rest. This is done with the help of the same water level.
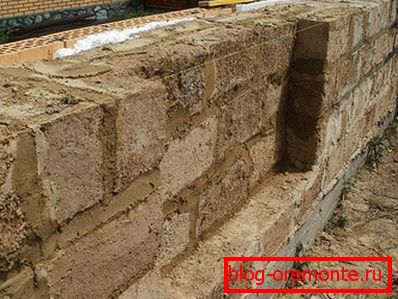
- As a binder solution, a mixture of clay and sand is used. Their ratio is 1: 1.
- The thickness of the seam should not exceed 1 cm. In this case, it will be possible to ensure perfect thermal insulation properties.
- In the course of advancement, it is necessary to provide binding of the seams, as is done with a usual laying. Then the wall turns monolithic.
- In every fifth row, you can lay a metal grid, which will give greater strength.
- The horizontal plane is controlled by the stretched twine, and the vertical by means of the building level.
- At the laying stage, it is necessary to determine the location of window and door openings and label them. Lintels are made of boards with a thickness of 10 cm or more. Its length should be such that from each side it enters the masonry by 15 cm. For the first time, it is supported by the bars below, after drying the solution can be removed.
- After the complete pasture of the walls, they should be plastered as quickly as possible to protect them from the effects of adverse weather conditions.
- Outside walls can be sheathed with any facing material. Under it, it is desirable to install a vapor-permeable barrier that will prevent the accumulation of moisture and provide the necessary drying.
- From the inside, the whole area is also sewn with a vapor barrier, its throughput must be lower than that of the outside.
- Windows and doors, it is desirable not to insert immediately. It is necessary that the entire structure undergoes shrinkage and shrinkage, only after that it will be possible to select the required parameters.
In one day it is better not to build more than two rows. This is due to the fact that each new adds weight, which can lead to the destruction of the lower blocks. The height of the walls must be done with a margin, which will subsequently shrink. An approximate figure was obtained in the manufacture of trial blocks.
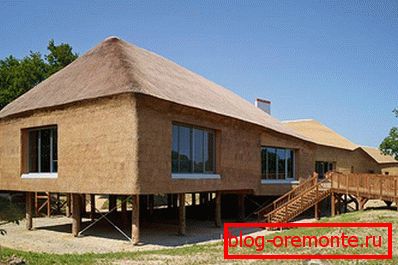
Lightweight construction
In addition to the method described above, where the manufacture and laying of blocks is required, there is another option. Its construction is performed several times faster and the cost of organizing the foundation for it will be much lower. But in this case, you will additionally need to stock up on wood. The general principle will be similar to the construction of a frame building.
Lightweight foundation

In this case, a columnar or pile foundation can be used as a base. For the second option, you can purchase ready-made screw elements. They are immersed to a depth below ground freezing. They should be located at a distance of one meter from each other. Under pereschenki should also make a separate line. Their upper part should be approximately 30 cm above the surface. The ends should be leveled and a square penny measuring 25 × 25 cm is welded on top. All elements are interconnected by means of a wooden grillage. For its manufacture you will need a bar of 15 × 15 cm or 20 × 20 cm.
For a columnar foundation at a distance of one meter, pits are dug to a level below the ground freezing. The formwork is installed inside and the metal crate is laid. Poured the solution and well rammed. The size of one element can be 40 × 40 cm or 50 × 50 cm. The top is made of the same wooden base as in the previous case.
Light walls

For the construction of walls you will need bars measuring 5 × 7.5 cm or 10 × 7.5 cm, for corner beams - 15 × 15 cm or 20 × 20 cm.
- First, the corner supports are installed. They are fixed with a spike joint and nails or metal corners.
- Mounted additional vertical racks. Two bars of the required height are connected by a crossbar, the length of which is equal to the width of the grillage. Such cross-pieces are mounted through each meter. The space between them will subsequently be filled with adobe.
- Upper strapping is performed, which will unite all the racks together.
- Mounted roofing system and flooring.
- The liquid solution is made of clay and water.
- The prepared straw is soaked in this composition and left for a while to drain a little.
- A formwork of edged boards is installed on the walls.
- Damped straw is placed inside this formwork and is well rammed.
- As the formwork dries up, it gets rearranged higher and higher. Thus erection is carried out.
- Finishing is the same as in the previous case.
Roof
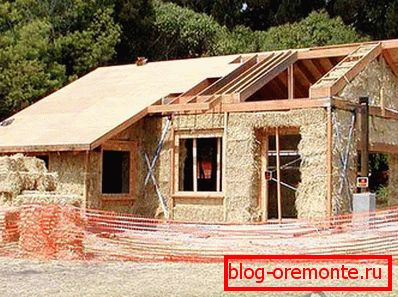
For such structures, the best solution would be a straight gable roof with an angle that exceeds 30 °; it can even be 45 °. Thanks to this, it will be possible to minimize the load on the walls. But it is important to remember that such a structure is subject to gusts of wind, so it is necessary to analyze how things are in a particular area. Overhang of slopes should be at least 70 cm. This will protect the walls from flying splashes during precipitation. As the flooring, you can use any material you like.
Additionally, be sure to make a blind area and install a system of water flow to prevent wet walls.
Using this guide, you can easily cope with the independent construction of the future place of residence.
Video
In this video, a young family shares the experience of building a classic house:
This video is about how to build a house from adobe on your own:
A photo