Laying the soft roof yourself
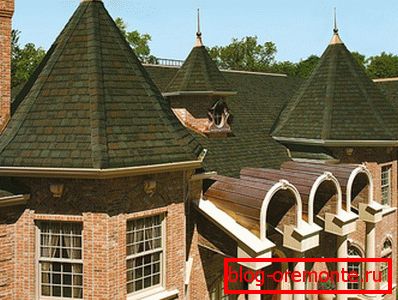
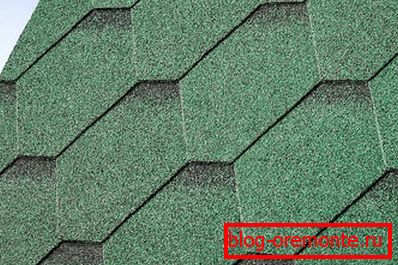
Currently, there are quite a large number of roofing materials for roofs with long service life and high-quality technical characteristics. However, you should pay special attention to the soft roof of shingles. It is a multilayer material based on polymer bitumen, reinforced with fiberglass and covered with a film or sand layer below, and outside with mineral powder made of basalt or slate. The flexible tile possesses high heat resistance and the long term of operation.
Features and benefits
Among the main technical characteristics that compare favorably with other materials are the following:
- Plasticity and flexibility, thanks to which you can lay out the roofs of various geometric shapes without any restrictions. The material will always fit snugly, without losing its properties when it is bent.
- The minimum amount of waste, as the tile has a small size, which allows it to be used more efficiently.
- To cover the roof with tiles, one person is enough, since its weight is relatively small.
- Frost resistance down to -450C and heat resistance up to +1100C, which makes it possible to use it regardless of the type of climate.
- High speed and ease of installation.
- The smooth surface allows you to build a roof with a minimum slope to the horizon.
- When various precipitations fall on the surface of the tile, noise is completely absent.
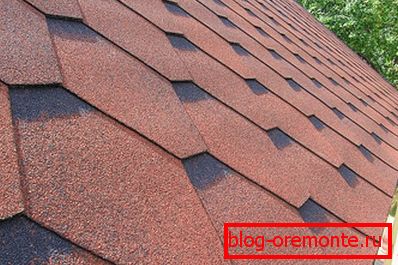
- The opportunity not only to choose any color for the roof, but also to lay out the image in the form of a mosaic.
- High safety when lightning strikes the roof of the building, since the material does not conduct electrical current.
- Lack of sail.
Calculation of roofing material
Before you cover the roof with a soft roof with your own hands, it is necessary to make calculations of building materials for proper cost estimation. Soft roof is significantly different in design and method of laying from other materials and has its own nuances. The first thing that needs to be measured and calculated is the surface area of the roof.
For rectangular roofs, the calculation is simple; it is enough to multiply the length by the width of each site, and then add the resulting areas. If the roof has a more complex shape, you need to visually divide it into several simple shapes, calculate their areas, and then fold them. After that, the number of packages that need to be purchased with a margin of about 3% is calculated. Knowing the total area, the corresponding number of rolls of the lining carpet is calculated.

Since skating and curtain rods use special-shaped tiles, it is necessary to calculate their lengths in the second stage in order to buy ready-made ones, and not waste time on cutting in one piece and thereby increase the amount of waste. Based on the lengths of the gables and cornices, you should also buy the corresponding metal strips.
The third stage is the calculation of consumables. For fixing tiles, nails are usually used, the number of which is determined by dividing the total area of the roof into square meters. by 10, resulting in a mass of fasteners in kilograms. The amount of glue is determined on the basis of the sum of the following lengths in meters: end, divided by 10, end parts of the roof, divided by 5, and adjacent roofs to the walls of the places divided by 1.4.
Note! All calculated values should be increased upwards. For convenience, calculations can be made on the basis of measurements drawing.
Laying requirements
Start laying with shingles should be from a carefully prepared surface. In addition, the base of the roof must meet the following requirements:
- The crate must be strong and rigid so that it is possible to carry out maintenance work, as well as to withstand the weight of snow and ice. Therefore, the maximum distance between adjacent transverse boards should be no more than 150 mm and correspond to the length of the tile element. The size of the boards should be 100 x 15 mm. The distance between the longitudinal planks should be equal to two intervals between the transverse ones.
- Humidity boards should be less than 20%, and they should be well ventilated.
- Due to temperature expansions, there should be a gap between boards of 5 mm.
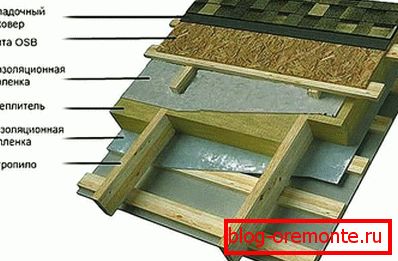
- When laying on wooden OSB panels, the seams should coincide with the rafters in order to strengthen the construction and prevent sheet overlapping.
- All wooden parts are treated with antiseptic agents.
Note! A prerequisite is to ensure high-quality ventilation of the roof in order to prevent freezing of ice on the surface of the tile, to reduce the temperature of the batten during the summer period, to ensure optimum ventilation. Therefore, you should leave the ventilation holes at maximum height to create a hood, and in the lower part, for the flow of air masses.
Laying lining
Start laying the lining and tile layers at temperatures below +50C does not follow, since the self-adhesive layer will not be able to grasp and stick with sufficient force, and also the brittleness increases and there is every chance of damaging the roofing material. In winter, you can perform work on the installation of crates, insulation, waterproofing. But if an urgent commissioning of an object is required, then it should be purchased, or rent special heating equipment that can evenly heat the roof and ensure high-quality adhesion of the layers. This process is quite complicated and requires a lot of experience, so you don’t need to undertake such work in the winter, and it’s better to wait for warming or to entrust the work to professionals.
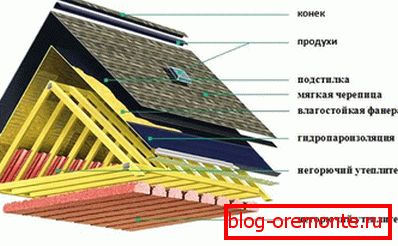
Note! Under the shingles should be laid a special lining layer, which simultaneously serves as a reinforcing and waterproofing. It is a material based on glass fiber coated with bitumen or polyester, with protective coatings in the form of a silicone film on the bottom and basalt spillage on top. Its thickness can be up to 2 mm.
Depending on the angle of inclination, the lining is installed differently: up to 180 spread over the entire surface of the roof, and with more, in order to save - only in the end, cornice and ridge parts. The material is laid from the bottom of the roof to the top. Alignment occurs relative to the end and eaves parts. After that, it is fastened with nails in the lower part with a pitch of approximately 200 mm, which ensures sufficient sealing. The following layers are formed by overlapping about 100 mm over the previous one.
Note! In order to protect the eaves from moisture penetration, metal eaves slats should be installed on top of the backing layer.
Tile laying

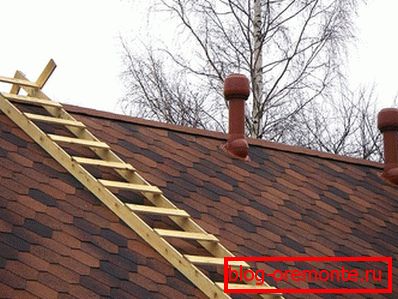
Laying the roof with roofing material begins with the eaves of the finished form. Along the slope of the roof it is laid butt and fixed with nails. To prevent uneven colors due to the use of elements from different batches, they should be mixed. The tile can be laid in two ways: at an angle and along the plumb of the roof.
In the first embodiment, a hexagonal ordinary tile is used, which is installed from the middle of the roof overhang and ending at the ends of the roof. The first row is laid so that its lower part is located at a distance of 10 mm from the eaves. Each element is fixed with 6 nails.
The joints should overlap with the next layer so that the caps from the fasteners are not visible on the surface. Rows laid at 450. At the ends along the edge, sizing is carried out at a distance from the edge of about 10 cm in an even layer with a thickness of up to 1 mm. Before applying the adhesive, the surface should be cleaned and degreased. The setting process can take up to 5 minutes, depending on the ambient temperature.

In the second variant, rectangular tiles are used. The first row is laid along the line of the cornice in such a way that overlapping of the joining points takes place. Each element is nailed with four nails. Subsequent rows are formed by overlaying the previous one. This installation option is the easiest.
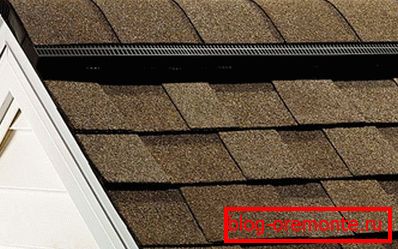
Ridge tiles in both versions are laid along the left to right overlap with a distance sufficient to overlap the fasteners and sizing the base. In the end parts it is also necessary to install aerators designed for ventilation. In places where the material is bordered by the heating surfaces of the heating pipes, sealing rubber and insulating strips should be used.
Conclusion
Laying tiles is quite beneficial both from an economic point of view, and from the operational. The roof covered with flexible material will meet all modern building requirements and standards.
Have you already covered the roof of your house with shingles? Tell us about your roofing experience with soft material, leaving comments on the article.
Video
Watch two installation videos of shingles: