How to sheathe the pediment with siding do it yourself -
Exterior decoration of the house - this is the very "clothes", which, as they say, are met. Even old buildings, the wood of which is darkened or the joints between the bricks were deformed, can look spectacular if you take care of its appearance and replace finishing materials in time. Often, to update the look of the house, making it a couple of decades younger, you only need to trim the pediment with siding. The easiest and most inexpensive way to do it yourself is to use your own set siding.

Varieties of siding
Siding is called finishing material that looks like separate elements, panels. The house walls sheathed by a siding visually do not differ from board. Each module along its entire length is equipped with hooks and latches with perforated edges for fasteners. The dimensions of the panels are different and depend on the manufacturer's capabilities, most often their width is 100-300 mm, length is up to 6 m. This is a very durable material, due to the qualities of which the finish of the roof gable does not suffer from moisture, does not require treatment with paint and varnish compositions and lasts up to 50 years. In the building stores there are the following types of siding:
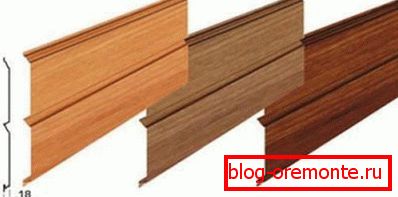
- Vinyl. Panels made of polyvinyl chloride are monolithic single elements. Vinyl siding is environmentally safe, withstands temperature differences, does not burn and has a wide decorative potential due to the variety of colors and textures. Finishing gables and ebbs of the roof with vinyl panels has a low cost and can be done independently.

- Metal. Aluminum and alloy steel panels are also used as a gable roof. Thanks to the hidden lock, the thin and light metal siding looks neat perfectly, and a diverse palette of polymer coating allows you to choose it to the roofing material of any shade. Such panels are stronger and do not change color under the influence of UV rays, however, the cost of such a variant of plating is much higher. The installation work takes more time, since it is more difficult to cut metal, it uses polyvinyl chloride.
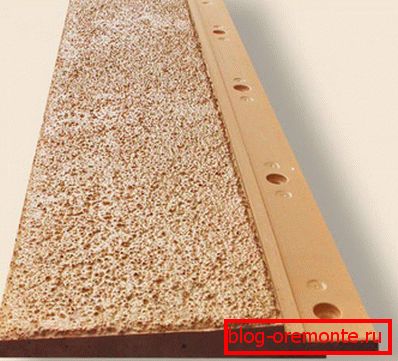
- Cement. This type of siding mimics the structure of wood, and consists of cellulose fibers and cement. Having a significant weight, the cement-cellulose finish needs a reliable frame, but it allows in a short time to bring the appearance of the roof gables in perfect condition. However, the cost of cement siding is significantly higher than the house's plating for the rest of its varieties.
Most often, affordable vinyl siding is used as a finishing material for roof gables, which can be assembled by hand. Please note that low quality siding becomes brittle and brittle in the cold, so it is better to measure and cut it in the winter in a heated room.
Mounting methods
Before sheathing the pediment with siding, it is necessary to determine the method of its installation on the roof pediment. Finishing occurs by three methods:
- Without frame. This is the easiest way, the cost of which will not burden homeowners. He is to install the panels on the metal profile without the construction of the frame. This finish is only suitable for unheated roof attic rooms, because it does not provide for the use of peat insulation materials. However, this method of installation can not be called ideal, since as the material of the gable's skin is worn, the siding deforms.

- On a wooden frame. Work on this scheme begins with the construction on the pediment of the frame of wooden slats, which are subsequently mounted profile. The cost of this method of trimming gables at home with their own hands depends on the price of wood in your area.

- On the metal frame. Such a finish involves installing a crate of metal beams on the gable. The metal frame is light, strong and durable, and the profile is most conveniently mounted on it.

Most manufacturers of siding pay attention to the fact that it is designed for use in structures with a metal frame, as the wooden crate, as its humidity changes, changes the configuration, deforming the siding and violating the integrity of the covering.
The order of work
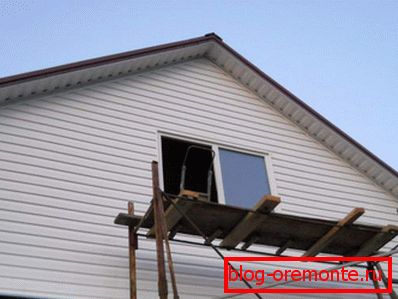
Self-assembly installation work on the roof gable begins with the construction of scaffolding or the installation of a reliable ladder whose height is sufficient to get to the place of work. Consider that the more comfortable you feel on the scaffolding, the faster and better the plating will be performed. Gable trim is performed in the following order:
- First of all, prepare the walls for the installation of the frame. To do this, it is necessary to remove the protruding parts and seal the gaps with moisture-resistant polyurethane foam.

- For brick houses it is necessary to build a metal frame of the u-shaped profile. On the wooden house you can nail the crates of the rails. The width of the steps between the yards of the frame take 40-50 cm.
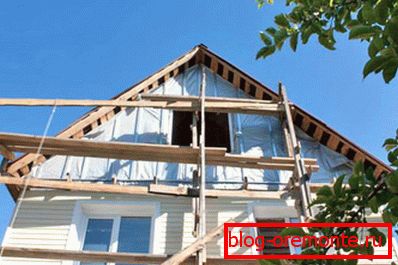
- If it is planned to warm the gables, then after setting up the lathing it is necessary to lay the layers of thermally insulating material under the frame and cover them with a waterproofing membrane. It is more convenient to carry out works on the warming of the gable from the inside of the room.
- To lay the siding in the vertical direction, you must fasten the starting rail along the base of the pediment on the screws. Experts advise against screwing in fasteners until it stops, since the material used to make siding expands when exposed to high temperatures.

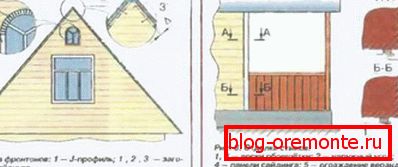
- If the length of the siding panel is not enough for covering the entire gable, it is necessary to install an N-shaped profile at the junction of the siding modules. The joints are arranged so that the scraps remain as small as possible, but they would not spoil the appearance of the gable.
- Along the slopes fix the l-shaped profile, for which you need to start the panel during installation.
- Make a template for trimming the left and right edges of the panel. The first panel is installed on the starting rail, locking it with a lock until it clicks. Do not join the siding too tightly due to the thermal expansion of its material. A normal clearance is 5-6 mm. For homes with heated attic panels it is customary to overlap to avoid wind penetration.
- Having thus laid the siding to the very top of the structure, it is necessary to trim the corner joints with plastic corners and sheathe the ebb.
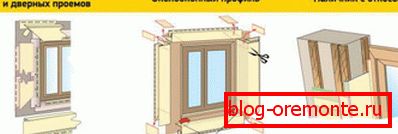
The window frames are framed with a special window profile so that the trim looks neat. Another way to beautifully finish around window designs is to close the joints with plastic corners.


Finishers often sheathe gables with siding horizontally, but sometimes they are more familiar with the vertical appearance of the finish, since traditionally the walls between the slopes of the dual-slope roof were equipped in this way.
Covering the pediment with siding is an inexpensive way to update the look of the structure with your own hands, extend its life and forget about seasonal painting of the walls of a house.
Video instruction