How to make a visor over the porch
The porch is a significant part of the exterior of the building, so that it harmoniously fits into the overall architecture, a visor is installed above the structure. The canopy has a practical function, it protects people and the entrance to the building from precipitation and sunlight. Having the basic skills of construction work and a minimum of tools, you can install it yourself. After studying how to make a visor over the porch, and looking at the video and photos of finished structures, you can get to work.
Canopy forms over the porch
A variety of types and forms of the visor allows you to choose the design, which will be an organic element in the design of the building. Not only aesthetic, but also practical requirements are imposed on the visor:
- structural reliability, it must withstand the weight of snow and wind load;
- covering the entire area of the porch.
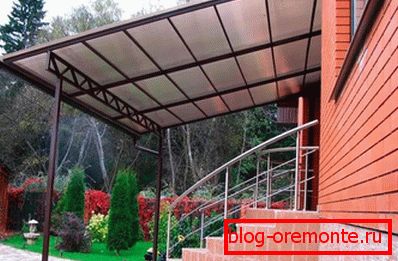
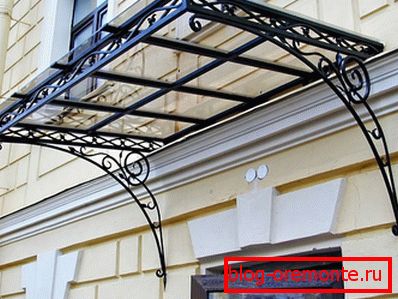
The canopy structure can be mounted on supports or to the wall. Suspended peaks are made of lightweight material, so as not to create an increased load on the wall. The load is distributed evenly, if the sheds are supported on poles, so the choice of material for them is limited only by matching the overall style of the dwelling.
The design is based on one of the four forms of the visor:
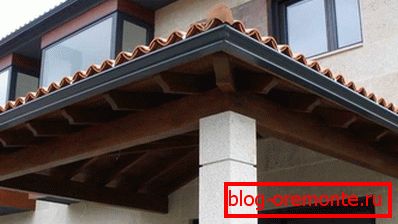
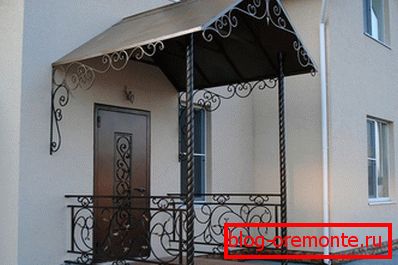
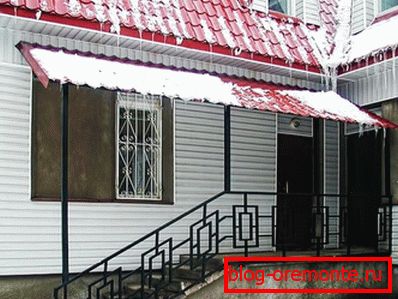
- Odnoskatnaya - one of the ends adjacent to the wall. The canopy is sloped to allow water to run out.
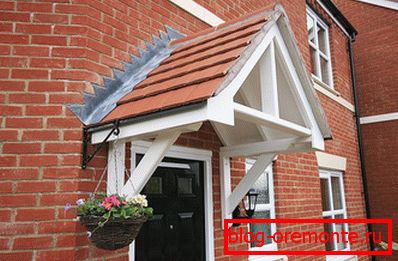
- Gable - two slopes are connected at a certain angle and directed to the side.
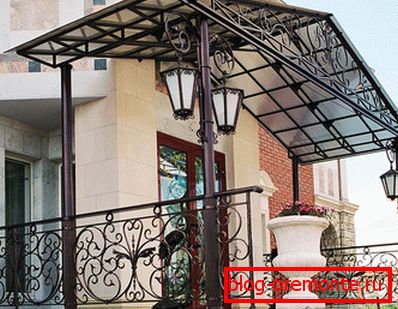
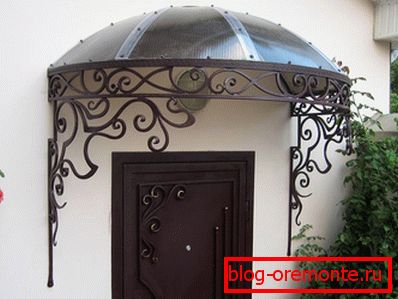
- Arched - a beautiful semicircular shape is complex in execution, but it protects the porch well.
- Tent - differs in significant size and closes the entrance from all sides.
To increase the stability of the supports are attached railings and barriers.
Materials
The canopy consists of a frame and cover. The frame is the basis of the design, therefore it is made of a material with sufficient strength, usually metal or wood is used. The coating should be combined with the roofing material and fit the selected form of the visor. For facing of a canopy use polycarbonate, a soft tile, a professional flooring, plastic. The use of polycarbonate allows you to create designs of any shape. This material is very often used for the manufacture of canopies and canopies. It is characterized by durability, ease of processing, a variety of colors, low cost.
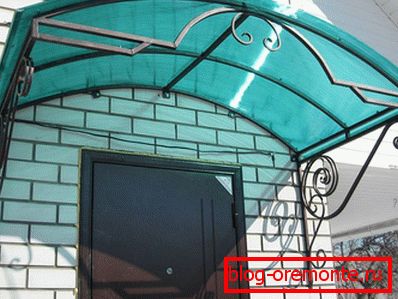
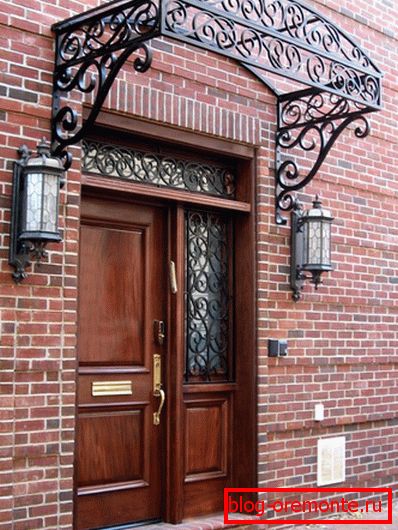
For a canopy of metal, you can use the remnants of the material from the roof, but it is worth remembering that the rain will loudly knock on the visor. Light shingles also choose the color of the roof. This may be the remnants of the roofing material or specially purchased material, matched in color to the tone of the main roof. Original forged parts will be a decorative addition when you make a visor on a metal frame.
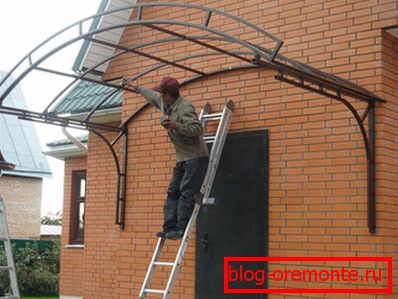
Installation of the gable visor
The design of a canopy with two slopes can be made by hand. This visor perfectly protects the porch, it is able to withstand high wind and snow load and looks attractive. You can make the basis of metal or wooden bars.
Note! A welding machine is necessary for working with iron; in its absence, it is easier to make a wooden frame.
The first stage consists of taking measurements and preparing a drawing. When determining the size of the canopy, you must leave a protrusion of at least 30 cm on both sides of the porch. The size of the mounting brackets and the batten depends on the length of the visor, and the rafters - on the width. To frame served for a long time, lumber must be treated with antiseptic.
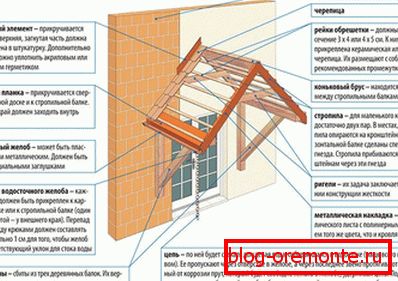
The brackets are two bonded beams with a strut. The vertical bar is fixed to the wall, and the horizontal bar is the supporting beam for the design of the gable roof. The length of the vertical support depends on the mass of the canopy. The beam is set strictly according to the level and attached to the wall with anchors.
For a small visor, two or three pairs of rafters are sufficient; if the width of the structure is considerable, they will need more. Rafter couples are fastened at an angle that protects the entire porch. Rafters are connected by metal plates. To add stiffness in the middle part are added bolts. Rafters are installed on the carrier beam and fasten corners. In the upper part is fixed ridge bar. The crate is made in steps of 30 cm, if metal tile is used as a coating, plywood is packed for a soft roof.
On a beam two hooks for a drain fasten. The wall profile fits, in front of the wind bars are packed. Roofing material is attached. After that, fix the gutter and bring the end of the cornice strip inside it. From the drain down the chain or pipe to drain water.
The design is suspended, if you plan to support the visor, the brackets are replaced by pillars, the upper part of which is connected to the supporting beams. To install the supports digging holes, racks are made of metal or wood, their lower part is concreted.

Note! At the device of a shed visor installation is performed with a tilt angle of at least 20 degrees.
Building a canopy over the porch does not take much time, but adds comfort and provides effective protection of the entrance from the weather.
Video
See the instructions for the manufacture of polycarbonate visor on a metal frame:
A photo