How to make a horse on the roof of the house with your own
The ridge of the roof is a rib formed at the meeting point of the roof slopes. The technology of mounting roofing materials is such that this section remains open after completion of the work. Ridge compound without additional measures of protection as an open window for the penetration of moisture, cold air, small birds and insects, despite the fact that we are talking only about the gap thickness of 2-3 cm. This article will tell how to make a ridge on the roof correctly.
Features ridge connection
Arrangement of the ridge joint is the last stage of the roof construction, however, its durability and reliability directly depend on this event. To make a horse on the roof protected from moisture and wind with your own hands, you need to know the main tasks assigned to it:
- Moisture protection. The roof section, unprotected by roofing material, allows moisture to pass inward, leading to decay and destruction of the truss system.
- Ensuring air circulation. A properly mounted roof ridge serves as a ventilation gap, through which the heated air saturated with water vapor escapes. In the absence of ventilation, water from the vapor settles on the truss frame elements and the inner surface of the roofing material, leading to their premature deterioration..
- Protection from small birds and insects. If you have not yet become a homeowner, but are only going, then you will be surprised how often birds build their nests in the roof, penetrating there through minor gaps, what can we say about insects.
- Giving a complete look. Among other things, the horse plays the role of a decorative element that adorns the roof, giving it a finished elegant look. The aesthetic potential of hand-made skating profiles is limited, but the purchased models are pleased with a variety of shapes and colors.

Note! Roofing masters recommend purchasing a profile along with the material to cover the ramps. In order to achieve accurate color, you should look for options from one manufacturer. Profiles for equipping the ridge joint are produced in the form of additional elements, which are 2 m long. To determine how many details are needed, it is necessary to add 10-15% overlap and fit to the length of the roof along the roof.
Device and profile forms
The roof ridge is a profile made of galvanized metal, asbestos cement, and ceramics. There are three forms of similar products: simple, oval and with a u-shaped edge:
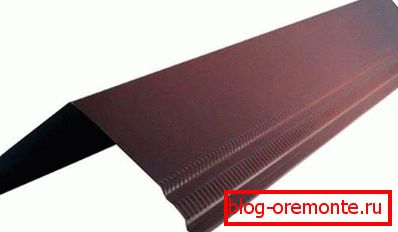
- A simple ridge detail looks like an ordinary metal corner of painted or unpainted galvanized steel, which is easy to do with your own hands. This option is used for alloy steel roofs with unheated attic.
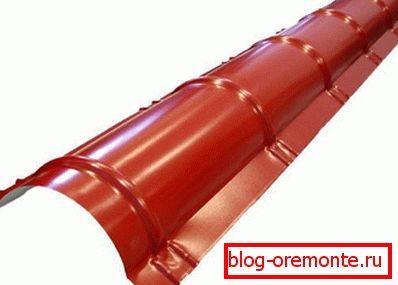
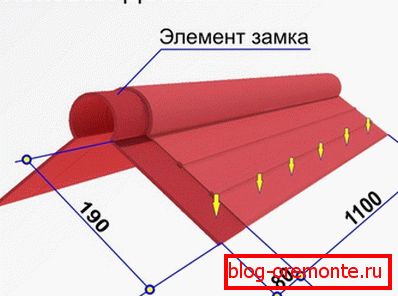
- The oval profile looks like a semicircular gutter with wide shelves for fastening; it is completed with special parts for the end cap. Models of the ridge profile in the form of an oval are great for roofs, because they create a large pocket, necessary for organizing forced ventilation. The oval horse has the highest decorative potential, but also costs more than the others.
- The ridge of the roof with an u-shaped edge also has a ventilation pocket, but differs in appearance from an oval, since its fold is performed in the shape of the letter P, and is not completed with plugs. This option looks easier, costs less than oval, but more expensive than simple.

If you have no experience in construction, then the most obvious option is to install a simple ridge beam. To make it, tedious to buy a metal corner with a width of mounting shelves 40-50 cm for better waterproofing.
Profile views
The choice of a profile for arranging a skate is not based on aesthetic tastes, but on practical tasks that it must perform. Therefore, the ridge elements are selected depending on the material with which the roof is covered:
- Ceramic tile. The ridge for a tile looks like a semicircular trench made of ceramic by molding. The elements are short in length up to 30-50 cm. For ease of installation, one end of each part is smaller in size. Ridge elements are used to decorate the hips of tile roofs. Laying the ridge of tile labor-intensive, painstaking process.
- Slate. For arranging your own skate on a slate roof using special parts made of asbestos concrete. Ridge profile for slate is a semicircular groove with a wide shelf. To reliably protect the ridge, each such element is laid in two layers, first with a shelf on one ramp, and then on the other.
- Metal tile, professional flooring. For profiled metal roofs, metal profiles are used for the ridge of an oval, triangular shape and with a u-shaped edge. The length of each segment is 2 m, installation is performed overlap. The metal ridge profile is suitable for do-it-yourself installation, as it does not require special skills or an expensive tool.
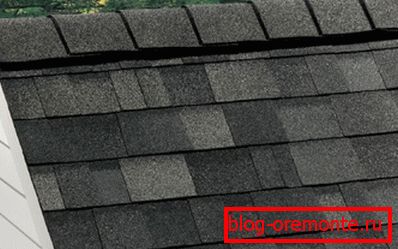
- Soft, roll roofing. For registration of the ridge of the roof covered with rolled materials on a bituminous basis, use special strips on a glue basis. Another option is to install pieces of soft tile along the ridge, but it takes more time and is less resistant to leakage.
To make a horse on the roof with your own hands, you should purchase a special ventilation tape, roofing material or a high-diffusion membrane for waterproofing, roofing screws, a screwdriver, a construction stapler.
Assembly process
The quality of the installation of a ridge profile directly affects the effectiveness of protection against the ingress of moisture and air circulation. To avoid a mistake, follow the following recommendations of roofing masters:
- During the laying of the roof covering, retreat a few centimeters from the top of the ramp so that you can install an auxiliary bar on the ridge beam, which increases the height of the ridge.
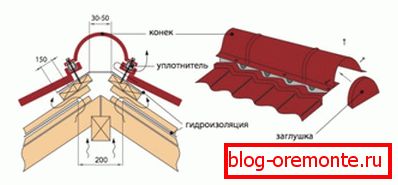
- Using a high-diffusion membrane strip, film or roofing felt, hydrosolate the rib between the slopes. Secure the waterproofing layer with a stapler and silicone sealant.
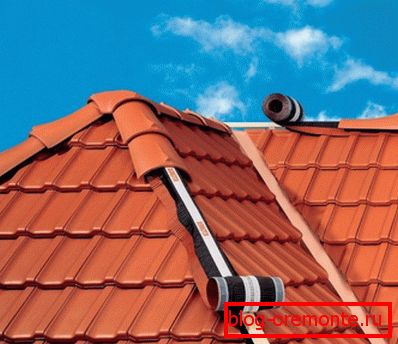
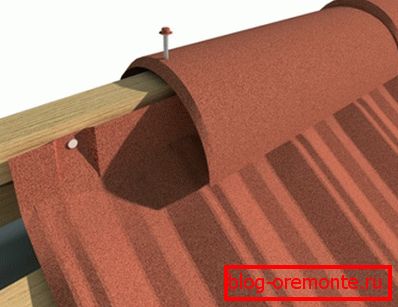
- Take the ventilation tape, remove the protective film from the adhesive side and stick it along the ridge on both skates. It is necessary so that the air freely comes out from under the roof, airing the rafter system, preventing it from rotting. For the organization of powerful forced ventilation use special ridge aerators made of plastic.
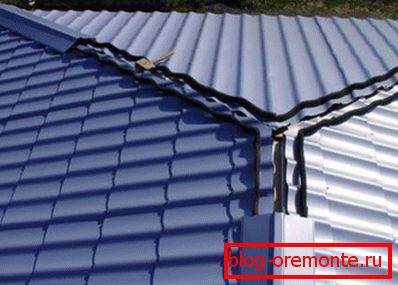
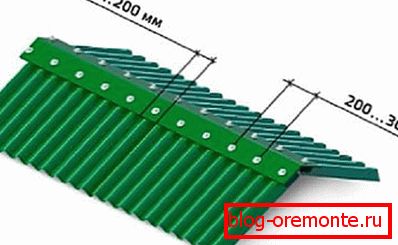
- Start the installation of the ridge profile from one of the ends of the house, carrying it forward 2-3 cm beyond the roof. Having placed the first segment of the profile, check whether it lies flat and fix it with a screwdriver and roofing screws. Step between self-tapping screws - 30-40 cm.
- Put the second part on the first one with an overlap of 7-10 cm, place it evenly and fix. Continue mounting until you reach the other end of the roof. Take the last section of the roofing profile 2-3 cm beyond the roof. For fitting and trimming in size, use scissors for metal, hacksaw or grinder.
- Insert special plugs into the end holes of the ridge profile, if they are supplied with your chosen model.
Note! In the building stores are presented ridge profiles, suitable for different angles of the roofs. Therefore, when going for the detail to design the ridge, determine the exact slope and consult with the seller if you like the detail you like.