How to lay out the chimney of a brick with their own hands -
Most of the private houses used for permanent residence, equip all sorts of heating appliances. Boilers, stoves and fireplaces, regardless of the type of fuel used, need to be equipped with smoke exhaust channels through which residual combustion products are released into the atmosphere. The brick chimney is considered a classic of furnace construction and, despite the abundance of analogues from cheaper and affordable materials, remains the most popular way to get rid of smoke.
Design
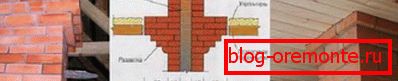
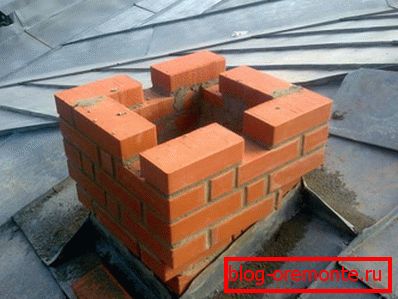
At first glance, it seems that a brick chimney for a heating boiler or fireplace is just a vertically folded pipe. This impression is deceptive, because for the smoke removal system to work properly, you need to give the pipe a certain shape and length. The device of a brick chimney consists of the following parts:

- Mounted tube. This term refers to the area of the chimney, attached to the furnace of a boiler or fireplace. It starts from the wall of the heater and ends in 5-6 rows to the interfloor overlap. Laying mounted mounted with the obligatory observance of ligation of joints between bricks.
- Reeling. Fluff is called the broadening of the chimney, starting 5-6 rows before overlapping and ending after its passage. Laying of the fuzz is performed with the insertion of brick plates, increasing the outer perimeter of the pipe by 250-400 mm.
- Riser. The term "riser" refers to a vertical section of the chimney, passing through the attic to the roof of the house. The laying of the riser is flat with a spoon, cross or chain ligation of the seams.
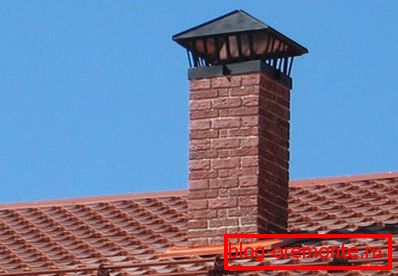
- Otter. Otter called another broadening brick chimney, starting immediately after the withdrawal to the roof. This part of the pipe is wider than the riser 100 mm on each side, which serves as a reliable protection against moisture penetration into the gap between the chimney and the roof.
- Neck. The flat section of the pipe, starting after the otter and the corresponding riser, is called the neck.
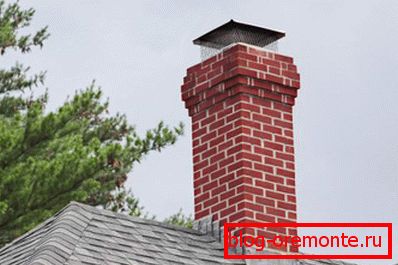
- The cap. Brick chimney ends with two rows of masonry, made with the extension. This part of the pipe is called the tip. A deflector or a wind vane is put on it to protect water and debris from getting inside the smoke exhaust channel.
Important! To design an effective brick chimney with your own hands, you need to follow three main rules: observe the same size of the smoke removal channel throughout the entire length, choose a section in accordance with the volume of the boiler or furnace, and avoid turns and internal corners.
Material selection
Constructing the chimney, you need to take care of the choice of quality and suitable for the performance characteristics of the material. Professional stoves recommend red solid bricks. The width of one brick is 125 mm, taking into account centimeter seams between it, using this material they lay out a brick chimney 140x140 mm, 14x270 mm or 270x270 mm. When inspecting a brick when purchasing, pay attention to the following characteristics:
- Color evenness. High-quality brick has a uniform, rich red tint. The presence of white bloom, impurities indicates the presence in the composition of lime, low-grade clay and other impurities.
- Integrity. Strength - the main criterion for the choice of material for the construction of the chimney. If cracks and chips are found on the surface of a brick, then most likely it is made without compliance with the technology of low-quality raw materials.

- Matching sizes. During the inspection, one should measure several randomly selected bricks with a ruler and check the size compliance with the GOST standard for this type of building product. Masonry brick of different sizes looks sloppy and does not serve for long.
- The correct geometry. To verify the correctness of the geometric shape, take two bricks and apply to each other. If between them is not formed gaps and gaps, you can safely buy.
Note! Brick is a heat-resistant material capable of withstanding a temperature of 400-500 degrees, to which the smoke passing inside is heated. So that the seams do not become a weak point of the chimney, use a clay-based solution or special dry mixes recommended by manufacturers for the construction of furnaces. The width of the seams is considered an important criterion for the quality of the laying, the thinner the better.
Assembly sequence
To build a brick chimney with your own hands requires special knowledge and skills, so most often the construction of a pipe, like a fireplace or stove, is performed by a professional stove. Skilled craftsmen create complex, functional designs in the form of a snake for more efficient heating, equip air intake ducts and windows. Masonry brick chimney of the simplest design is as follows:
- Under the location of the fireplace, stove or boiler pour the foundation, not associated with the main. The height of the filler base is calculated based on the weight of the furnace and chimney. Usually, a thickness of 30-50 cm is sufficient; if necessary, the foundation is reinforced for reinforcement.
- After the construction of the furnace or the installation of the heating device, begin to lay a grab pipe. The laying is carried out with strict observance of bandaging. To reduce the number of cuttings, a spoon ligation is used.
- For 5-6 rows to the ceiling begin to spread fluff. In this place, the dimensions of the pipe expand to 250-400 mm through the use of quarters of bricks. They are placed inside the clak in such a way that the inner surface of the smoke exhaust channel remains flat. The creation of fuzzing takes place in 5 rows, the last of which is laid in solid bricks with observance of the dressing.

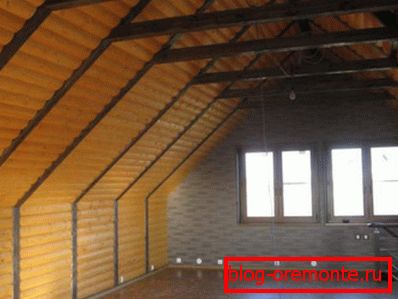
- During work in the attic lay out the drain pipe, whose dimensions are equal to the width and length of the attachment pipe. On the slope of the roof between the rafters cut a hole for the output of the chimney to the outside.
- After the riser 1-2 rows above the roof, otter begins to lay out. Depending on the geometry and slope of the slope, it can be one-sided or multilateral. An otter consists of 9 rows of bricks, each of which is a quarter wider than the previous one. In the last row should be observed proper dressing between the seams.
- Next, build the neck of the chimney and the cap. Wear a fly-cap on the tip.

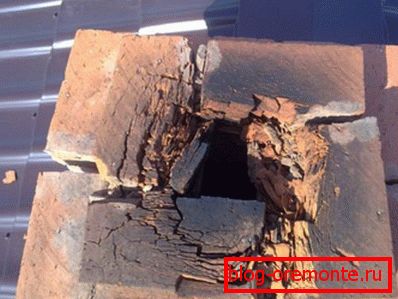
Important! In the process of performing fuzzing, otter and making the tip, it is necessary to cut a brick to obtain the required size. To ensure the smoothness of the inner surface of the smoke exhaust channel, it is necessary to perform cutting neatly and evenly. Oven masters with experience of one movement split bricks to the desired size, however, it is easier and faster to use the grinding and cutting machine.

Installation errors
Miscalculations made during the construction of a brick chimney by an unprofessional master lead to financial losses, fires and an increased risk of carbon monoxide poisoning. The difficulty is that after the completion of the construction it is impossible to correct the defects, most often the only way out is complete disassembly and reconstruction of the pipe. Common problems in the work of smoke removal masters believe:
- Unsuitable material. Unknowingly or in order to save money, homeowners building their own chimneys use hollow, silicate, recycled bricks. The use of chimney from such materials is unsafe.
- Resize channel. Due to the change in the size of the channel, the chimney thrust force decreases, soot sedimentation occurs and congestion inside the pipe occurs.
- Insufficient length of the neck of the tube. Because of this error, the thrust force in the firebox is reduced; to eliminate this problem, it is enough to increase the height of the chimney to the recommended one.
- Incorrect channel form. The best form of the smoke removal channel - a circle or an oval, working with a brick, is very difficult to achieve such geometry. Therefore, brick tube attached to a rectangular or square shape. If the inner surface will have a large number of corners, steps, soot will settle on them.
Brick smoke exhaust channels will last a century, if not save on quality material and comply with technology. To avoid problems with the operation of the heater, order a chimney design from an experienced master.