How to install drains on the roof
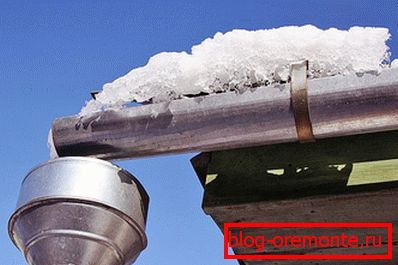
The absence of the possibility of normal removal of precipitation from the roof of the building contributes to the speedy reduction of the roof to an unusable state. To prevent this from happening, a roof gutter system with gutters and drain pipes is first designed for the roof. A poorly functioning drainage system, or its complete absence, causes permanent dampness on the roof and uncontrolled runoff of the aquatic environment during precipitation in the form of rain and snow. Such a disorder on the roof leads to negative consequences not only for the roof, but for the whole building as a whole, starting from its walls and ending with the foundation.
Applicable materials
Today, the market of drainage systems offers for installation materials and structural elements for them from materials of different composition. They all have their own characteristics. Therefore, before you make a drain from the roof, you first need to learn what materials you can use for this work.
Galvanized steelwhich is classic and relatively inexpensive. Unfortunately, this material is not sufficiently resistant to corrosion processes, which leads to its short-term effective operation.
Galvanized steel со слоем покрытия полимерного. The drainage network constructed from such material visually looks beautiful - you can choose a color that will harmonize with the roof covering. In addition, the service life of the material is greater than galvanized steel. The disadvantages include high prices for products with a polymer coating and the need for increased attention during installation work.

Copper, which visually enhances the drainage system, but is amenable to external influence and is expensive.
Metal-Plastic) today the most in demand, as it is cheap and easy to install. In addition, it has good performance.
Payment

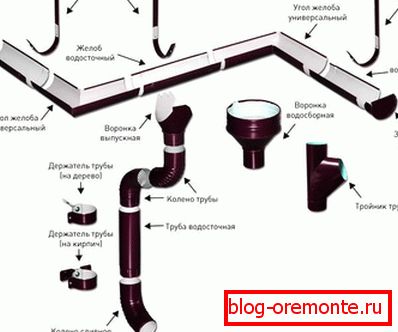
In order to acquire the necessary material, first, a drainage system is calculated, which consists of the following products:
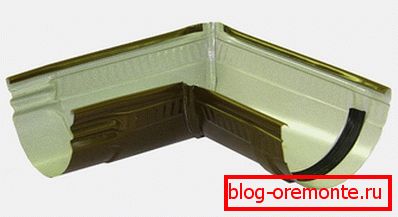
- gutters, consisting of brackets, couplings, corner elements, funnels and plugs;
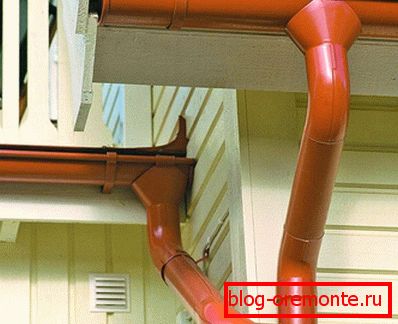
- pipes consisting of brackets, couplings, upper and lower knees.
Note! The calculation of drains is repelled primarily from the area of the roof drainage basin. Depending on this parameter, the diameter of the gutter and the number of funnels are selected.
Accepted, the number of downpipes should match the number of roof corners. It is possible to draw up a scheme of a network of gutters on your own, armed with standard projects, building codes and other normative and technical literature. If there is no experience of such calculations, it is advisable to contact a specialist.
General recommendations for calculating the performance of the elements of the drainage system are given below:
- when building a small building with a roof area of up to 70 m ?, the diameter of the gutters should have a corridor of 7.0? 11.5 cm, and the cross-section of the drain pipes should be in the range of 5.0-7.5 cm;
- for a medium-sized house with a roof area of up to 100 m ?, the gauge of the gutter can start from 11.5 cm and end at 13.0 cm with a diameter of from 7.5 cm to 10.0 cm;
- if the structures are large and the roofing area starts from 100 m?, the diameter of the grooves should be within 14.0? 20.0 cm and pipe diameter - 9.0? 16.0 cm
Based on the rule of proportions of the ratio of the area of slopes to the number of drain pipes, is taken at 100 m? plane 1 drainpipe.
Note! For drainage it is important to adhere to an acceptable chute slope. If it is small, the water in the collections will linger, with an excessive bias - the funnel will not miss the rolling water. The slope limit of the gutter is 0.003 to 0.005.
When buying products you need to count their number. Knowing the existing geometric parameters of the roof and the dimensions of the products offered, you need to calculate the required footage based on material savings. When mounting a single gutter system, it is imperative to consider the number of coupling joints. Calculate their number is very simple. If, for example, there are 20 gutter fragments, then the clutch should be 19 - 1 less.
Installation
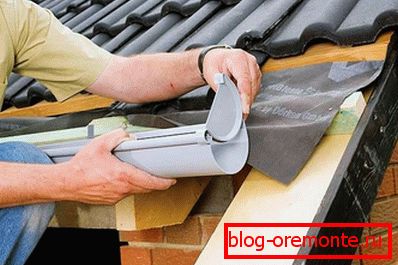
According to the construction standards, the system of drainage system is carried out before the start of roofing works. No gutter installation can do without pre-mounting brackets, which will hold the catchment trays.

In normal work, the brackets are fixed to the headboard or to the feet of the rafters in the absence of the first element of the lower roof trim. The distance between the brackets is determined by the gutter material. If the trays are made of plastic, the pitch of the fasteners will be 50 cm. With a metal drainage system, the distance between the brackets will be about 100 cm.
Funnels and corner gutters should be fixed with brackets of 2 each from adjacent sides. The tray must be installed in such a way that its middle part faces the roof overhang. In this position, even with rainfall, precipitation will not flow through the sides.
Then we will talk about the installation of drains, based on the desired slope of the tray. Gutters must be installed with a differential of 0.3? 0.5 cm per 1 m length, in other words, with a tray length of 11.0 m, the slope will be equal to 3.3? 5.5 cm
Work begins with mounting the first bracket to the head board at the very beginning. Next, on the opposite side, the last fastener is installed under a slope determined by calculation. Between the 2 brackets, the rope is stretched, on which the rest of the fastening elements will be oriented when fixing it.
On the fixed hooks cling gutters. They wind up in the front part under the bent protrusion of the bracket and rotate all the way to the side of the wall so that the n-like formation becomes an u-shaped drain. Troughs are fixed with specially selected plates.
If drainage systems made of plastic are used, the fixing of individual elements is done by 2 methods:
- using rubber seals;
- using cold-type welding.
Both options are good enough, but besides the advantages, they have some disadvantages. Rubber gaskets, in addition to well sealing the elements of drains, also compensate for the expansion of pipe dimensions during temperature jumps. However, the time for such gaskets is not a positive factor, since with its passage rubber products lose their working functions.
If the second method of installing the drainage system is used, the adhesive mixtures used fix the connections securely and permanently, because cold-type welding fixes the elements on a molecular basis. The disadvantage of this method is the inability of connected pipes to respond flexibly to temperature changes, which leads to their cracking.

Fastening drainpipes and outlet funnels is the next stage of work. With a plastic drainage system in the gutter, where the funnel will be installed, a hole with a fine tooth is sawed through, the edges of which are treated with an emery paper or a round file.
The upper side of the funnel strip is treated with glue with a distance of 10 mm from the edge of the gutter element. According to the diameter of the finished hole, glue is applied in 2 circles at a distance of 5 mm between them. With the work of gluing the funnel can not be slow. It is placed under the tray and pressed in place of the formed hole. Heating the plastic on one and the other side of the hole in the middle of the gutter, where the funnel is located, makes a kind of anchoring "tears".
At the final stage of work, drainpipes are installed, which actually complete the process of draining water from the roof. When doing this work, you need to know the following:
- the pipe must be from the wall of the house at a distance of from 30 to 80 mm and certainly not less, otherwise the wall from the frequent contact with water will syt, which can lead to fungus inside the room;
- mounting brackets when installed at a distance of up to 2 m between them, must necessarily be mounted at the junction of the pipes;
- the distance between the ground surface and the pipe drain must be up to 0.3 m, and in the presence of drainage - up to 0.15 m.
Installing drains is a tricky job that needs to be approached with full responsibility, as evidenced by a video showing how best to install drains.
Video
We offer to get acquainted with the video materials on the installation of gutters:
In the next video you will see the process of installing plastic drain: