How to build a barn with a lean-to roof with your own hands
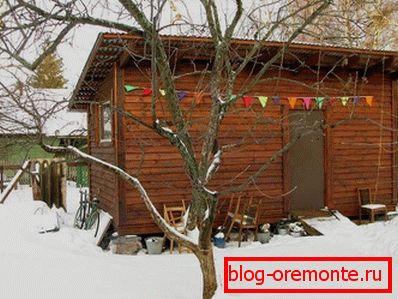
A shed is an indispensable economic building both on the garden and on the garden plot. It leaves for short-term and seasonal storage of working tools, materials. Advanced gardeners with their own hands equip in the barns a comfortable bathroom, shower. In a word, there would be a shed, there will be an application for it in any case. The purpose of this building is strictly utilitarian, so the appearance does not impose many requirements, the main thing is ease of use and ease of construction.
A shed with a single-sided roof is the most inexpensive option for the construction of auxiliary, utility room for storing inventory with your own hands. Its frame is easy to assemble, does not require the involvement of special equipment, the purchase of expensive materials and tools. If necessary, it can be built from what is on hand, what remains of building a house. Moreover, even a person with small carpentry skills can do this kind of work with his own hands.
Choosing a site for construction
The first thing to do is to find and clear a site for construction. There are two options for placement: close to residential buildings or on the edge of the site. Location primarily depends on the tasks assigned in the future to the barn. To use it conveniently, we suggest following the following rules:
- To build a barn with your own hands, choose places with the least suitable for farming soil and relief. On each plot there is a space shaded by an old tree that cannot be uprooted, occupied by a ditch or simply distant.
- Place the farm building so that it does not obstruct the entrance of machinery and transport.
- Consider the distance that you have to carry heavy objects when working, place the shed close to the main work front
Required materials and tools
In order for the construction process to go quickly, without the formation of downtime, you need to immediately purchase the necessary materials and make sure that the tools are available. An outbuilding with a single-sided roof is quite an economical option, for its construction with their own hands they use mostly wood, it can be built even from cheaper second- and third-grade lumber. You will need:
- Bar 100x100 mm or 150x100 mm for the construction of the frame;
- Edged boards 50x150 mm for roof system;
- Edging boards 40x150 mm for plating;
- Unedged boards for crates;
- Roofing material;
- Waterproofing film;
- Ruberoid
- Mix for production of concrete, sand, small gravel
- Fasteners: nails, screws.
From the tool useful powerful screwdriver, drill, Bulgarian, electric planer, jigsaw. In general, all operations can be done manually, but the availability of electrical devices will speed up the construction process twice.
Stages of construction
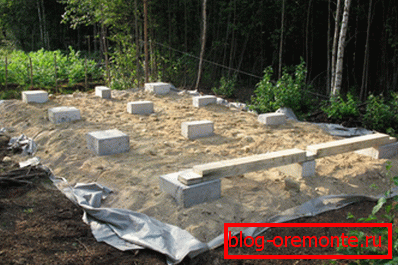
Foundation laying
First, the chosen place is prepared: they remove garbage, large plants, if necessary, level, after which you can begin to fill the foundation. Although a single-shed roofing shed is a non-capital, low-weight structure, it nevertheless needs a reliable foundation.
- It is enough to build with your own hands the column base, on which the frame is installed, to a depth of 40-50 cm. With the help of a tape measure, twine and pegs, you need to mark where the pillars will be. Calculate, so that the spans between them are in the region of 1.2-1.5 meters. Four pillars are placed at the corners of the structure, and somewhat inside the perimeter, depending on the area of the shed.
- After marking it is necessary to make holes in the ground with a drill to the depth of soil freezing. Top formwork from unnecessary planks to a height of 20-30 cm.
- At the bottom of the excavated holes, before pouring them with concrete, a sand-gravel pad is made, reinforcement is inserted into reinforcement.
In order for the foundation to gain strength, it is left alone for 3-4 days, after which they continue to build.
Frame assembly
While the foundation solidifies, there is time to process all the wood going to the frame with antiseptic and fire-resistant compounds, so that the barn will serve longer, be protected from fire, rot and pests. The following is an instruction how to build a frame with your own hands:
- Remove the formwork of each pillar of the foundation and place on the top of the roofing material in double fold for waterproofing.
- Next you need to build a base - the frame of the bar in the form of a rectangle on the foundation pillars. The ends of the timber cut "to the floor of the tree" and tightened with metal straps.
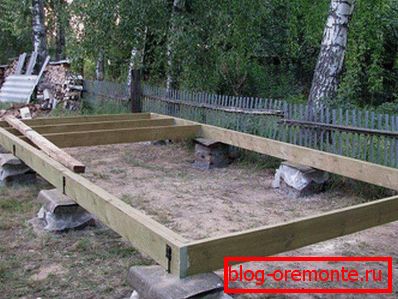
- The level expose the vertical racks. The frame is measured by the construction level, they are strengthened with temporary struts, metal corners are used for fastening. Notice, we build the front wall above to set the slope of the roof to 15-20%. Openings for doors and windows need to be done in advance, it is more convenient than cutting them out later.
- Genital lags are installed on the frame, they are fixed “into the sweat” with a step of 60-120 cm. Lay the floor from a special tongue-and-groove board or edged board.
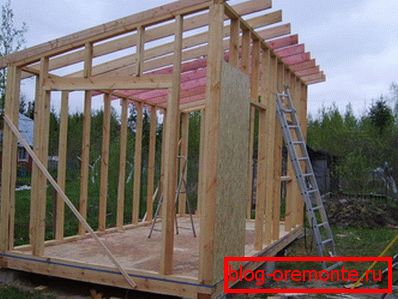
- We build floor beams on vertical supports, using metal corners or brackets as fasteners. The frame of the barn is ready.
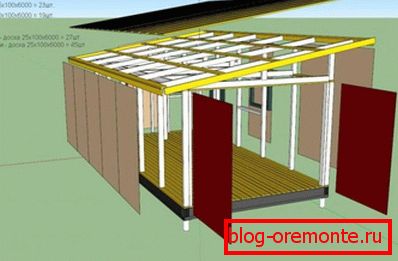
Roof structure
The design of the shed roof includes elements such as rafter legs, lathing, waterproofing and roofing material. They form the so-called roofing cake, necessary for reliable protection against precipitation. As the mauerlat, the top frame of the frame is used. And since we have already installed raznovysokie racks, then move the flooring rafter legs with their own hands:
- We make the "curve" of the truss foot, which will be used as a model for all the others. The length of the rafter is calculated by adding the distance between the walls with the length of two overhangs. The overhang of the roof protects the walls from moisture, usually 40-50 cm is enough for this purpose. We take a cut board 50x150 mm, saw off to the required length and lift it up. They try on the rafter and mark the notch in the attachment to the beams to the frame. We make the rest of the legs according to this pattern.
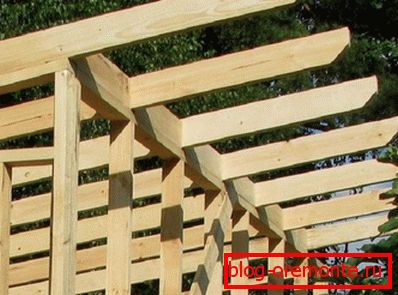
- Install the front and rear rafters on the frame, stretch the thread between them. Using the thread as a level, we mount the remaining rafters in increments of 60-80 cm. For example, for a 3x6 m shed you will need 8 truss legs. Fasten on nails or corners.
- With the help of a construction stapler we fasten a strip of waterproofing film. Overlapping one on another at 10-15 cm, starting from the bottom edge of the rafter legs.
- We mount the crate from unedged board. If you plan to use a soft roof, we build the crate more often.

- We make cutting and laying of roofing material. The cheapest material - profiled, metal tile is only a little more expensive. Despite the emergence of modern materials such as shinglas or ondulin, roofers recommend metal roofing for the installation of a single-shed roof of a barn. It is smoother and does not make it difficult for snow and moisture to slip off from sufficiently gentle slopes. For fasteners use special galvanized screws, equipped with a rubber head, which, after screwing, flattens and closes the hole.

Finishing work
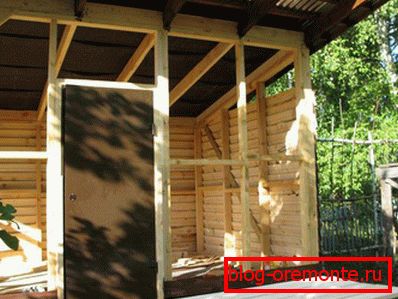
After finishing the rough work, the frame of the shed is sheathed with a board or sheet of moisture-resistant plywood. In the window openings insert windows, install the door. This is followed by the external treatment of the building with a lightening antiseptic or acrylate oil based paint. The next step is interior decoration, for more convenient storage, shelves are made, shelves, if desired, light is carried out, sockets are mounted.
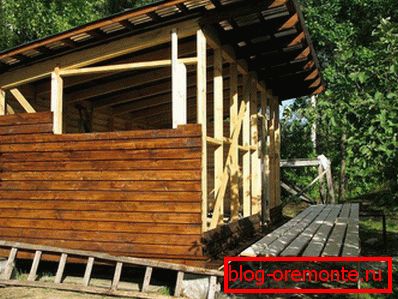
In order for an outbuilding with a single roof, which you built with your own hands, to serve as long as possible, you need to inspect it twice a year for defects. Roofing requires a seasonal inspection and repair, painting is carried out every 5-6 years. A neat, functional outbuilding will become an indispensable room on your site, which you can build with your own hands for little money!