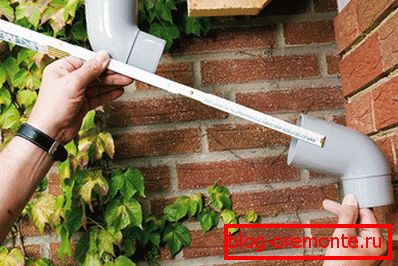
Drain from sewer pipes yourself: the technology of making
Water not only easily corrodes various metals, but also "copes" well with other materials. You may have observed that over a period of time draining sediments wash away the shells on the blind area and the walls of the building. To prevent the destruction of the concrete layer, it is important to think over and create a drainage system. It is very convenient and technologically possible to make a drain from sewer pipes.
We evaluate and consider

Below are some pros and cons of this design. So, the advantages:
- Low weight of the whole system.
- Availability and replaceability of all items.
- Low price compared to ready-made systems.
- Chemical Resistance.
- Ability to combine with other systems.
- Ease of processing material.
Disadvantages:
- Some types of plastic do not tolerate direct sunlight.
- Requires great care when cutting.
- There may be difficulties with the mount.
Calculation of the stormwater system

Before purchasing components, you need to be aware of some nuances and make certain calculations:
- Determine the size of your roof.
- Schematically put her plan on a piece of paper to make a rectangle or square (it all depends on the version).
- Outlets with funnels are installed every 12 meters. If the side of the house is smaller, then you can arrange them in the corners. This can be done on only two of them.
- For funnels, you can use a transition tee 110? 50 mm, and take the drain pipes with a diameter of 50 mm.
- The slope of the main discharge should be 1: 200 (1 m - 0.5 cm).
- Plastic mounts are installed every 50–60 cm.
- The size of one gutter tray will be 110 cm wide - that’s enough for most private house roofs.
- From one pipe (cut along) two identical trays are obtained, therefore the total length of purchased blanks should be equal to 1/2 (half) of all the gutters of the drain.
- Each butt will need to drown. To do this, you can use ordinary, cut into 2 parts, or auditing plugs.
- Now, knowing the location of all the elements, put them on the scheme and calculate their total number.
- Already at this stage it is worth considering where the rainwater will be diverted further. Maybe you decide at the same time to make a storm sewer with a drain in the drainage. Perhaps you already have barrels for collecting rainwater.
Note! When installing improvised gutters, their total length will change due to overlapping joints, with overlap within 2–5 cm
Necessary tool

To perform all the work from cutting to full installation will need:
- Bulgarian or hacksaw;
- nylon thread;
- marker;
- screws with press washer;
- screwdriver or screwdriver;
- silicone sealant (preferably transparent);
- building level;
- roulette.
Installation

Do not install drains at temperatures below 0? C. This can lead to significant deformations after the air temperature rises to high values. If you do this in cold weather, calculate the expansion joints and gaps that the entire system can expand.
So, consider the sequence of creating a drain from sewer pipes:
- Before installation, once again walk around the perimeter of your home. Inspect the space under the roof. Determine how best to fix holders. This can be done in various ways: on the rafter or on the wall. Better if hooks are mounted before aiming. roofing In this case, it is more convenient to mount the trays.
- It is necessary to prepare future gutters. To do this, exactly cut along the four-meter pipe into two parts. For comfort and accuracy of the cut, it is better to fix them. The easiest way is to lay under the edges of the board and fasten the blank with screws to the substrate. In order not to violate the integrity of the trays (do not make holes with screws), you can make locks. To do this, take two strips of tin or thick fabric, pass them inside along the entire length and secure, pressing on the ends.
- Mark the center of the circle at the ends. Now with the help of kapron thread connect them. It can be tightened by twisting one screw at each end. There is another way - make small cuts with a construction knife and stick a thread in them.
- Attach the thread close to the pipe and use a marker to draw a dotted line that will be your reference.
- Apply the markup and on the opposite side.
- Using the grinder, make longitudinal cuts. When using an angle grinder, be sure to wear gloves, goggles and do not remove the protective cover from it. Molten plastic has a high temperature and can cause burns. In addition, the scattering particles can injure the cornea.
- Cut off the top of each funnel adapter. You can not do this operation, if you are not confused by the towering part. In this case, you can more reliably fix the product. Do not leave the upper part, if the tee is located in the inner corner. So it will be impossible to drain water from the drainage.
- If the length of one slope exceeds 20 m, then it is better to direct the flow in different directions from the middle, otherwise you will get too much difference, which will not look very attractive.
- In order to make it easier to fix the holders, taking into account the angle of inclination of the common plane, you must again use the nylon thread or chokline. Twist the screw into the beginning of the line for the location of the drain channel. Now go to the place where it will end, and fasten the second screw below, taking into account the calculated angle. Between them, stretch the thread or repel the line with dye. The tensioned thread will also help if the holders are attached to the rafters under the cover, as they will have to be bent slightly. Do not forget about the accuracy of the mounting step, it can not be exceeded. In some cases it will be necessary to fasten the holders to the roof. This may be necessary if the overhang of the roof is large and far enough to the wall.
After fixing the holders can be laid drainage trays. At this stage, many make mistakes that lead to overflow of the gutter, or the destruction of the whole structure under the weight of melting snow and ice.
- Observe the correct departure. The edge of the roof slope should go into the tray on? or ? its width. This is very important, because if the flow is small, water will drip onto the blind area, in this case the whole structure will be useless.
- When laying, control the angle of inclination. Do this with a building level.
- If the brackets were purchased, then do not forget about the fixing antennae, which are bent inside the gutter. If you made them yourself, in advance in each of them make two holes in order to press the pipe.
- Grease the joints of trays with silicone sealant and also tighten with screws with a press washer. They will need three - on the edges and in the middle.
Note! On the fasteners of the holders to the wall, you can save money and purchase ordinary plastic clamps. They look good and well fix the entire structure.
The next step is to mount the funnels made from tees. You can slightly move the brackets so that they hold this element of the drainage system as well. Connect the pipes to the drain hole in the same way as between them. Be sure to seal the seams with silicone.
Note! If the funnel will not be on the edge of the drain and will act as a connector, then all installation must begin with it.
In the case of an open drain system, that is, there are no connected ends of the gutters, you will need to make and install plugs. To do this, take a pre-purchased stub and cut it into two parts. In place of the joint it is better to put a rubber seal, fluff all with silicone and fasten with screws.
If the entire gutter perimeter is closed, then at corners you can use corners cut into two parts in 90?.
Note! Do not throw away the rubber bands included. They are useful at the stage of connection with the transition tee and when installing the corners.
Now about sewers:
- For fastening the grooves made to the walls, it is better to use standard clamps 50 mm with a seal.
- Install a 45? Angle in the tee tap. Measure the distance from this corner.
- A branch pipe connect these corners among themselves.
- Markup and mount holders.
- Secure the drain that goes down the entire height.
- If in the lower part of the house there is a small ledge, then “go around” it, using additional corners for 45? or 90 ?.
The general stream can be started up directly on a bed or in the prepared water waste channels. Test the entire system. To do this, a hose or bucket, pour on the roof. See how the water flows into the gutters, whether there is enough slope to go to the funnels, where it collects after the runoff. Eliminate all the defects and defects noted. Everything, your drain from sewer pipes is ready for operation.
More information on our site, giving answers to questions close to the topic described in this article:
- How to clean the roof of snow and ice
- How to install plums on the roof
- How to properly install drains
- How to hem roof moldings