Construction of a gazebo with a shed roof - drawings and
In the summer, while in the country, we spend most of the time outdoors: we work in the garden, we sunbathe, we eat, we have noisy gatherings with friends. In order to hide from the sun during the midday heat or to protect from inappropriate rain, a gazebo is needed in the backyard. This is a building that serves as a recreation area, which is always ready to open its hospitable arms for the owners and their friends.
Garden centers and construction companies are full of "lucrative" offers, looking at which you might think that this is not a cheap pleasure. However, the real cost of the necessary materials and work is much lower, and the result of independent labor cannot be compared with the finished type specimens. For those who do not mind saving and improving their skills in working with wood, we have prepared detailed instructions on how to build a gazebo with a lean-to roof, which can be installed independently or attached to a house.

Project selection
Several years ago, at the peak of consumer demand, there were octahedral arbours, now their place was taken by rectangular variants, which are attached to the house. For a novice builder, such a change in fashionable preferences is only a hand - it is easier to assemble structures in the shape of a rectangle or a square. In addition, the internal space in the gazebo with this geometry is used more rationally, it has enough space to accommodate a brazier, a sink, a stationary table and a sofa. In favor of a rectangular gazebo of a bar with a lean-to roof says:
- Low complexity of the project. Any person who is remotely familiar with the school course of geometry will be able to read the drawing of the future arbor. In order to compose it does not require special knowledge.
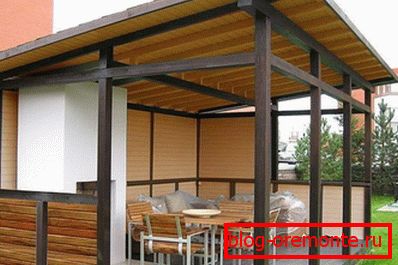
- Versatility. Arbor with a shed roof is placed both autonomously, that is, separately, and as an extension to existing structures. In both cases, it looks organic. The gazebo attached to the house, on the one hand, is also protected from wind and rain by its wall.
- Minimum costs. Such a geometric shape of the structure guarantees the most efficient consumption of materials and allows saving labor remuneration. A small angle of inclination of the roof minimizes the cost of roofing material.
- Extensive use. A spacious gazebo can be used as a summer kitchen, dining room, a place for events and children's games.
The Internet on the thematic sites contain a lot of ready-made projects with the calculation of materials, foundation plans, including the frame drawing, the angle of the roof and the truss system. We advise builders without experience to use them.

Selection and preparation of materials
We opted for wood, as it is an inexpensive, environmentally friendly material that is harvested and sold almost everywhere in Russia. To make construction economical, choose a project taking into account the fact that the standard length of sawn timber is 6 m. Having studied the line, estimate how much wood is required for construction. If the size of the structure exceeds this figure, you will either have to purchase a bar of atypical size, which is much more expensive, or make the components of the frame. You will need:
- Pine timber 100x100 mm;
- Unedged board 40x150 mm;
- Cutting board 40x150 mm;
- River 25x25 mm;
- Ondulin or other roofing material, waterproofing film;
- Fasteners (nails, galvanized screws, corners);
- Mix for the preparation of concrete, sand, gravel;
- Ruberoid
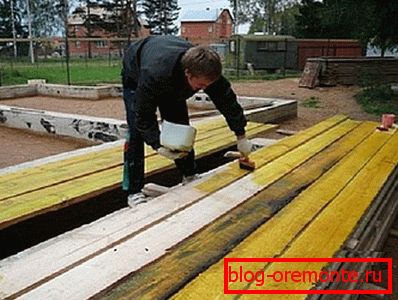
Since wood is a natural material, poorly protected from pests and bacteria, all purchased lumber is treated in several layers with an antiseptic of deep penetration, for example, Senezh Extra.
Important! If you are planning to install barbecue, barbecue or stove in the gazebo, treat all wooden elements with a fire retardant to protect against fire, this elementary measure can save lives in case of fire.
Preparing the construction site and laying the foundation
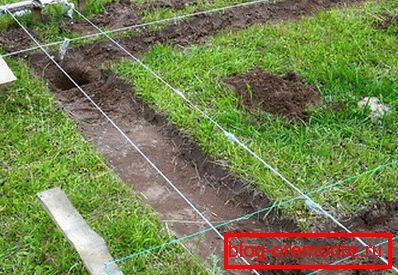
Choose a picturesque place for the construction of a gazebo, clear it from foreign objects, align it if there is such a need, uproot or transplant plants. It is good if the lower edge of the single-pitch roof for the gazebo is located above the edge of the site, because rainwater will flow there, forming a puddle. When the place is selected and cleared, mark it with a tape measure, twine and pegs, designate the location of the foundation pillars, for a rectangular gazebo, they should be at least 6, take a flight between supports equal to 1.2-1.5 m.
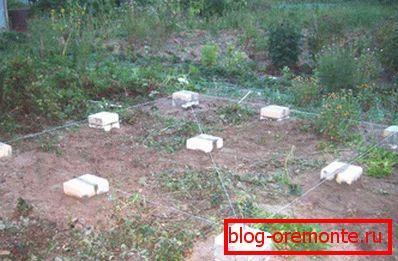
After you have carefully examined the drawing, completed the marking and checked its correctness, you can begin to fill the foundation. You can calculate the required amount of concrete, knowing the number of pillars, their depth and size. In places marked with pegs, dig holes in the depth of soil freezing (50-60 cm in central Russia) with a drill, make a formwork 25x25 cm, height 20 cm from trimming boards. concrete mix. It is very important to measure the end of the foundation pillars at the construction level. After you have filled the holes with concrete, leave the foundation for 3-5 days for it to stiffen and gain strength.
Installation of the arbor frame
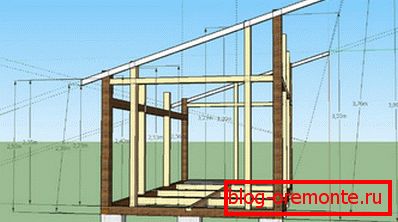
While the foundation is hardening, losing no time, mark out the elements of the frame, cut them and process with an electric plane. Remember, in order to set the angle of the slopes of the roof, the front vertical posts must be higher than the rear. For example, if you want a ceiling of 2.3 m, then at the peak the roof should have a height of 3 m. When the foundation hardens, start the assembly in the following order:
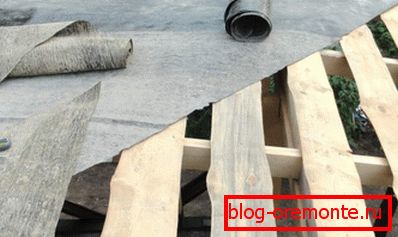
- Remove the formwork from the pillars and install waterproofing on them. To do this, cut squares of 30x30 cm of roofing material and place on each support in two layers. You can coat the head with bitumen.
- Install the frame bottom trim. To do this, the ends of the beam are treated so that the fastening is obtained according to the “thorn-groove” principle and is tightened with metal brackets.
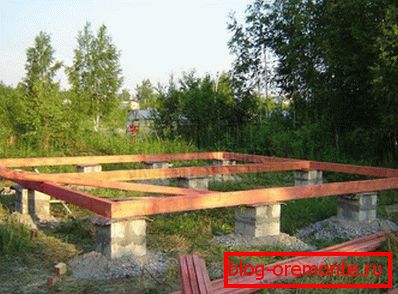
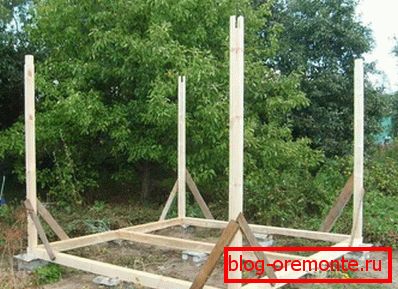
- Set the vertical pillars of the frame to set the angle of the roof of the gazebo. They, like the pillars of the foundation, should be six. While there is no upper strapping, reinforce them with temporary braces so that the racks stand strictly vertically.
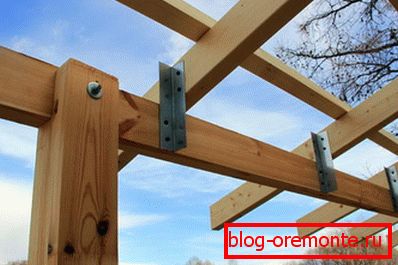
- Pull the tops of the uprights. It is also performed as the bottom. If it is more convenient for you to use metal corners for fastening, use them. Make sure that the rectangular shape of the gazebo is maintained, measure out the corners of the building level.
- Mount the floor logs on from boards with a pitch of 80-100 cm. Note, the greater the distance between them, the thicker the boards should be. When the logs are exposed, go to the flooring. For this you can use a special grooved decking, however, its price is quite high. In order to save, lay the usual edged board, treated with a plane.
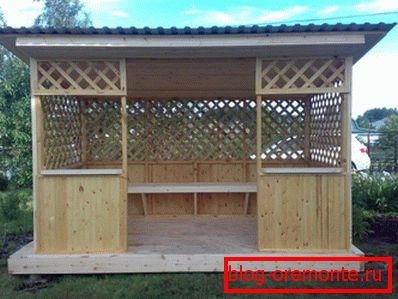
- Install the railing of the timber, attaching it with corners to the vertical uprights. If the project drawing envisages the lining of a part of the openings, we shall also carry it out. The decorative lining of the slats with gaps looks very impressive: it will protect and leave the feeling of free space from the sun.
At this assembly of the frame is finished, it is time for the construction of the roof.
Roof structure
The roof, consisting of one slope - for the gazebo is the simplest installation of the roof, which nevertheless effectively protects those under it from precipitation and creates a pleasant shade. It is possible to calculate the angle of inclination using a special construction calculator. Follow the step by step instructions:
- First cut down the rafter legs. Their length should include a reserve for two overhangs of 40-50 cm. Take one rafter, lift it up and mark the cutouts for fastening to the upper frame of the frame. This will be a pattern for the rest of the legs, they are made according to one sample.
- Secure the rear and front rafters with nails or metal corners to the trim beams, observing the chosen angle of inclination. Between them, stretch the fishing line or twine, it will become the level by which you will measure out and mount the remaining truss legs.
- Stretch the roll with waterproofing film and cut the strips. Secure them, without pulling, on the rafters with a construction stapler. Overlap the strips of film on each other by 10-15 cm. The smaller the angle of inclination of the roof, the wider the overlap should be.
- Adjust the crate of unedged boards with a pitch of 20-30 cm, if you use ondulin as a roofing material, for a metal tile, make the crate less often.
- Start the installation of the roofing material as recommended by the manufacturer. Use the hardware supplied with it. Also observe the overlap between the sheets of 10 cm. Please note that the angle of inclination of the roof determines the material with which it can be covered.

- Fasten wind boards at the ends of a gazebo with a lean-to roof, equip with a drain system.
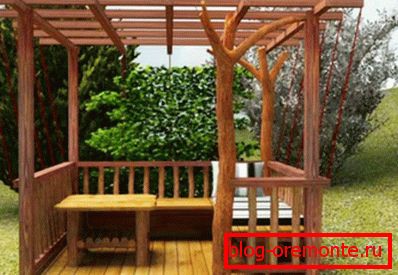
The work is done! The arbor attached to the house will be a stylish decoration of the garden plot or the courtyard of a private house. And the fact that it is made with your own hands is a reason to boast to the guests!