Attic finishing with plasterboard: preparation and plating
Each owner of a private house, who decided to engage in its improvement, thinks about how to equip a dwelling in the attic, which allows expanding the useful area of the building. One of the conditions for the successful implementation of such a reconstruction is a balanced approach to the choice of material used for wall cladding and attic ceilings. Most often, preference is given to drywall. Let's take a closer look at its use for these purposes.
Advantages and disadvantages
This type of finish has a number of advantages, the main of which are as follows:
- It has a low price, so that it is available to almost everyone.
- Part of the gypsum is able not only to absorb excess moisture, but also to release it into the surrounding space when the humidity of the air drops below the critical one. This property allows you to automatically adjust and normalize the microclimate in the finished room.
- In addition, drywall has good fire resistance and does not ignite even under the influence of open fire. The maximum that can occur in this case is the smoldering of individual areas of the coating, where no hazardous substances are released into the atmosphere that could cause any harm to human health.
- Finishing will take you quite a bit of time, since drywall sheets are mounted fairly quickly. It takes no more than two days to prepare the frame base with its further covering. The same amount of time will be taken by the final surface treatment, including its finishing putty.
Note! Finishing the attic involves the use of a special modification of this material, characterized by increased moisture resistance.
Preparatory activities
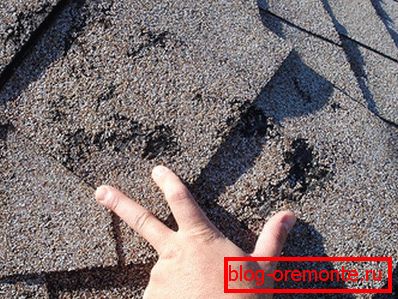
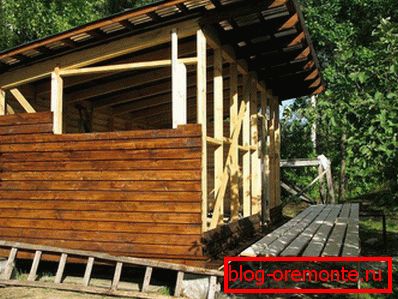
Before finishing work, you must make sure that there are no leaks in the roof above the attic. After preparing the frame and covering it with finishing material, it will be almost impossible to eliminate the defects found in the roof. Examine the inner surface of the roof to be completely sure of its integrity.
Note! Ensure also the complete safety of other elements of the roofing system - beams and rafters. These parts of the structure are the supporting elements for fastening the frame - their strength cannot be in doubt. On the rafters and beams of the system should be completely absent traces of mold, rot and dampness.
Wood blanks used to assemble the base must be well dried, which excludes the possibility of their deformation during operation. This can lead not only to the displacement of sheets attached to them, but also to their destruction.
Tool used

In addition to the basic finishing material (sheets of plasterboard, wooden bars or metal profiles) and fasteners required for installation, including suspensions and screws, you will need an appropriate tool. For successful work it is necessary to prepare:
- construction level used to check the horizontal installation of bars or profiles;
- screwdriver;
- electric drill;
- Bulgarian, with the help of which profiles of the required length will be cut (in its absence, you can use special scissors for metal);
- marking tools (tape measure and pencil);
- construction knife;
- hacksaw used when the knife is not very convenient to use;
- a set of drill crowns, used to make holes of one or another diameter.

Preparing a special frame
With a limited size of the attic from the frame should be abandoned altogether, because this design has a certain thickness, due to which the useful volume of the room will be even smaller. In this case, it will be possible to sheathe the beams and rafters first in thin bars or slats, and only then proceed to fixing the sheets on them.
If the dimensions of the room when finishing are not taken into account, it is most convenient to fix the drywall on a wooden frame made of well-rounded bars of a small section (not more than 50 mm).
Preparation of the frame of a particular type is necessary in cases of:
- if it is impossible to fix the sheets on the inner lining of the roof;
- with an overly spacious attic, the volume of which you would like to intentionally reduce due to the use of additional crates - this can add comfort;
- if you want to give the interior a non-standard and original look that can be achieved only through the use of crates of a special configuration.
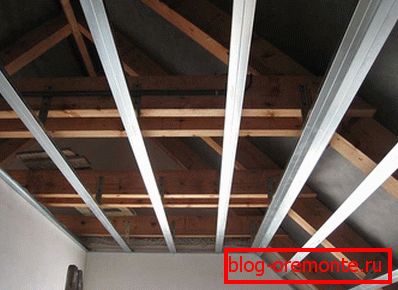
The preparation of the base under the attic finish, we consider the example of metal components. The order of manufacture is no different from the generally accepted.
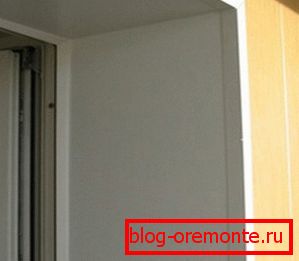
Along the perimeter of the room, guide profiles are mounted, between which then vertical jumpers or racks are installed with a step of about 60 cm. When installing them, special attention should be paid to the locations of window and door openings in which the pitch width of the supporting frame is slightly different from the standard value (it must correspond to the size of the windows or doors).
Note! When arranging the frame, it is necessary to repeat exactly the contours of the roof, often having a rather complicated configuration. If every millimeter of the usable area is expensive, you will have to prepare a construction that completely repeats the contours of the roof covering.
Installation and fastening of insulation
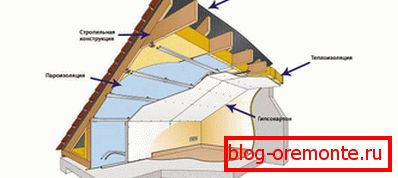
To improve the operational characteristics of the room, as well as if you want to make living in it more comfortable, you can place a layer of insulation under the cardboard. Plates or mats molded heat insulator fit into the voids formed between the profiles and racks frame construction.
When laying the insulator in the free space, it is quite reliably fixed in them and does not need any special fastening. But in order to increase reliability, the stacked plates are additionally fixed with a special glue or with the help of small sections of the profile.
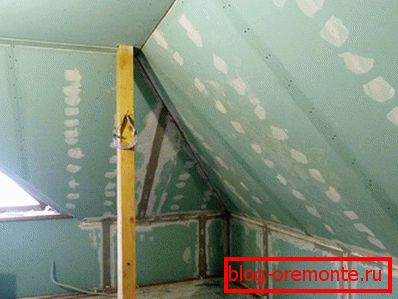
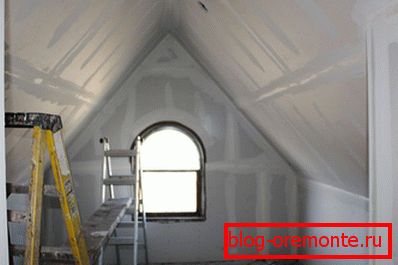
Sheathing
For attic cladding, it is recommended to use a special type of moisture-resistant drywall. The finished frame can be sheathed in one or two layers. In the first case, there is significant savings, but the walls are not strong enough.
With a two-layer finish, the material consumption significantly increases, however, at the same time, the reliability of the construction is significantly increased.
The procedure of single-layer plating is quite simple and usually reduces to the most basic operations. First, the selected sheet is pressed tightly to the plane of the frame base, and then grabs it with self-tapping screws with a pitch of about 20 cm.
Note! In the case of a two-layer lining, the second layer is mounted on the first layer with offset sheets in the adjacent rows (with the so-called "run-up"). Such a two-layer installation allows you to further strengthen the constructed structure.
Upon completion of the attic plasterboard plasterboard you will only have to seal the seams with acrylic putty and perform finishing work.