Laying the laminate itself
For the successful and rapid formation of the floor in the rooms was developed laminate. Due to the fact that the configuration and shape of the panels are carefully thought out, even an unprepared person can cope with the installation of the laminate. Even in rooms in which a complex layout, you can quickly put a laminated floor covering, because the laminate is easily cut and combined. To do this, you must follow some basic rules.
Preliminary preparation of the base
Unlike other types of flooring, laminate is most demanding to prepare the base. It should be smooth and extremely smooth. The reason for the laminate, subject to certain rules may serve:
- Tree.
- Concrete.
- Linoleum.
- Tile.
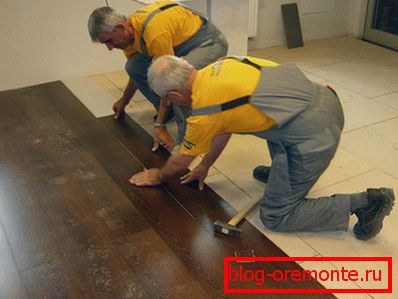
Laying laminate with his own hands on the base of the tree is possible only if the floor is not damaged by fungus and pests. If you find unreliable fixed floorboards, then fasten them to the logs, using screws. Ordinary scraping of the surface will help you to eliminate minor differences and irregularities. If there are dips and damaged boards in the wooden base, disassemble them before the lags, and then, if possible, align or, as a last resort, completely replace.
Note! On the basis of the installation of laminate made of plywood, wood or particleboard does not need to lay a vapor barrier layer, but the substrate must be installed. It will, among other things, be soundproofed.
If you have a concrete screed at your disposal, please note that it is possible to install laminate onto it only after the base has completely dried, which occurs approximately one month after the sand-cement mixture has been poured.
If you decide to replace the floor, which is based on concrete, then after you dismantle it, check the condition of the screed. If you find small cracks or irregularities, then level the base with a special mixture. In case of significant damage, the coupler should be completely removed and the new one should be poured.
Note! It is mandatory to put a vapor barrier of polyethylene with a minimum thickness of 200 microns on the self-leveling floor and screed, with an overlap on the walls of approximately 15 cm. Fix the joints with adhesive tape.
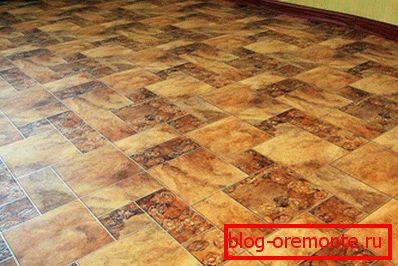
The basis for laying laminate can be any well-fixed surface. The main thing is that it should be smooth and provide moisture insulation. Even tile and linoleum may well be suitable for this. However, this is possible if the technological nuances were observed when laying materials of this kind. It should be noted that neither the tile nor the linoleum does not need a vapor barrier. After laying the substrate, you can proceed to the installation of laminate.
Tool and component materials

Before you do your own laminate flooring, prepare components and tools that will allow you to significantly simplify work and improve installation efficiency. So, you will need:
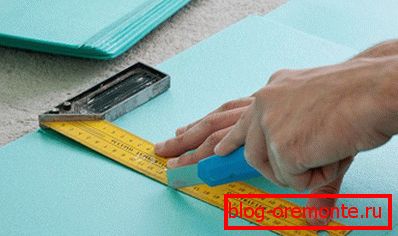
- Tools for the implementation of the markup: square, pencil and tape measure.
- Jigsaw or hacksaw for cutting laminate in accordance with the floor configuration.
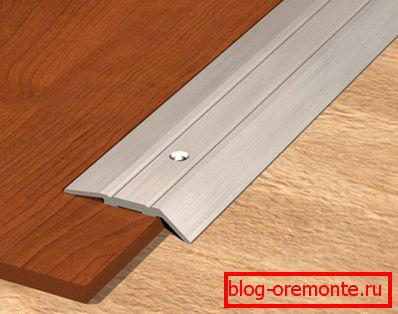
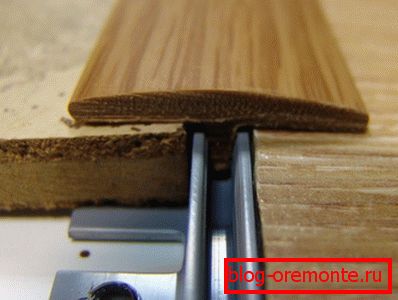
- Components: plinths and corners to them, strokes around the pipes. Valves, hiding the gap on the transition between the rooms. In cases where the slot is winding, for example, at the junction with the tile, you should purchase a flexible docking profile.
Since impregnated paper is used in the manufacture of multi-layer floor coverings, inexpensive softwood or board, which is pressed during production, direct contact of the laminate with moisture-emitting surfaces is extremely undesirable. Therefore, as mentioned earlier, a vapor barrier must be laid between the newly laid concrete floor and the old concrete floor and the laminate. But this applies only to the concrete base. The insulation will not allow the water in the concrete to be absorbed into the laminate, which is so sensitive to it, therefore, moisture will not be able to twist the lamellae. After the laminate flooring is finished, close the polyethylene protruding from the floating floor using a plinth.

As for the substrate, it should perform a number of functions:
- Alignment of small base defects.
- Sound insulation that will absorb the sound of the steps of a person walking.
- Ensuring the static nature of the so-called floating floor.
- Protection against abrasion of the inside of the laminate from contact with the sub-floor.
- Moisture protection.
Ordinary linoleum can act as a substrate, provided, of course, that it is laid flawlessly. Instead, it is also possible to use a 3 mm bubble wrap, rolled EPS and other composite materials intended for this. Cork can also serve as a substrate, but many experts claim that this material is an expensive overkill when laying an economy class laminate.
The thickness of the substrate is determined by the size of the panels. The minimum thickness of the laminate for arranging a living area is 0.9 cm, which means that there should be a substrate 0.3 cm thick under it. If the brand of laminate is thicker, then it should be laid in combination with material having a thickness of 0.4-0 , 5 cm. The instructions for the elements of the floating floor are usually recommendations for laying the substrate. Such a floor is not attached to the draft basis or walls, but only connect the panels together.
Laminate installation methods
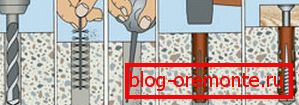
There are several ways to connect the panels together, which is why the installation technology will be different:
- Castle Click connection.
- Glue mount.
- Замковое connection "Lock».
The most popular at the moment is connection "Click». At an angle of 30 °, fastening follows the thorn-groove principle. After you lower the panel, it will be securely locked with a lock. With this attachment, the joints are almost invisible.
Adhesive bonding The spike-groove system reminds of the parquet laying process. In this case, the edges should be applied glue and pull together two panels, pressing them as tightly as possible. This type of fastening is intended for rooms in which high loads are provided. This technique is less in demand because it requires more time and labor. The disadvantages of fastening include the inability to disassemble the flooring and fragility due to the fact that the glue cracks with time.
If you will use замковое connection "Lock», then note that it is worth paying more attention to the flatness of the surface. With careless installation, you can damage the locks, which, of course, is very undesirable. When assembling dock panels with a hammer. A significant drawback of the connection is the difficulty that comes with disassembling the flooring.
Choosing a laying scheme
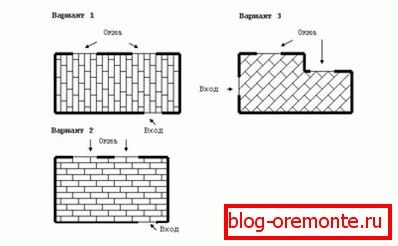
Depending on the course of design thought, laminate can be laid parallel to the direction of light from windows or by other two options:
- Perpendicular to the direction of light.
- At an angle to the direction of light, that is, diagonally.
Laying the laminate is also divided into three groups:
- Chess or brick.
- Classic.
- Diagonal
It all depends on the main tasks, for example, on what effect you need to achieve: visually change the geometry of the room or focus on the laminate itself. The durability of the coating is the only general condition when mounting laminated panels.
Note! Laminated panels must be laid in pursuit. This means that each separate panel of the next row should be shifted no less than 15 cm relative to the adjacent panel of the previous row.
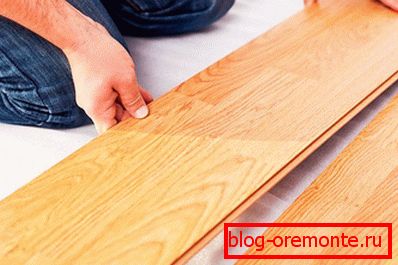
Using a combination of drawing and lighting when installing laminate panels, you can either visually narrow or expand the room. In addition, you can simply create a beautiful floor or emphasize its atypical shape.
When laying laminate most often experts use classical schemebecause it is the most economical. Performing the installation according to this kind of scheme, the panels are laid parallel to the direction of the light flux from the window and begin the process from the wall nearest to it. In this case, the cut off part from the previous row is placed first in the next row. Experts do not recommend the use of panels with a length of less than 30 cm, except for those areas where large-sized interior items will be installed, such as cabinets, sofas and others. This method allows minimizing the waste of laminated panels.

Brick or chess pattern looks like a brickwork. Here each row shifts no less and no more than half the panel. However, creating a picture masonry, you will spend about 15% of the original material. However, this scheme allows you to create the most durable floor. Brick scheme can be used only when installing a single-color laminate.
The diagonal scheme can be called a variation of the classical scheme, only installed at an angle of 45 ° with respect to the wall in which the door is installed. Diagonal styling is applicable to designers for the visual increase of small spaces. This option is also appropriate in rooms with a door located in the corner. The overrun of the source material is approximately 10-15%. It is worth noting that in long and narrow rooms the overrun is maximum, and in square, in turn, is minimal.
Basic installation rules
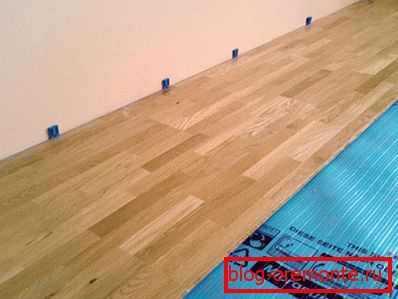
There are features laying laminate. When installing a floating floor between the wall and the panel, there must be a gap of at least 1 cm. Its width is controlled by specially designed wedges inserted before starting work and removable upon completion. The gap, therefore, preserves the integrity of the floor with seasonal changes in its size.

Laminated floor elements are best laid on the corner in which the radiator is located with heating pipes. The fact is that if a point with radiators becomes the last, then there will be difficulties when closing the final panel, since the radiator will interfere with this process. When the laminate is laid around the pipes, the hole should be cut into the panels of the required diameter so that there is a gap between the pipe and the laminate equal to one cm.
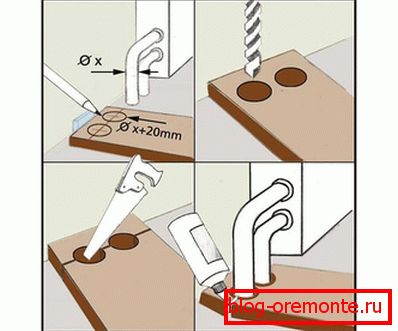
During the installation of the last row, panels of a given width are usually required. Moreover, each of them should be cut out taking into account the remaining space and a gap of 1 cm. This is explained by the fact that the geometry of the rooms is in almost all cases uneven. At the same time, the difference in the required width of two opposite panels can be several centimeters. Once the laminate is laid, you will need to fix the baseboards and decorative sills at the door. If you lay the floor locking method, then it can be exploited immediately. In cases where glue is used during installation, the floor can only be used after it has dried.
Have you already laid laminate? Maybe the tips from the article helped you? Or on the road to success did you cope with any difficulties? Write comments on the article!
Video
With self-installation of laminate will help video instruction: