Laminate ceiling
In the modern world, all stereotypes are broken, so the idea of decorating the ceiling with a practical flooring material - laminate - was quite surprising. Today, designers are widely using it in the interior decoration of houses, because it is originally overwhelmed by the walls and ceilings. It is most common in the romantic design of rooms, when an atmosphere of comfort and warmth is created. It should be noted that the coating of the ceiling with laminate only at first glance may seem time-consuming and impossible process. In fact, such a finish is quite simple to perform, if you read the small tips, as well as step-by-step installation instructions from this article.
Features and benefits

Finishing material has high strength, and also has a number of other properties, thanks to which the ceiling will be interesting and original. Among the advantages worth highlighting:
- Durability. Since no one will walk on the ceiling, there is no impact on it, which leads to an increase in service life.
- Ease of care. Among the huge number of types of dirt for the ceiling is characterized by only one thing - dust, which can be cleaned once every six months with a dry or wet soft sponge.
- Range. Today, in specialized stores, there is a huge choice of laminate, and manufacturers produce new collections every year, so there will be no difficulty in choosing the right variant.
- Affordable price. Not every finishing material is distinguished by an optimal combination of price-quality, but this is peculiar to laminate; therefore, they consider it a good solution to the problem of interior and decoration in the house.
- Easy installation. All you need is a couple of people to mount the frame and lay the laminate on the ceiling.
- Ecological purity (models of natural wood). This option is perfect not only for the decoration of residential premises, but also for offices.
- Fireproof. Due to the special impregnation, the laminate does not support self-burning.
- Heat and sound insulation. Thanks to several layers, which consist of modern materials, as well as with proper installation, the ceiling surface will get the best technical characteristics, moreover, during the construction of the frame, insulating materials can be laid.
If we consider the options of laminate, the surface of which is made of natural wood, then the room will create a special microclimate, because, despite the protective top layer, wood will give its flavor. Cheaper options should be treated with caution, since the amount of phenolic resins (harmful to the human body) in them can be exceeded and they will evaporate when heated.
Note! When choosing a laminate for finishing the ceiling, it is worth considering that for a too damp room with a wet microclimate, such as a bathroom or a kitchen, you should not choose this material. In addition, if the neighbors on top of you flood, then escape from the flood will only help waterproofing the ceiling.
Main selection criteria
Before you go to a specialty store, it is worth considering that there you will not find special models or collections that are designed for walls and ceilings, because the laminate is a floor material. Therefore, to show him the same criteria as when choosing on the floor is not worth it. For example, such a parameter as strength for the ceiling will not matter, so the best solution would be class 21, 22 and 23. If you wish, you can choose the thinnest and lightest laminate, but in this case you should carefully handle it during installation to avoid damage .
Note! Much attention should be paid to the width and length of each element, as today manufacturers have moved away from the standards, and produce options of the usual sizes (120? 14 cm), square shape (40? 40 cm), or large boards (200? 20 cm ).
The most important criterion when choosing a laminate is the convenience of working with the size of the material, depending on the size of the room. For example:
- for small rooms, it is better to choose two-meter lamellas;
- for medium and large rooms - 1.5 m.
The width of the selected laminate should not be more than 15 cm, otherwise it will be inconvenient to work with it, and the installation process will be delayed.
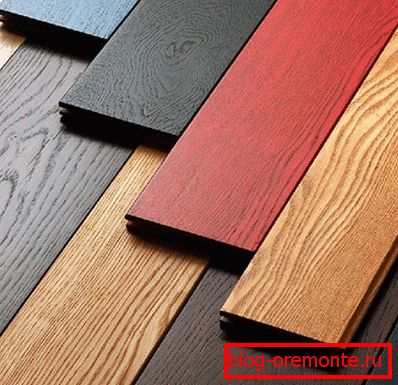
Also, when choosing a material, it is necessary to determine the color, pattern, texture that should be combined with the other elements in the room.

Note! It is important to calculate in advance the required number of laminated panels for ceiling decoration and buy them in one store from one manufacturer in order to get the right picture. Even the differences of 2-3 tones will be too obvious. Experts recommend taking the material with a margin of 10 to 15%.
Preparatory work
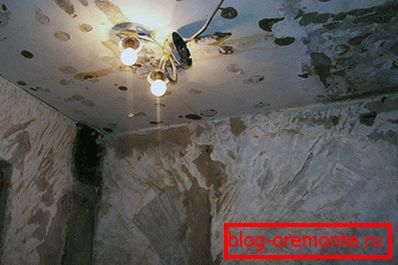
Before you start installing laminate on the ceiling, you need to prepare the surface. If earlier plaster was applied to it, then it is better to remove it, especially if it does not hold up in some places. Based on the size of the boards, it is necessary to calculate the pitch of the batten, as well as the dimensions of the rails. When arranging the batten, the slats can be set to a thickness of 15 mm, but the width should not exceed 30 mm. Place them at the junction of the laminate.
After everything has been prepared, you must specify the laying scheme for the batten and make holes for its installation. For fixing use dowels with a diameter of 4 mm. When arranging the crates for the concrete ceiling, it will be necessary to drill the holes using a hammer drill with a concrete drill, the diameter of which should be 1 mm smaller than the diameter of the socket for the dowel-nail.
Note! The batten cells can be both square and rectangular.
Step-by-step installation instructions
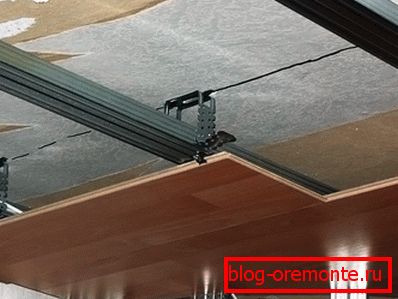
Laying on the ceiling requires care, accuracy and clarity of performance of each stage. After all the preparatory work is completed, you can proceed directly to the installation and fastening of the batten. The holes are drilled and the battens of the batten are fixed according to a previously marked pattern with the help of dowels.
The next stage is for the installation of electrical wiring. If it remains inside the concrete ceiling, then the stage is skipped, but if we are talking about new wiring, then you must follow all the instructions exactly.
The cable is fixed in the established places with the help of corrugated pipes made of plastic. It is also necessary to pre-drill holes in the laminate boards for lamps and ventilation, if any. Now you can proceed to the direct attachment of laminate boards to the slats. It is worth starting from the far left corner, but do not forget to leave a gap of 1 cm between the walls and the laminate. It is best to install together, if we are talking about a large and medium room, while only one can cope with a small volume.
Note! At each stage of installation of the lathing, it is necessary to carefully monitor the evenness of the structure, at the same time use the construction level or tighten the thread along which to orient.
Final stage
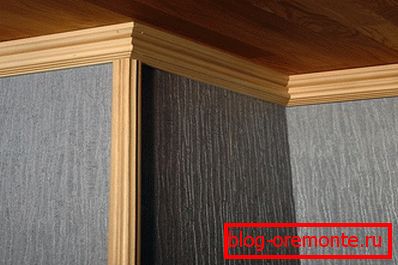
To finish the laminate ceiling was fully completed, it is necessary to fix the baseboards around the perimeter, which will close the gap left. The color of the plinth should match the shade and pattern of the laminate to create a harmonious design. Sometimes it is allowed to install the plinth in contrast.
For fixing baseboards to the wall and laminate using liquid nails. You can also use screws, but their heads will need to be further masked.
Note! On the Internet there are a large number of options for final design of the ceiling of laminate, so you can use any ideas to create an original interior in the room.
As can be seen from this article, everyone can independently create an original finish in his house using laminate. There is no need to choose expensive models of high strength, since no load will be applied to the ceiling. This option is very common, as it is both original, affordable and practical.