Laminate board replacement
A distinctive feature of laminate coatings is, as is known, the high resistance of their upper decorative layer to mechanical damage. However, over time (as a result of intensive use or due to the low quality of the material), individual elements of such a coating may wear out, which, as a rule, requires their urgent replacement. Immediately make a reservation that the replacement of the laminate board is an extreme measure, which is forced to resort only in cases where it is not possible to restore the damaged surface by one of the known methods.
Consider the types of damage in which there is a need for such operations.
Reason for replacement
In practice, during operation, small scratches, visible deformations or even cracks may appear on the coating slats. But, of course, not all the cases listed above are grounds for urgent dismantling of the damaged board in order to replace it.

Indeed, the scratches on the surface of the panels, for example, can be removed without dismantling the floor covering element, having carried them out directly on the spot. Similarly, when small deformations appear within individual lamellae, they are eliminated if desired by trimming the damaged element and increasing the so-called compensation gap. After such a simple operation, the lamella being repaired is immediately put in place.
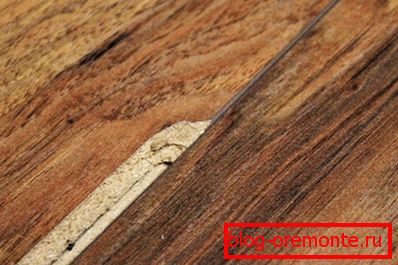
But when a crack appears on the surface of the coating (even if it is small in size), you will in any case have to replace the damaged element, which can be done without disassembling the entire flooring.

Replacement work is carried out according to the standard scheme, which assumes:
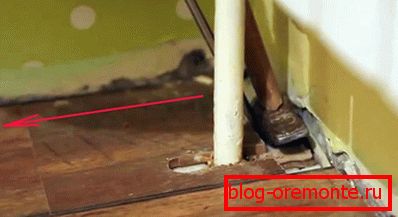
- dismantling of the flooring in the area from the wall to the location of the board to be removed;
- replacement of a damaged item with a new one (spare);
- laying of previously disassembled boards in their previous place.
Note! To properly assemble the entire dismantled flooring before removing the boards, we advise you to number each of them using any marking tool (marker, for example).
We would especially like to draw your attention to the fact that it is worthwhile to worry about the possible replacement of a damaged element even before purchasing a complete set of flooring, which should be completed with a small margin (in case of repair). Otherwise, it will be very difficult to choose the color and texture of the replaced board for the existing flooring.
Before replacing the damaged fragment of the laminated coating, first of all, it will be necessary to become familiar with the techniques for restoring individual elements with locking and adhesive fastening.
Castle mount

In order to dismantle the element of the laminated covering with the lock fastening (according to the above scheme), it is necessary to disassemble the entire flooring from wall to lamella with a defect. And only after that you can replace it, and then put all the previously disassembled elements in its place.
The phased order of disassembly of the floor covering is as follows:
- First of all, the plinth is removed with a screwdriver, and then all dismantled elements are numbered with a marker. When disassembling the plinth, you should act very carefully so as not to damage the surface of the extreme board.
- After this, it will be possible to proceed to the disassembly of elements located in the area up to the damaged section. The lock joints used for fixing (such as “Lock”, “Click”, or 5G) are disassembled in accordance with the manufacturer’s instructions, and the lock operation in all cases can be judged by the click accompanying the operation.
- After removing the damaged link, a new lamella is mounted in its place, and then all the elements that were previously dismantled are put back.
- At the end of the restoration work, the previously removed baseboard is installed in its original place and secured there with the help of special clamps.

Note! In order to protect the locking locks from breakage during disassembly, it is necessary to act very carefully; at the same time, it is recommended to store the dismantled elements in separate piles, which differ in panel type (leftmost, extreme right and intermediate).
adhesive assembly

For partial disassembly of laminated panels, fastened by an adhesive method, it is necessary to use the used method of cutting the damaged lamella using a manual circular saw.
Preparatory operations
Carrying out this difficult operation will require a number of preparatory actions, taking into account the peculiarities of adhesive attachment.
First of all, in order to avoid violation of the flooring pattern, it is necessary to select in advance a panel that fully matches the texture and color with the entire coating.
Note! In order for the new element to acquire the final size, depending on the humidity and temperature in the workroom, it should be left to rest in it for about two days.
Panel replacement

The procedure for removing and replacing a damaged panel is as follows:
- First of all (even before the panel is removed), its corners are labeled with an indent of about 4 mm from the edge.
- Then, at an angle of approximately 45 ° from these marks, lines are drawn toward the longitudinal axis of the element. After this marking, you should get four triangles with vertices connected by a longitudinal line.
- Further, using a manual circular saw, along the marking lines, cuts are made to the depth of the entire panel that does not reach its edges.
- After that, using the chisel and a hammer, it will be possible to cut down the formed triangular elements of the panel surface. This will be quite easy to do, since the melamine layer of the coating is not very durable and can be removed relatively easily. To do this, it will be enough to pry the removed segment from the bottom with a chisel, and then tap it with a hammer on the area of the tongue and groove joint.
- Upon completion of this operation and the release of the panel from the damaged coating, it is necessary to clean all the ridges and grooves located on it, located along the perimeter of the recess. This can be done using the same chisel, because this tool makes it easy to cut off all the remnants of the adhesive composition and wood fibers. The remains of dirt and dust are removed from the surface of the panel with a vacuum cleaner.
- After fitting the new lamella, it will be possible to proceed to its installation in the previously prepared opening. To this end, a layer of special glue is applied to the inner surface of the element, after which it is put in place so that reliable contact with the adjacent lamellae is ensured.
- At the final stage of work, you will only have to remove the remnants of the adhesive composition and fix the lamella with a heavy load for about 12 hours.

Note! You can start using the updated section with a lock joint immediately after replacing the lamella, but you can start walking on the coating with glue fastening only after some time (as a rule, it takes at least 24 hours to dry).
In conclusion, I would like to make another observation of the organizational plan. If you are completely sure of the need to update the panel - do not postpone this work "on the back burner", because the case may turn out in such a way that then you have to change two or more slats at once.
Video
For visual instructions on replacing the laminate board without disassembling the entire coating, see below: