How to repair laminate yourself
Undoubtedly, laminate coating is the most practical in terms of durability. But still, in some cases, its appearance may be damaged, and then the repair of the laminate will be necessary.. Such work is easy to carry out, and after reading this article, you will learn how to repair the laminate with your own hands.
Damage types and repair options

There are several defects in laminate that can be fixed by yourself. To do everything correctly, first you need to understand the reasons for their appearance.
First, consider the most common damage:
- The gap between the boards of laminate.
- Scratches on the surface.
- Cracks, chips, dents.
- Bloating or swelling slats.
Causes of cracks

- The first explanation for the appearance of this defect lies in poor-quality material, not only laminate boards, but also the substrate. Unfortunately, not all manufacturers produce quality products.
- The second thing that can lead to stratification of boards is laminate from different batches or from different manufacturers. Even if you buy the material of one production, but in different stores, it may differ in configuration. As a result, the lock is not securely fastened, and over time this will lead to the formation of cracks.
- The third reason is the most banal - mounting on an uneven surface. In this case, the defect does not immediately manifest itself, because at first the substrate will compensate for differences.
Note! The main danger of this defect lies in the fact that if you do not eliminate it in time, then over time the gap will expand more, and open access to the inner layers of the laminate. And given that the inside of the coating does not have protection from moisture, it can swell up, and then more serious repairs will be required.
Eliminate the gaps in the laminate

If the cracks in the laminate are caused by the unevenness of the floor, then in this area you need to dismantle several boards and replace the backing. But this method is appropriate only in the case of a local defect.
If the scale of the problem is more serious, then the entire floor is dismantled and the floor is leveled with a concrete tie.
Note! Such problems can be avoided if the preparation of the rough coating is carried out correctly.
Wedging planks
This is a very good option to eliminate gaps in the laminate, but it is suitable only if the installation was carried out without the use of adhesives.
- First, the skirting boards are dismantled from the perpendicular side relative to the seams. For reliability, experts recommend removing them from all sides.
- Then you need to install wedges in the deformation gap. Carefully hammer them in, and they should fit the planks together, minimizing clearance.

If this option is unacceptable, then the gap can be covered with colored sealant. Works are carried out according to the following plan.
- The slots are first cleaned of debris and dust.
- Then gently need to glue the edges of the slats with tape to avoid staining them with putty.
- Putty is applied with a spatula over the entire length.
- After drying, the scotch is cleaned and rubbed over with a damp cloth.
Note! Given the high elasticity of the sealant, and the fact that over time it will not crumble, this method of repairing the laminate is very convenient.
Scratch and Chip Repair
Such defects are also often encountered during the operation of this flooring. They appear after the fall of various items or rearrangement of furniture. They can be divided into two types: deep and shallow - each has its own method of elimination.
Today there are two options for eliminating scratches on the laminate.
- Wax chalk.
- Special pastes and grout.
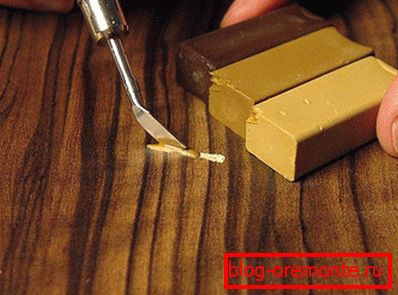
Wax chalk is a small pencil. Due to the variety of shades, you can choose any color option for your coverage. Work with him does not require special skills and is carried out as follows:
- To begin with, the repair site is thoroughly cleaned from dust and small debris. If this is not done, the wax can “move away” from the floor and the scratch will again be noticeable.
- Then you need to gently hold a pencil over a scratch. After that, a slightly noticeable mark is formed at the repair site, and the scratch will be completely invisible.
- To complete the work and make the surface shine, it must be sanded with a dry cloth.
This option is suitable for minor damage, for deeper scratches use a special paste.
Repair Scratch Paste
Working with this material, you need to show maximum attention and accuracy. It would be better to purchase a special repair kit at the store, because depending on the brand and color of the laminate, you may need several different colors of paste to repair.
- The repair site is cleared of dirt.
- Paste is applied with a small spatula evenly, and, if necessary, leveled. With a liquid paste consistency, you first need to push in the scratches, and then cover with another layer to obtain an even layer.
- Excess material should be carefully removed with a sponge or soft cloth.
Note! When repairing deep scratches and chips, there is one caveat: from the first time, it will not work, because the sealant “shrinks” when dry. To get a flat surface, the procedure will have to be repeated several times.
The repaired surface will be ready for operation after 2–3 hours.
How to deal with bloating slats

To correct this defect, you need to find out its cause. Experts identify two options.
- Wrong installation. This is mainly due to the inadequate provision of the technological gap between the coating and the walls. If the conditions in the room change, the laminate can expand and rise in some places. Output: it is necessary to reduce the size of the slats mounted between the walls and the laminate.
- Exposure to moisture. If neighbors flooded you, or you spilled liquid, it could be absorbed into the coating. This will cause the material to swell and swell. Output: First you need to let the surface dry. If the material does not even out after this, then you need to dismantle the slats and replace them. If you have not purchased a laminate in stock, you can try to repair it.
Lay the planks on a flat surface, and press down heavy on top. Under the press, he should lie for 5-7 days. After that, you can check the result of work and set the bar in place.
Coating care
Despite the increased durability characteristics, the laminate flooring is constantly under stress, and various defects can form on it. Of course, it is impossible to secure coverage 100%, but, following certain rules, it is possible to extend its service life.
- Try not to allow heavy and hard objects to fall onto the surface.
- If the room will be heavy furniture, then on the legs it is better to make special lining of cork or rubber. This is a good way to deal with static loads.
- In the presence of furniture on wheels, they must be replaced with rubber ones. Plastic under load has a negative effect on coverage.
- Before entering the room bed mat. This will protect the coating from dust and sand, which can cause minor scratches.
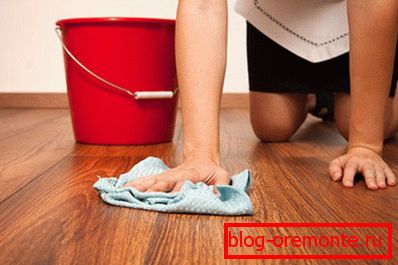
- To clean the laminate, use products that do not contain abrasive particles.
- At hit of liquid on a surface it is necessary to wipe it at once. In general, such a material should not be in contact with water for a long time.
Any repair is troublesome and better to prevent it than to resort to drastic measures. If repair is still required, the above tips and the right material will help you to bring the laminate to its original appearance.