How to lay laminate
Before laying laminate flooring, it is necessary to conduct a detailed study of the foundation with which you will have to work - whether there are any squeaks, whether the floor is not bent. For example, an old concrete or cement screed could crack after tens of years of room operation, if the floor of the boardwalk could rot the logs or the floorboards.
Note! Inspection should be carried out before all the furniture is removed, as it creates the load necessary to detect various defects in the floor.
Repair of wooden floor

Why can squeak floorboards? This can be facilitated by the mutual friction of the floorboards or the friction arising from the nails with which they are nailed to the logs. If the nail loosely entered the lags, which also contributes to the “movement” of the board. If the lag quantities, which are usually made of 50 × 100 mm from a bar, are not enough under the boards, then they can sag while moving along them. In a word, there can be a lot of reasons. How to correct these shortcomings, if the base under the laminate is made of wood?
Note! First of all, you need all the places that somehow give out themselves with a creak, mark with a felt-tip pen or a building marker. When furniture is removed from a room to another location, the floor can be re-examined to see if it creaks without furniture elsewhere or not.
How can you get rid of such disturbing sounds? First of all, you need all the places where the boards are loose on the logs or badly nailed to them, to fix, that is, it is better to fix. If in some place the nail got out, then just hammering it again may not be enough. In that place, the hole is already bigger than it is required for a nail, so it is better to hammer one more side by side, 1-2 cm from the old place. And even better - tighten the screw with a screwdriver. So, the board will be attached more securely.
The length of the screw should be like two widths of floorboards - this is quite enough so that it firmly pressed the board. If the screw is spinning badly, perhaps it has fallen into a knot and another place should be chosen for tightening. Maybe even need to drill a hole for the screw.
When the floor is fixed, you need to re-check if there are any creaks left. If they are repeated in one or two places, the procedure for fixing the floorboards with self-tapping screws is repeated. A prerequisite is to remove the sticking heads of nails and screws. Screws must be screwed up, and nails be hammered or in extreme cases bend.
Repair of concrete surface
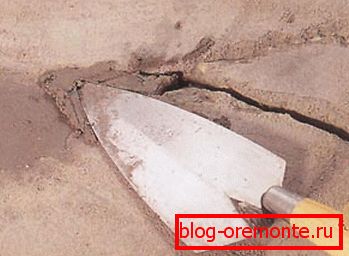
In the case of a concrete floor to level the surface must be different. Concrete is checked as follows: it is a rule that shows whether there are cavities or protrusions on the floor. You may need to make a screed on the floor based on glue-cement or self-leveling mixture.
For the device screed in addition to the above materials you will need to have in your inventory the following items:
- the rule;
- metal grater;
- trowel;
- water or laser level;
- laser or conventional roulette;
- metal or wooden lighthouses.
Before installing the beacons, it is necessary to use a laser level (if it is not suitable for water), put floor level marks at the corners of the room. A line along the bottom of the wall is drawn along them with a blue upholstery thread, and lighthouses are installed on it on the floor. They are usually placed at a distance of about 1.5 m from each other and strengthened, and the mixture layer is leveled and leveled. If you need to level the floor quite a bit, then you can not put the beacons, but simply pour the glue-cement liquid solution and grind the rule. After that, when the screed is dry, you can begin to lay laminate on the concrete.
Preparing to install laminate

Where can I install laminate? Valid bases for installation include floorboard, old linoleum and concrete, as well as many other coatings. In fact, laminate can be laid on almost everything. In this case, a more important condition is compliance with all technical requirements for installation, such as:
- evenness when laying;
- strength of the selected laminate;
- the level of humidity in the room.
Note! If the laminate must be laid on a concrete base, then you can not do without plastic film. It is necessary in order to create a vapor barrier layer.
Before fixing the laminate, all irregularities are eliminated, as already described above. It is also mandatory to lay a sound-absorbing substrate under the laminate, the thickness of which should be about 2–3 cm, and then glue it along the edges with adhesive tape.
The substrate prevents contact of the laminate and the base, provides greater thermal insulation and sound insulation, protects the laminate from moisture. It is worth noting that most products 32 and 33 classes are already sold with the substrate.
Before starting work, you need to decide in which direction the laminate will be laid. If the light falling from the window, goes to the back of the seams, they will strongly stand out. To avoid this, the installation of laminate is best done so that the sun's rays fall in the same direction as the seams are located - that is, parallel to them.
The substrate for the laminate, you can choose any. Would you like a warmer so that neighbors could not be heard from below? Suitable is the one that is made of cork. It is sufficiently thick and does not collapse under load.
Laminate installation в комнате
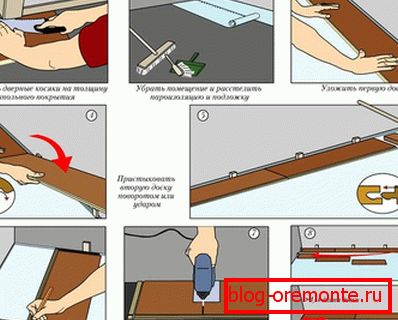
Laminate installation нужно начинать с крепления двух досок в первом ряду, обычно в левом углу. При помощи особых распорных клиньев уже уложенный на пол ряд укрепляется, также благодаря им появляется прекрасная возможность избежать перекосов и обеспечить необходимый зазор между ламинатной доской и стеной комнаты, равный 7–15 мм.
The gaps are necessary so that after installation the laminate can slightly change in width upwards or downwards. If you do not make such gaps, the laminate in the case of expansion will begin to puff up.
Fastening the laminate under the door jamb

To install the laminate under the door jamb, the jamb will need a little hack saw or jigsaw. Plank, which is attached to the laminate, should be located under the door, while it is closed, go to 5 mm and at the same time do not rest on anything under it.
The row that goes where the heating pipe goes is laid from the pipe. To do this, after accurate measurements, the panels need to be cut with a semicircle with a jigsaw, so that after installation a neat circle is formed around the pipe. These panels should be fixed to a row laid earlier, a gap of 11–15 mm left around a metal or plastic pipe should be closed with a round nozzle sawn beforehand. It is glued to the floor with PVA glue.
Note! When installing the laminate, wedges cannot be removed from their seats until the entire row has been laid.
In the case when the floor area covered by the laminate is more than 100 m ?, it will be necessary to make expansion joints whose width will be equal to 12 mm. Without them, in the laminate after a long service life, considerable gaps are formed, spoiling the look and destroying the integrity of the structure.
Laminate is not glued. The lock provided in the laminate board is very convenient and allows at any time to dismantle the damaged part of the board and install a new one. At the same time, if for some reason difficulties arise during installation due to the inconsistency of the panel, the lock on it can be cut down and put the panel on glue.
Wedges installed for ease of installation may be removed not earlier than after 12 hours, respectively, it is impossible to walk around the laminate and, especially, to bring furniture into the room in no case.
How to choose the laminate
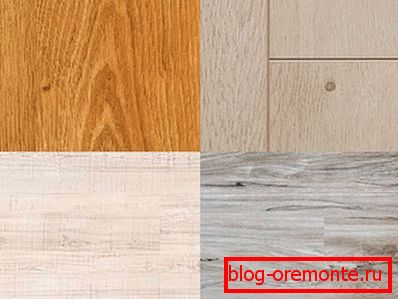
European standards provide an opportunity to purchase laminate, different classes of durability, the use of which depends on the room in which they will be used. So, these are the following class numbers:
- 21–23 - for rooms in the house, such as a nursery, living room or hallway.
- 31–33 - commercial-type premises, that is, various office buildings, offices, reception rooms and even shops.
It is better to purchase classes 31, 32 or 33.
The usual thickness of the laminate varies in the range of 6-15 mm. If the laminate board will be laid in the rooms of a residential house or apartment, a thickness of 6 mm will approach, up to a maximum of 10 mm. But in the office space it would be wiser to apply products thicker. It should be noted that at the same time it is easiest to work with 8 mm laminate.
To make sure that the laminate is environmentally friendly, you should see if there is an “E1” marking on the package. It is also important to know the country of origin. If it is China or the goods are made in Russia, then you can forget about any ecology. Accordingly, it is better to leave such products on the shelves of a hypermarket and look for a supplier from Europe.
Note! Laminate, the design of which provides latches, is assembled and disassembled without problems. Thanks to this feature, you can easily change individual boards.
Color and size can be selected in the store, after consulting with the seller-consultant or taking along an experienced friend.
Making calculations

Before you go to buy laminate, you need to calculate how many meters of this product you need to purchase. To do this, measure all four sides of the room, since the length and width of one may differ from the size of the opposite wall. Big data is taken into account - with a margin.
Note! Measure the room diagonally. This will help to more accurately calculate the amount of purchased laminate, since the geometric shape of the room will become clear.
To make it easier to calculate the shape of the floor, which can not be called rectangular, it can be divided into conditional squares or rectangles and calculate the area of each individual, and the resulting values add.
Laminate installation

Laminate flooring can be attributed to the type of flooring known as “floating”. They are able to change with increasing or decreasing humidity, they are affected by temperature, and as a result, the dimensions of the laminate can change in all directions. Because of this, as mentioned above, it is necessary to leave gaps in all places where the laminate will come into contact with the surfaces of the room - walls, door jambs, heating pipes or plumbing. It is necessary to leave 5 mm wide gaps, but no more, otherwise they may not be closed by the plinth, which will be fitted later.
Note! Make the desired gap of the same thickness can be, if you insert between the laminate and the wall of equal pieces of plywood.
Laminate boards are laid from the window (s) to the door. Due to this, the room will not seem small, and the joints between the panels will be almost invisible, if, of course, do not look at the floor. What is equally important is how exactly the installation of the first and last series takes place. You need to pay special attention to this, because if the width of the last board is a couple of centimeters, it will be extremely difficult to cut off such a strip, and even more secure. It is necessary to calculate so that there are equal pieces on both sides - this floor will look more aesthetic. We must not forget about the fact that the wall itself can be a curve, so the board will also have to be customized.
If the latches do not connect properly during installation, this may be due to improper transportation and damage, or due to clogging with dirt. You can install such panels under the furniture so that there are no gaps between them.
Plinth mount
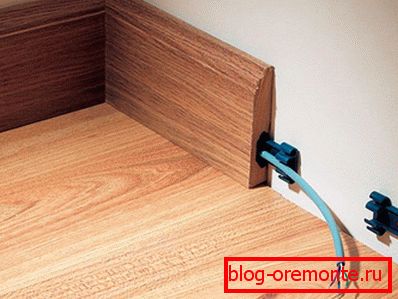
Plastic plinth is matched to the color of the laminate and is attached to the walls. You can find both solid skirting and skirting with a channel for wiring. They are fastened with the help of latches on a special base, which, in turn, is screwed to the wall with screws or put on glue.
Before purchasing baseboards, you need to measure the perimeter of the room, taking into account all permissible bends, for example, a decorative column in the room or a fireplace. Also, together with the plinths, it is important not to forget to buy plugs and corners. The latter will be needed for a beautiful connection in the corners of the room, the number of connections you need to know in advance.
After fixing the plinth, you can consider the work completed. It remains only to clean the floor completely (without using soap and alkali, so as not to damage the surface of the laminate board), bring the furniture in and place it. Now the room is really transformed!
Video
This video shows the installation technology of laminate and the rules for its installation:
This video tells how to lay the laminate and which tool is needed: