How to lay laminate: along or across
Laminate was appreciated by the owners of apartments, private houses, offices and institutions. This coating has an excellent view, unpretentious care, durable, lay it yourself is not difficult. After completing the necessary alignment of the floor, you will face a choice - how to lay laminate: along or across. Both options are used when installing the flooring, and the right choice is made taking into account the lighting, the geometric dimensions of the room, the design of the slats.
Preparing for paving

Laminated panels are laid only on a flat surface, the presence of recesses and other irregularities will lead to the divergence of the connection locks. High loads during the operation of the floor will cause the appearance of a gap, which will open moisture, and the laminate will deteriorate. A good basis will be an updated concrete screed, a wooden floor with strong boards, linoleum.
The next step is laying the substrate. It will provide additional heat and sound insulation, smooth out minor irregularities, serve as a shock absorber, eliminating the creaking of the slats when walking on them. The thickness and material of the substrate are selected depending on the class of laminate: for inexpensive 22? 23 classes use polyethylene foam, the prestigious coating of 32? 33 class needs a more durable base, suitable for it polystyrene foam or composite substrate.
Note! The substrate is spread over the entire area of the floor, the sheets are laid overlap. Sheets of polystyrene or cork cover butt butt, all connections are glued with tape.
Laminating tool
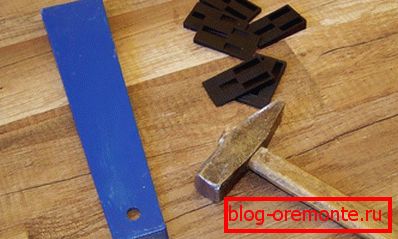
You can set up your own laminate flooring with a few tools on hand:
- jigsaw or saw with fine teeth;
- rubber mallet;
- wooden block for tamping lamellas;
- tape measure and pencil.
What to focus on
The quality of the flooring does not depend on how the laminate is laid? along or across This question arises because of the aesthetic perception of the room.
Note! When placing a laminate along a stream of natural or artificial light, it gives the impression of a neat one-piece fabric. In the case when the light falls perpendicularly, the lamella joints become noticeable and the overall impression of the laminate deteriorates.

If the light source in the room is a window located on a short wall, the panels are placed parallel to the long side. This method is popular with professionals, it is called direct styling. It is practical for the consumption of materials and provides an attractive appearance of the coating. Even an inexpensive low-grade laminate looks advantageous with this layout.
Note! In a long room, you can lay the panel across to the optical room seemed wider. This process will require a large number of undercuts and careful docking of the boards.
Coupling options for laminated panels

Manufacturers equip laminate locking systems of two types - Click and Lock. They provide for the closure by entering the ridge into the groove. Panels with Lock-type locks are assembled in one plane, so the degree of surface alignment matters to them. After inserting the spike into the groove, hammering is required for high-quality docking. Reliable and efficient Click connections are joined at a 45 degree angle and snap into place when lowered to the floor. Hammer correction is not required. Joints are invisible.
A less common method is adhesive bonding. It creates a monolithic waterproof coating and is used in rooms of a large area. The need to purchase expensive glue leads to higher material costs. The process of laying laminate more time-consuming, and the final design can not be disassembled if necessary repairs. Given all the qualities, it is safer to purchase panels with a floating system that do not require additional funds for fasteners.
Laying Laying Laminates

The scheme, according to which the laminated panels are laid, affects not only the appearance of the coating, but also further operation. To ensure the strength of the new floor and evenly distribute the load, it is necessary to stack each row with offset joints. An economical option would be the use of scraps of the board, the final row. In places that are planned to be covered with furniture, segments of less than 30 cm are used. This reduces material consumption, but the aesthetics of the coating deteriorates.
The way to ensure the highest durability is considered to be laying the laminate in a checkerboard pattern when the shift in the next row occurs on half the board. An attractive floor pattern is obtained, especially when using a laminate with a chamfer.
One-third displacement of the board is another way to create a beautiful finish and to ensure that the end seams do not match.
Correct installation

Installation of panels start from the far corner. The floor should not adhere to the wall, leaving a gap of 8 × 10 mm. You can control the size of the gap around the perimeter with laminated scraps or special wedges. The gap is left to allow the panels to expand as the humidity changes. At the boards of the first row, the comb is cut off so that the edge facing the wall is even. Depending on the type of lock, the second panel is joined at the end to the second, either in the same plane or at an angle. Lock connection is driven through a wooden bar with a hammer. The first row is assembled completely, the last part is cut with a jigsaw to the desired length.

The second row does not begin with a full lamella, and with half or third. It is necessary that the seams in adjacent rows do not coincide. He is also going to fully fit in with the first row. After docking, the laminate is compacted by tiling through a wooden bar. Laying technology is similar in all rows. Boards of the last row sawed along the length, not forgetting to leave an additional 1 cm on the thermal gap.
Features of laying lamella near the pipes

In the room can pass the riser or heating pipes, under them will have to cut holes in the laminate. It is necessary to measure the distance from the wall to the pipes and mark them on the panel. At a certain point, a hole is drilled 2 mm greater than the diameter of the pipe. The panel is cut in the middle of the hole. The most part is joined to the next level, the smaller one is put on the pipe and glued to the main part. The hole is closed with special plugs.
Plinth installation

At the end of laying the laminate along or across the room, it is necessary to remove the wedges and attach the baseboard. The decorative element is always attached to the wall. For this purpose, self-tapping screws are used, expensive models of baseboards are supplied with special fasteners.
Approaching the choice of the direction of laying laminate is to weigh the positive and negative aspects of each method. The location of the panels along the rays of light will avoid shadows at the joints and turn the floor into a smooth solid canvas. If your room looks excessively long, and the effect of the integrity of the coating is not fundamental, boldly lay the laminate across the room to visually expand it. The method of placing the lamellas will not affect the operation of the coating: high-quality and neatly laid boards will last for many years.
Video
As a supplement to the topic, we propose to watch the video materials, which consider the rules for laying laminate and errors that can be made during installation: