How to close the joints of the laminate
Laminate is a beautiful, comfortable, durable, easy-to-install floor covering material.
Installation of laminate flooring can be done without special training, we need only a set of tools and a desire.
Most likely you will be interested in, than to close the joints of the laminate?
Laminate panels are usually covered with a protective coating, but the main material is chipboard. So, under the action of moisture, the coating can swell and deform. To avoid this, the treatment of joints with sealant will help.
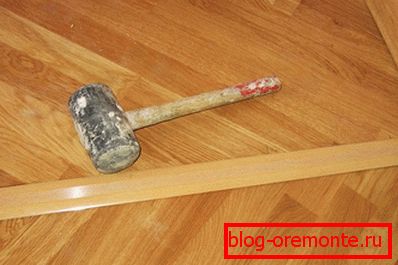
Required tools and materials:
- sealant in a tube or tube;
- rubber hammer;
- jigsaw;
- pencil and ruler;
- spacer wedges;
- retainer.
Sealant

Before you grease the joints of the laminate sealant, you should be familiar with its composition.
Reliability, wear resistance, elasticity and long service life, excellent performance is achieved when using silicone-based sealant. The product has good technical performance and operational properties. They can work at any temperature conditions.
The main purpose of the sealant is to protect against moisture ingress into joints, gaps and seams. However, it does not glue the treated material. You will appreciate this property if you dismantle the panels. After working as a sealant, no gaps appear in the locking joints, which increases the service life of the coating. The absence of harmful substances in the composition makes it suitable for use in residential areas and children's rooms.

All the listed properties of the sealant depend on the components included in its composition. In silicone add:
- mechanical additives: quartz flour, chalk;
- fungicides - anti-inflammatory substances;
- dyes that determine the color of the composition;
- extenders - organic, reducing the viscosity of the composition.
We perform laying laminate

The surface on which the laminate will be mounted should be clean, dry and flat, without large differences (maximum 3 mm). Otherwise, the castle connections will quickly become unusable, the panels will become loose, the joints will become uneven and will crawl. The best option for surface preparation is a new screed, which will allow you to properly lay the substrate that protects the laminate from steam and water.
The first row is mounted with an open deformation gap between the panels and the wall of the room. To perform it, prepare the spacer wedges to be installed around the perimeter of the room. The gap is necessary so that the panels can "breathe" when the temperature in the room changes.
Note! Calculating the position of the last row, the width of which should not be less than 6 cm, we consider the symmetry of the joints on the outer panels.
Close the joints
The laminate panels are fixed with sealant, which is applied to the joint panel. Following is fixed the next part. The composition fills all the space inside the joint, while not gluing the planks. Excess sealant protruding onto the surface of the laminate should be removed with a sponge. Thus all panels are mounted.
Now all connecting locks between the panels are sealed. It is not clear just how to close up the gaps left near the walls and doors.

The decorative elements will help to give them an aesthetic, neat and beautiful look: plinths and powders. The plinth, which will hide the gap, should be fixed to the wall. And if the laminate joins with tiles or linoleum, then such seams must be closed with an aluminum or plastic powder.
The choice of material from which the threshold will be made depends on the joint:
- it is necessary to connect tile and laminate with a metal element that is more resistant to water;
- cork thresholds are perfect for leveling the drops.
The transition from laminate to stone surface is best closed cork plate. They have excellent shock absorption properties.

Thresholds differ in the form and functionality:
- joints with a difference of 3-4 mm close the leveling parts;
- single-level joints are decorated with straight-slats;
- the corners of the angular form (the final ones) well hide the flaws on the edges of the steps;
- for joints of the laminate-tile or laminate-linoleum type, multi-level powders are used, which are capable of hiding a difference of up to 2 cm.
Professional Tips
- Sealant can not be used when laying expensive laminate, because its edges are usually treated with special substances with water-repellent properties.
- Silicone sealant does not glue the elements together, so the dismantling of the laminate in this case will not be a problem.
- Adhesive laminate is a non-separable coating that is not suitable if a floor heating system is used.
- Laying laminate runs along the light source so that the shadow does not emphasize the joints between the panels. In a room with several windows (light sources) it is better to make a diagonal laying of the floor covering, which, however, will take more material.